


The stylish sophistication of this dress designed by Nicola Finetti is just perfect for the long, hot Australian summer ahead. With the illusion of a halter neck at the front, the full back bodice with its edgy metal zip is a stylish surprise.
Vogue Patterns recommend this style for triangle and hourglass figure types and a good fit is critical for maximum comfort in this figure enhancing dress.
Recommended fabrics are Ponté knit, crepe, gabardine and piqué. The fabric I have used is Lycra™ ponté purchased from The Fabric Store in Brisbane.
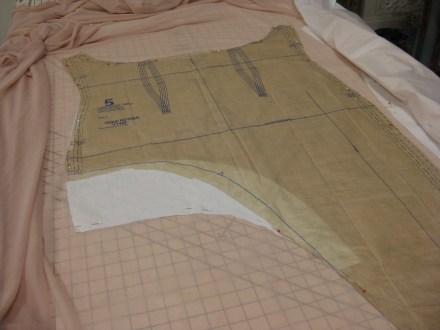
Even though knit fabric is recommended, there is no knit gauge on the envelope. So to ensure a good fit, I made a trial garment using calico and fitted it close to the model’s body. This worked very well and there was only minor alteration needed to the shape of the side seams in the skirt.
How To Maximise the Benefits of Making a Toile:
When making a toile, it is worth taking the time to mark all seam lines, grain and horizontal balance lines and match points with dressmaker’s carbon. Just making a trial garment without marking these points where they can be seen makes fitting assessment and pattern alteration more difficult.
Accuracy at this stage is very important. To stop the possibility of fabric layers moving against each other I mark each layer individually. The method I use to do this is:
- Mark seam lines on the pattern (Tip: Use the edge of a 15mm /5/8” tape measure placed against the cutting line as a guide.)
- Place carbon with marking side up and lay fabric (single or double layer as required) with the pattern pieces pinned in place on top
- Using a pointed tracing wheel, trace seam lines – to protect your table surface, use the wrong side of a rotary cutting mat to ensure clear marks on the fabric
- If working with double fabric, carefully remove the pattern and pin the fabric layers together; flip the fabric over and lay it on top of the carbon paper.
- Use the first carbon marks as a guide to mark the second layer.
Stay stitch neckline and armhole edges with a small straight stitch (length 1.5) right along the seam line. Clip seam allowance to the stitching to allow the seam allowances to fold back. Using this technique will allow the outer edges to sit flat on the wearer which makes the degree of any alterations easier to assess accurately.


When sewing the toile together, I used the marked side of the fabric as the right side and piece the garment with a long straight stitch (4.0 to 5.0). This makes it easy to check that the garment is hanging on grain and the seams can be quickly ripped to let the garment out or pinched to take it in.
The insertion of a zip will also help to give a true picture of the fit with a close fitting garment.
Tip: When fitting the toile, the undergarments to be worn with the final garment should be worn. As it is fully lined, the dress may be worn with or without a convertible bra and that decision needs to be made from the outset so that it can be fitted accordingly.
When the fitting is completed, the marks on the toile guide the placement or alterations on the pattern.
The Pattern:
The pattern features a close fitting, lined bodice which needs to be perfectly fitted to avoid gaping at the armholes and centre front. The length of the bust section may need to be altered to achieve this.
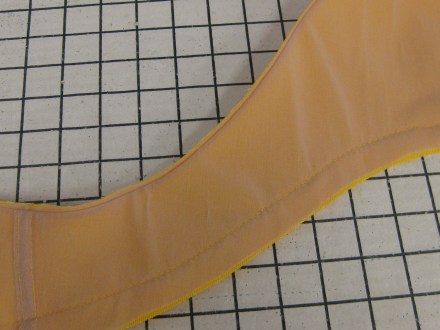
The skirt is fully lined as well. The back bodice features slightly cut-away armholes and the shoulder seams need to meet exactly at the wearer’s shoulder line so the angle from front to back is not distorted.
The back skirt is darted to a waist seam while the front skirt falls in two overlapping panels from a seam directly under the bust. The front panel edges and all hem edges are finished with a separate facing to which the lining is attached.
The left side front crosses over the right. The right side panel has an inserted panel of lining on the section that sits under the crossed over left panel. This is to lessen the bulk in the under bust seam.
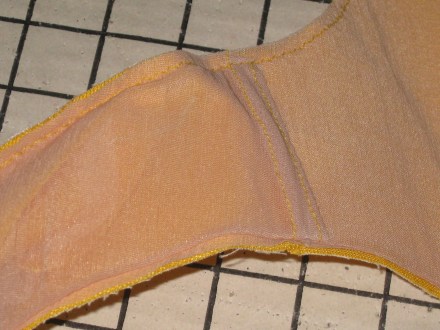
Because the garment fabric is a knit in a close fitting garment, it was necessary to use a knit lining. I used a flesh coloured knit tricot from Sckafs Fabrics. This fabric is very soft, light and perfect for eliminating bulky seams.
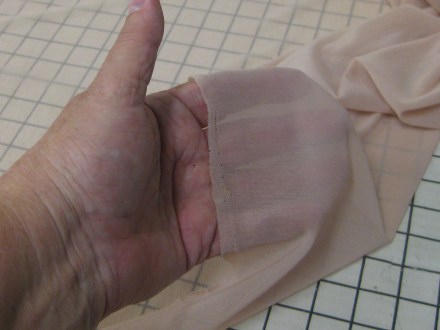
Tricot lining
However, this caused an issue of show through with the fabric I used. The shadow of the seam joining the lining insert to the right side was visible through the left side panel.
Unfortunately I did not discover this until the first fitting and there was not enough fabric left to cut a new right front panel. To solve the problem I cut the upper right front lining from the garment fabric and attached it as well as the previously inserted lining. To eliminate a bulky seam right across the front, the bottom edge of this extra layer has been allowed to lie flat over the bottom section of the skirt before stitching and the edge of the seam allowance caught by hand so that it will not move.
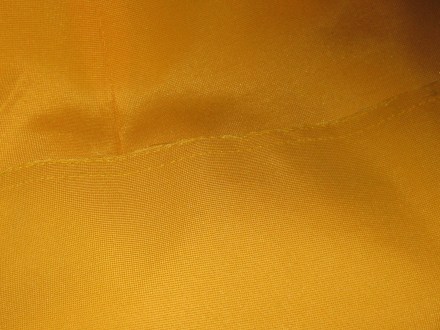
Upper section laid over lower section of right front side
If the garment was made in a plain dark colour or print, this may not be an issue but is definitely something to think about when selecting fabric and cutting out. I would suggest that using a darker or patterned fabric would prevent this problem.
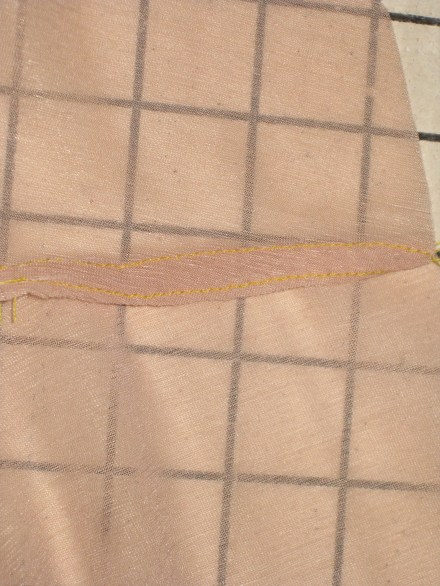
The second issue with the pattern was the cutaway hem section on the right side panel. At first fitting I discovered that the finished hem of the short section was at hip length. For modesty, especially when sitting, an additional 15cm was added to the length of the extension.
Additional 15cm added to lower edge of right front garment and lining
Construction:
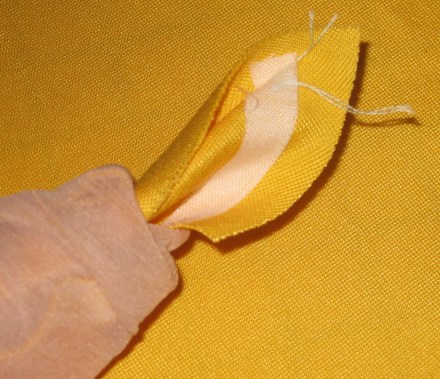
For accuracy in piecing, all match points (centre front position, notches and dots) were thread traced using two strands of embroidery floss. This left no residual marks on the fabric and the thread was easily removed during construction.
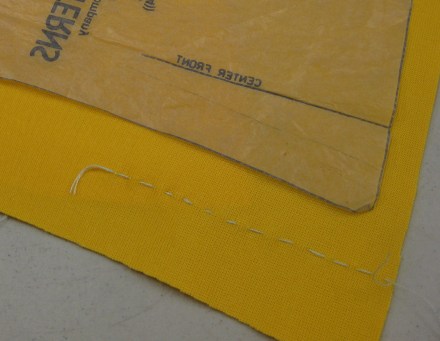
Thread tracing
Even though the fabric stretches lengthwise and crosswise, it is not slippery and surprisingly stable and easy to sew. I used a small zigzag (SW1.0; SL2.0) to stitch all seams.
To prevent stretching at the armhole and neckline edges, I applied fusible stay tape on all bodice edges.


The zipper opening was also stabilised to prevent any rippling of the heavy metal zipper.
The seams are quite thick so all horizontal and outer edge seam allowances have been graded which has resulted in smooth, flat neckline and armhole edges.


Facings were fused with lightweight tricot knit interfacing and seam allowances graded and under stitched.
Handling the tricot lining presented a number of problems. It is very fine and the edges cut edges curl making accurate cutting and pinning critical. Even with careful grading, pressing and under stitching, the outer edges were quite spongy. To keep the edges flat I have added edge stitching (straight stitch with length of 4.0).
The tricot lining was laid out on tissue paper with the pattern pieces pinned through all layers to allow straight cutting and no slippage.


It was surprisingly easy to work with – except for the cut edges which continued to curl. So to control the curling and ensure accurate seam allowances, the cut edges were pinned through twice which kept everything in place while machine stitching.


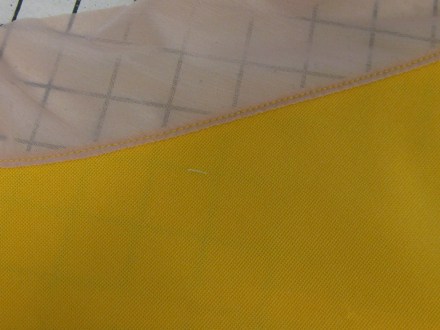
All lining seams were double stitched and trimmed to prevent them curling during wear.
Double stitched seam trimmed back to avoid curling
I was unable to source a regular metal zipper so metal open end zipper was used. It has been shortened and the bottom end and unnecessary teeth removed. Petersham ribbon has been used to finish the cut end of the zipper. (Tip: Use the hand wheel if stitching across metal teeth – with care the needle slips easily between the teeth.)
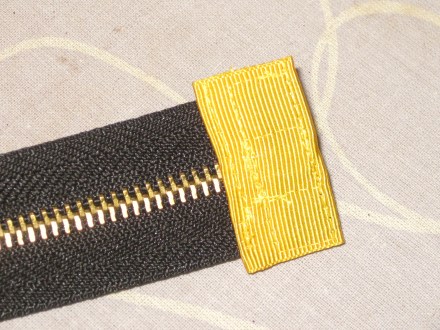
Bound edge of shortened zipper
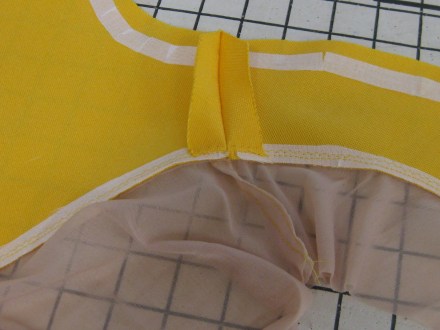
A Petersham ribbon zipper shield has been applied to prevent the teeth abrading the wearer’s skin.


Conclusion:
The skill level for this pattern is noted as “Average”. Lots of concentration and great care need to be taken to follow the guide sheet cutting layout so that right and left pieces are not reversed. It is not a project that can be rushed.
I changed the order of construction in the bodice section so that the lining was applied in the manner of a pull through all in one construction. This resulted in a much neater finish at the shoulder seams. Care was needed so that when the back pieces were attached they allowed for the crossover in the bodice. Having the pieces laid out on a flat surface when pinning was a great help.
Join shoulder seams of lining and garment
Stitch lining to neck edge; grade and understitch
Stitch lining and garment at armhole edges
Grade seam allowances
Pull front sections through shoulders
This is one pattern where it would certainly be unwise to omit careful reading of the guidelines before starting the project. It is quite critical to follow the order of construction for the front skirt pieces, particularly regarding the application of the lining.
