
When we are about to start a new project it is so easy to be swept up in thoughts of how beautiful the fabric feels; the beautiful lines of our chosen style and how we will look and feel when we wear our beautiful new creation.
Taking a step back to think about preparing the pattern and fabric and the techniques we will need to use is such a good idea on many levels.
Pattern Preparation
If you need to make a number of alterations, it is a good idea to trace the pattern pieces in your chosen size on to greaseproof paper. The benefits of doing this are:
- your original pattern is preserved (with all sizes in tact)
- confusion between different markings for multi sizes can be minimised
- seam lines can be marked and grainlines extended
- seam allowance widths can be varied if desired
- the pattern can be pinned together (along the sewing lines) with the writing side out and tried on to check the placement of details like necklines, pockets, etc.
- alterations for fit can be made
- additional pieces can be cut to make pattern matching with a single layer layout easier
Creased patterns affect accuracy so, if your pattern is creased, place it writing side down on your ironing surface and iron it flat with a warm, dry iron.
Fabric Preparation
Even though I love the feel of wearing a creation I have made using the as new fabric without pre-treating it, I have had a couple of disappointing experiences caused by not taking the time to either wash or steam my fabric before cutting out my garments.
One garment shrunk a whole size when fusible interfacing was applied. Steaming the fabric beforehand would have avoided this problem. The other experience was the garment shrinking during its first wash; again had I washed the fabric first this would not have happened.
In recent times, many natural fibre fabrics contain 3-5% Elastene© or Lycra© threads for comfort and to make them less prone to creasing. These elastic threads are most commonly found in cotton but can also be found in silk, linen and woollen fabrics. It is very important to pre-treat these fabrics to avoid lengthwise shrinkage during washing and/or steaming. As a general rule, fabrics with polyester as the major fibre do not need to be pre-treated.
Remember when selecting fabric, it is always wise to take note of the care instructions. Fabric retailers are required to have these attached to the bolt so if you can’t find them, ask the assistant. Taking a quick photo of the tag can provide a helpful reminder for future fabric care too.
If the fabric has been stored for a while and you are not sure if it has been pre-treated, it is worth washing or steaming it before use. Always make sure that the fabric has been ironed smooth and creases from storage removed before layout out for cutting.
Tear or pull a thread and cut on the crosswise grain. If the selvages will not lie flat, carefully clip into them along the length of the fabric so the fabric is not distorted.
Fabric Layout
The key to success with any garment is accuracy in laying out the pattern and cutting the fabric. Mistakes at this stage will affect how the garment goes together.
Pattern layouts are computer generated to minimise fabric wastage so following the layout as detailed in the guide sheet for different sizes and fabric widths is usually the best way to go with plain fabric. However, there are other considerations as well.
If the pattern has been altered resulting in increased width and/or length, this will need to be factored into the layout as these changes often require additional fabric.
When using patterned fabrics (especially large graphic prints or florals or plaids), consideration also needs to be given to whether you will have enough additional fabric to place large florals attractively or match plaids or one-way prints.
If you fall in love with such a fabric, be sure to measure the pattern repeat and allow an additional repeat for each major pattern piece when you are purchasing.
Using a gridded cutting board is a great help with laying out the fabric on grain, especially when using loose weave or slippery fabrics.
When folding fabric for a double layout, right sides should be together. This makes marking the fabric easier. With a single layout, the fabric is placed with right side up. Single layout is usually required for asymmetrical pieces and pattern pieces are usually placed with the writing side up.
There are many different options for holding the fabric in place for cutting. When making my choice, I consider the number of pattern pieces, the fabric thickness and properties:
- How many pattern pieces are there?
- Will the whole layout fit on my cutting surface?
- How thick is the fabric?
- Is it stable?
- Is it very slippery and difficult to keep in place?
When working with a pattern with lots of pieces, I like to use pins placed within the seam allowances (to minimise the chance of marking my fabric) and parallel to the cutting edge as I feel this gives me the best control of the fabric when I am cutting. Pinning in the corners and the centre of curves makes my cutting much more accurate.
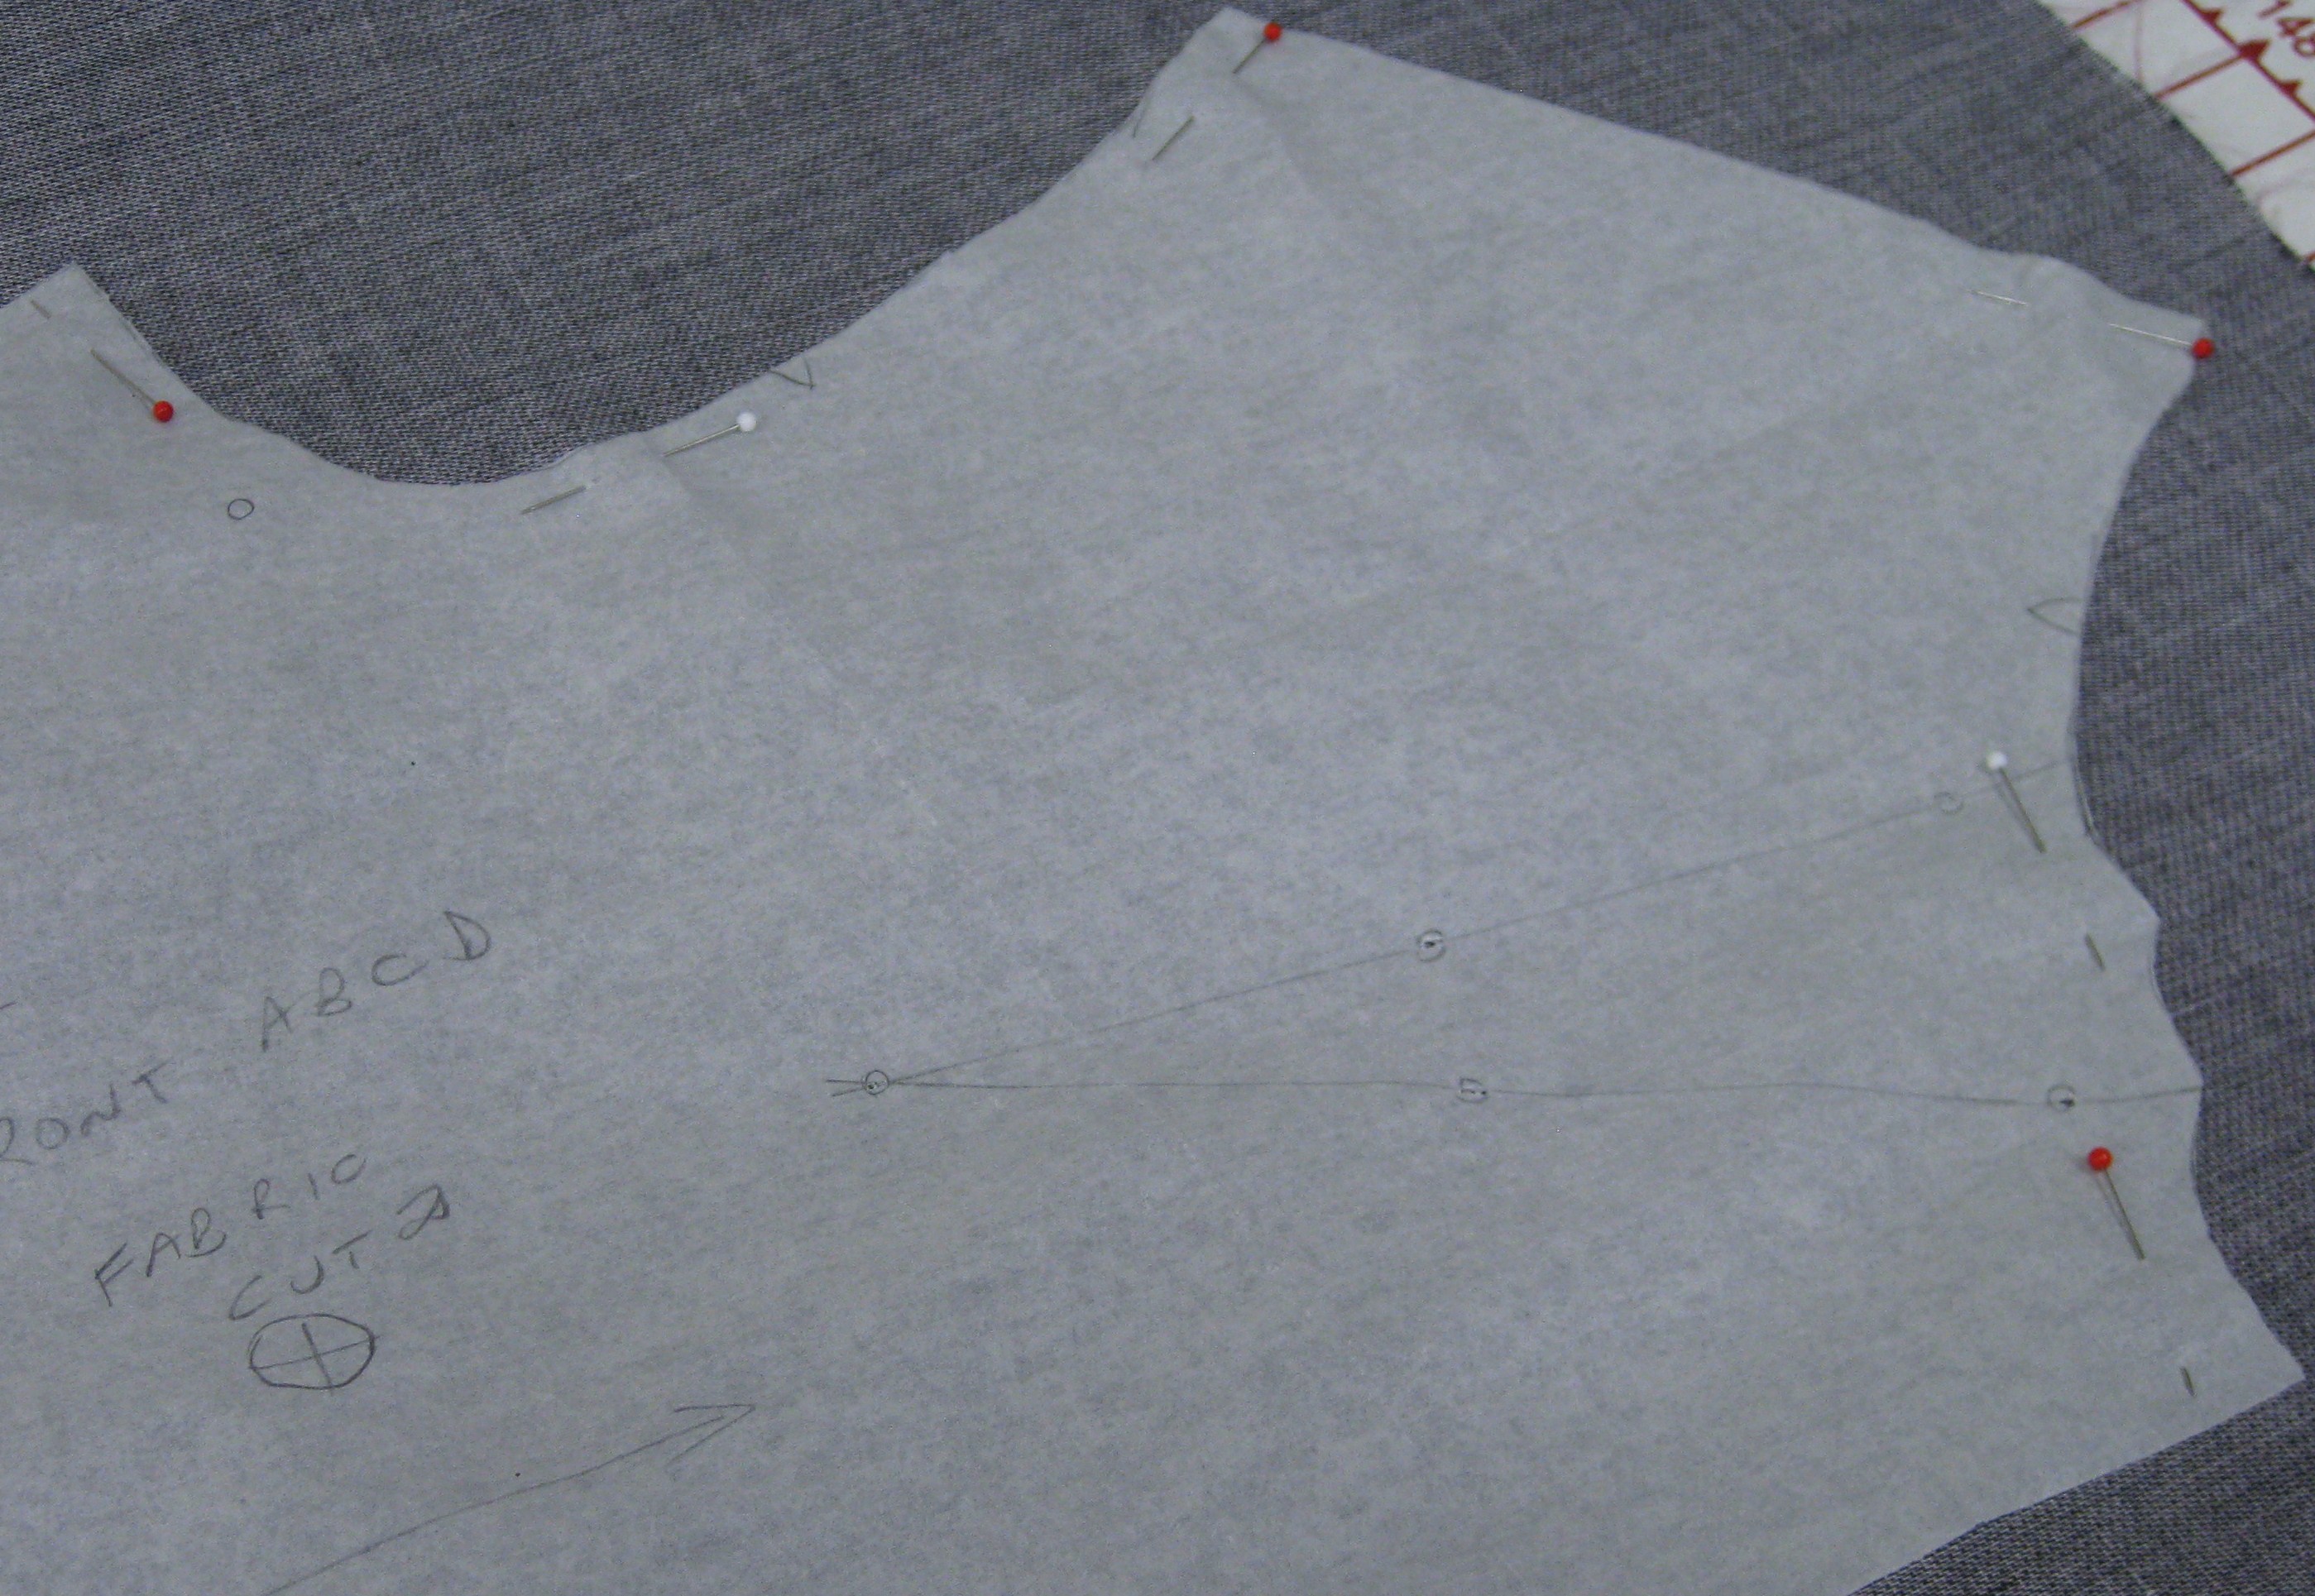
I prefer to pin within the seam allowance and parallel with the seam line. Make sure corners and the mid point of curves are pinned so they will not move when fabric is being cut.
However, for garments with less pattern pieces and when using very stable fabrics and some knits, I use pattern weights. Unless you have extra long pins, weights are also useful when the fabric is very thick and being cut with a double layout.
Align the selvages and crosswise grain of the fabric. To avoid distortion during the cutting process, roll the fabric that would extend beyond the cutting surface so it will remain on the table and not fall off the edge. The fabric can then be rolled at the pinned edge as you work your way along the yardage.
When laying out the pattern pieces, I always use a ruler to measure from grain lines to the selvage or fold. It is difficult to be sure that a tape measure is actually at a perfect right angle to the edge and this can result in pieces being cut slightly off grain. The weight of the ruler also helps by holding the fabric in place for pinning.
For very long pieces, for example a full length skirt or dress and pants, I extend the pattern grainline from top to bottom. I measure from the grainline to the selvage/fold in the centre of the piece and anchor it with a pattern weight before repeating the process up and down along the whole length of the garment to check the grainline with my ruler. The reason I do not pin within the body of the garment is that I do not like to risk pulling a thread or marking my fabric with a damaged pin. Once the grainline is held in place it is easier to smooth from the centre and pin around the edges of the pattern.
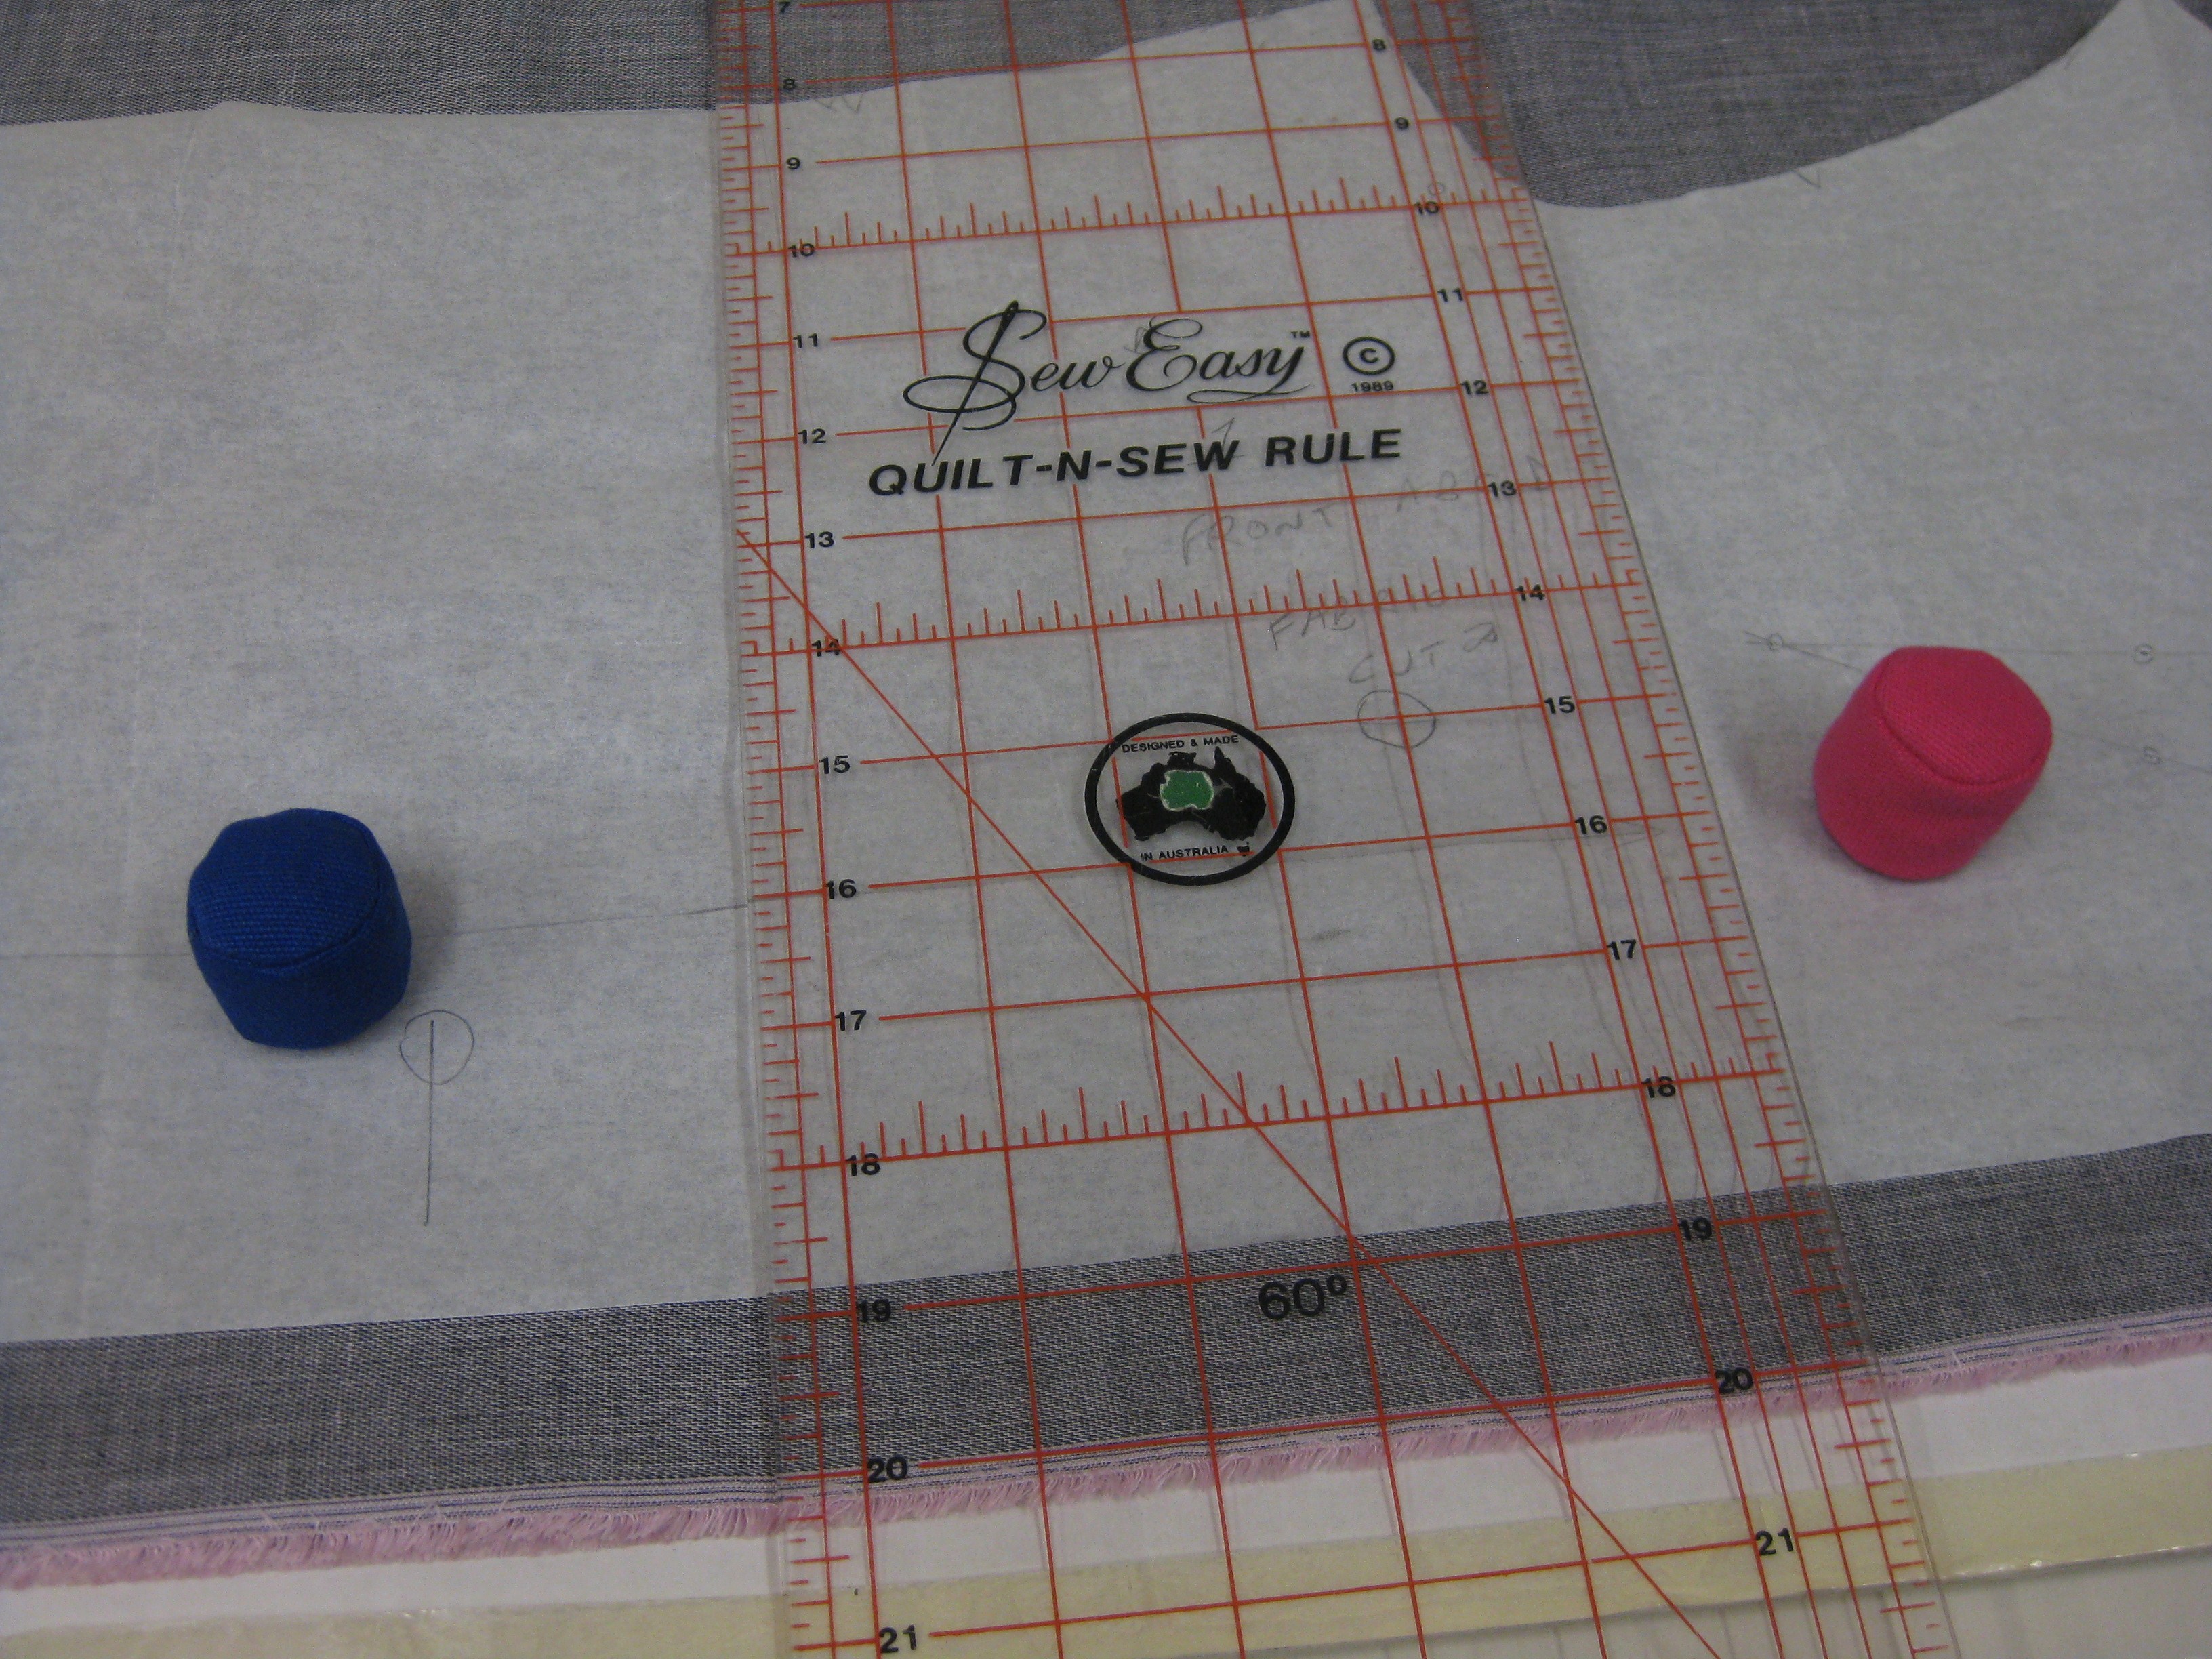
Use ruler to align grainline and weights to keep the grain line in place while pinning.
To place pattern pieces on the fold, I pin the top and bottom edges along the fold first. While holding the centre of the pattern piece in place, I smooth across to the other side and pin. So that I cannot pull a thread down the centre of a piece, I do not pin the pattern edge down the folded fabric.
Once all the pattern pieces are in place, cut roughly around each piece. This preliminary step makes it possible to move the pieces so that you can cut at right angles to your body for greater accuracy. If the scissors are parallel to your body, the bottom layer will be slightly wider than the upper layer and this will impact the ease with which the pieces go together during construction and the fit of the garment.
If for some reason you do not wish to cut all garment pieces at the one time, it is important to check that all the pieces fit your fabric yardage so that you do not run out of fabric when coming back to cut additional pieces.
Mark the wrong side of the fabric so that you do not inadvertently cut remaining pieces from the opposite side to your original pieces.
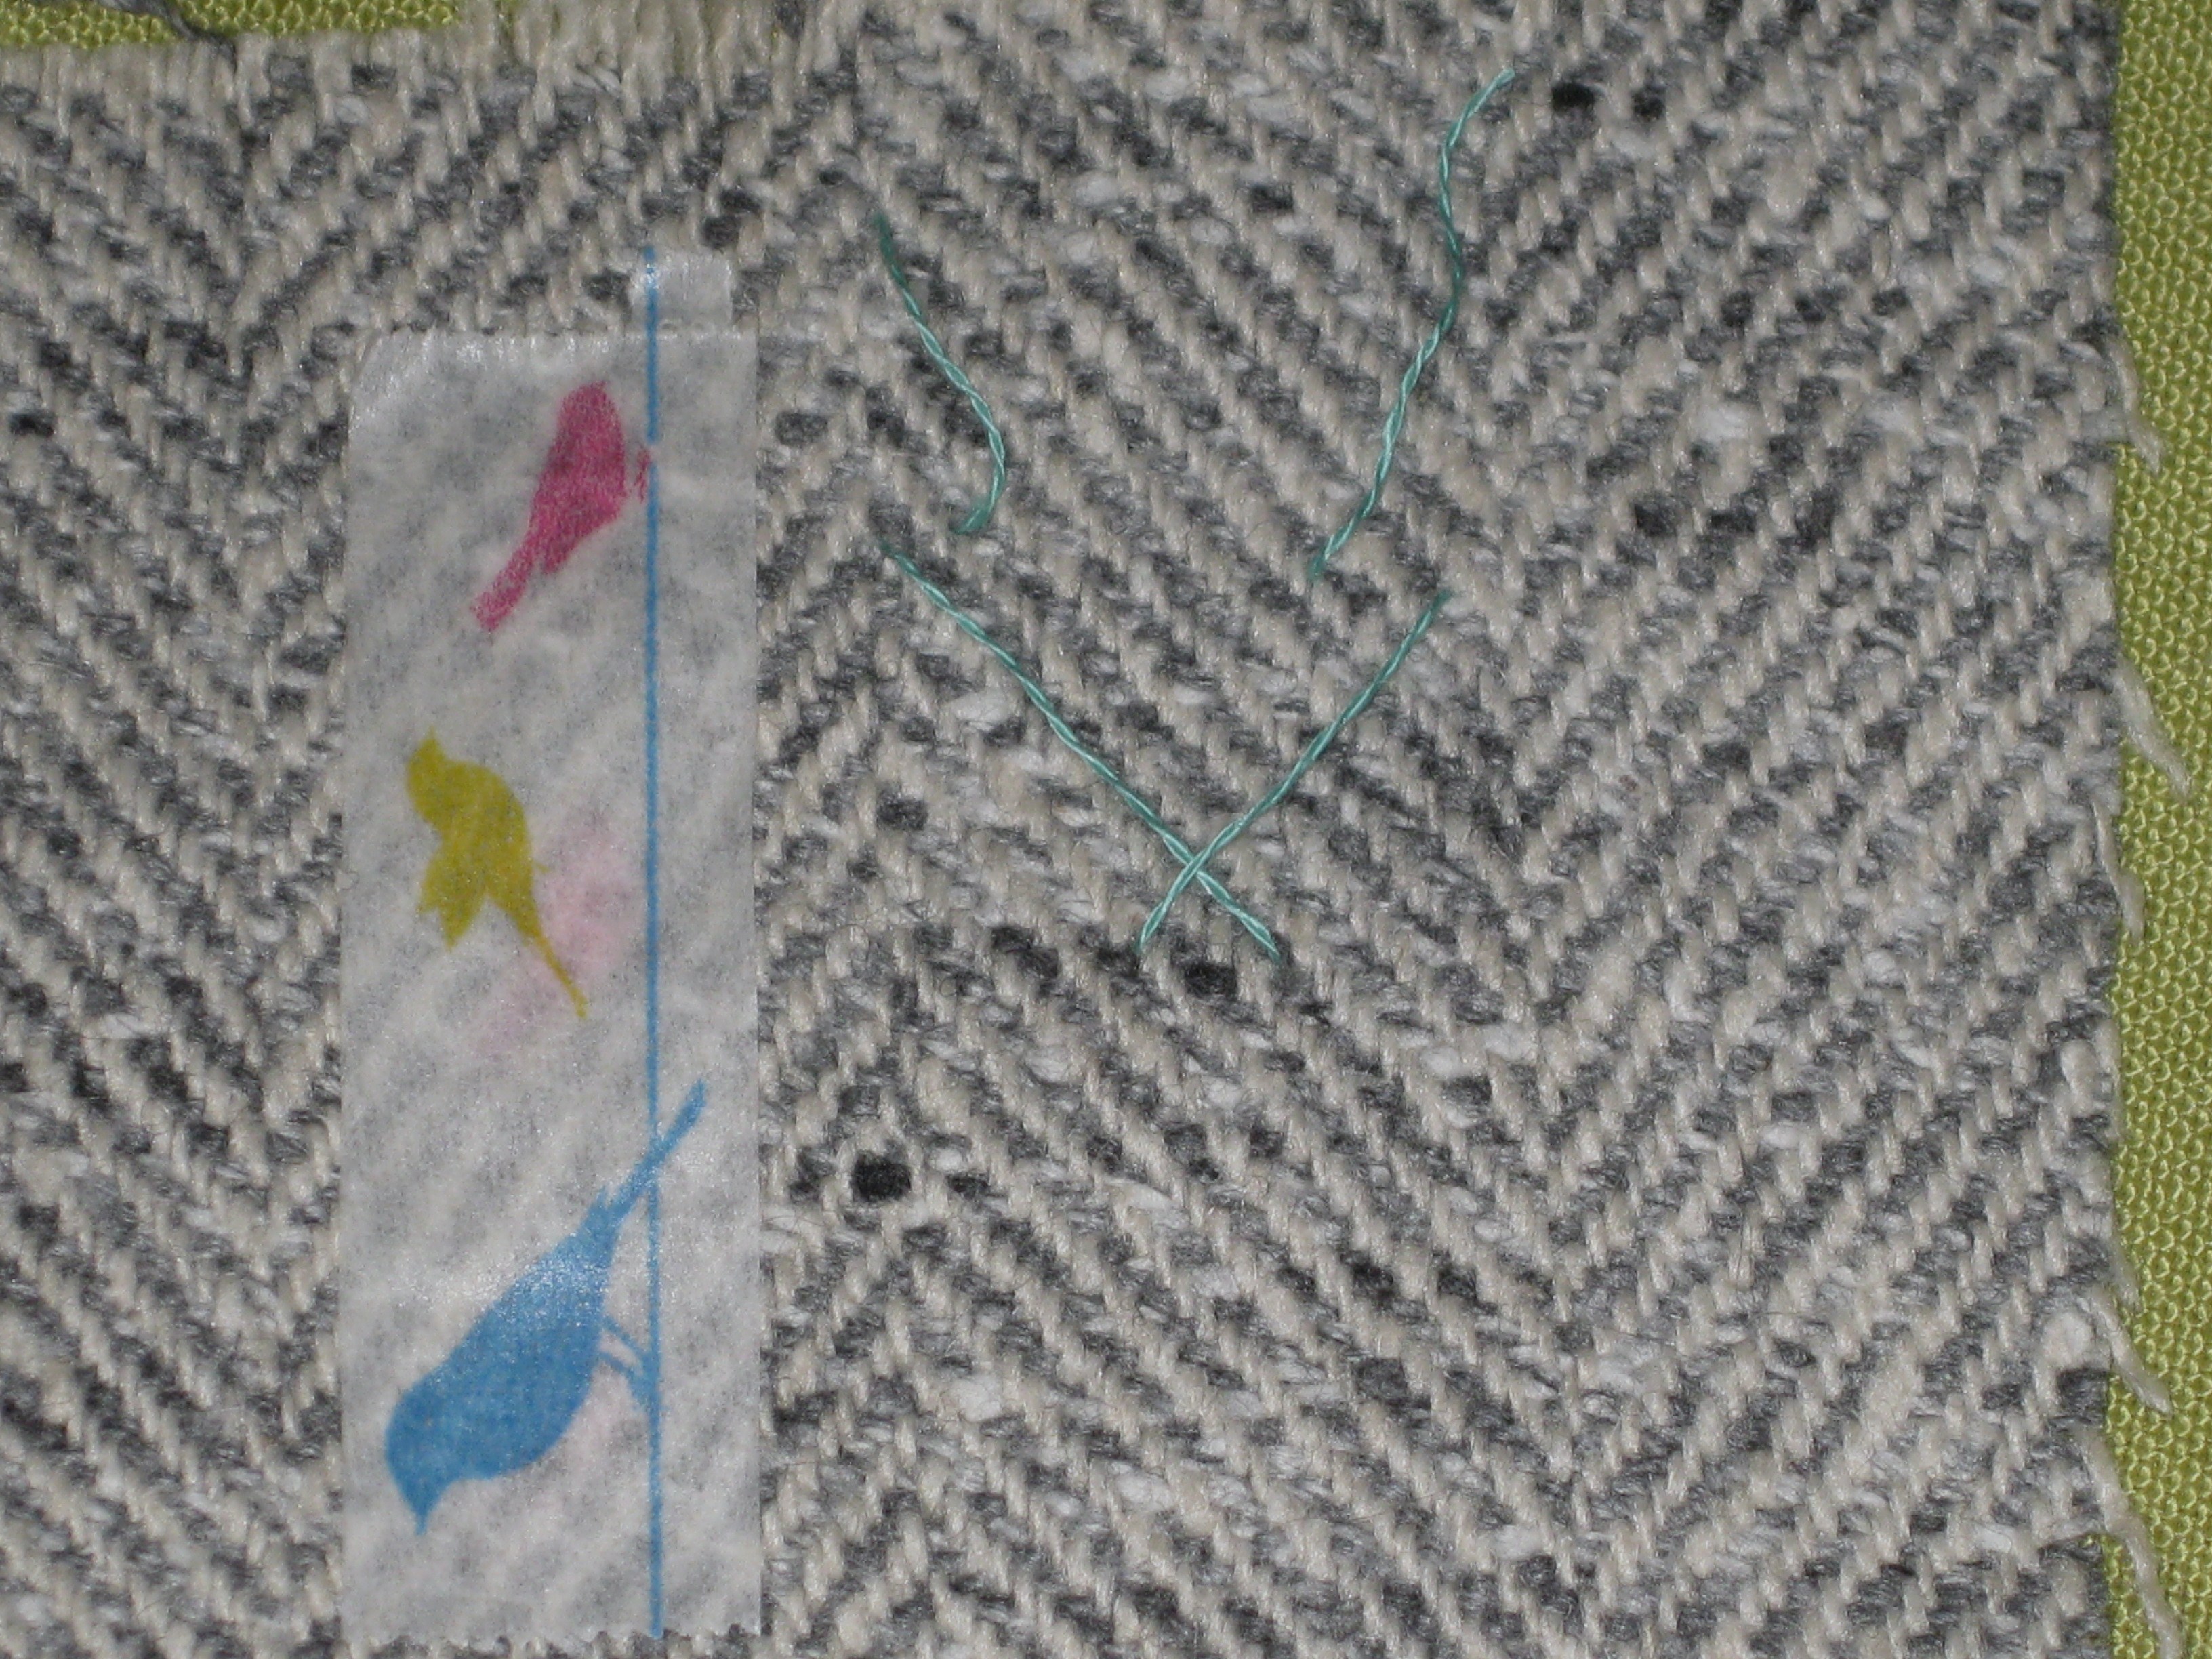
Use a piece of Washi tape or a hand stitch to indicate the wrong side of the fabric.
It is never a good idea to leave pattern pieces pinned to fabric for any length of time, especially if you live in a humid climate. If you find a bent, burred or blunt pin, dispose of it immediately.
Cutting Out
I prefer to use dressmaking shears to accurately cut my pattern pieces. The exception is when I am cutting straight pieces (waistbands, tab fronts, belt loops, etc) which I cut using a rotary cutter, mat and ruler.
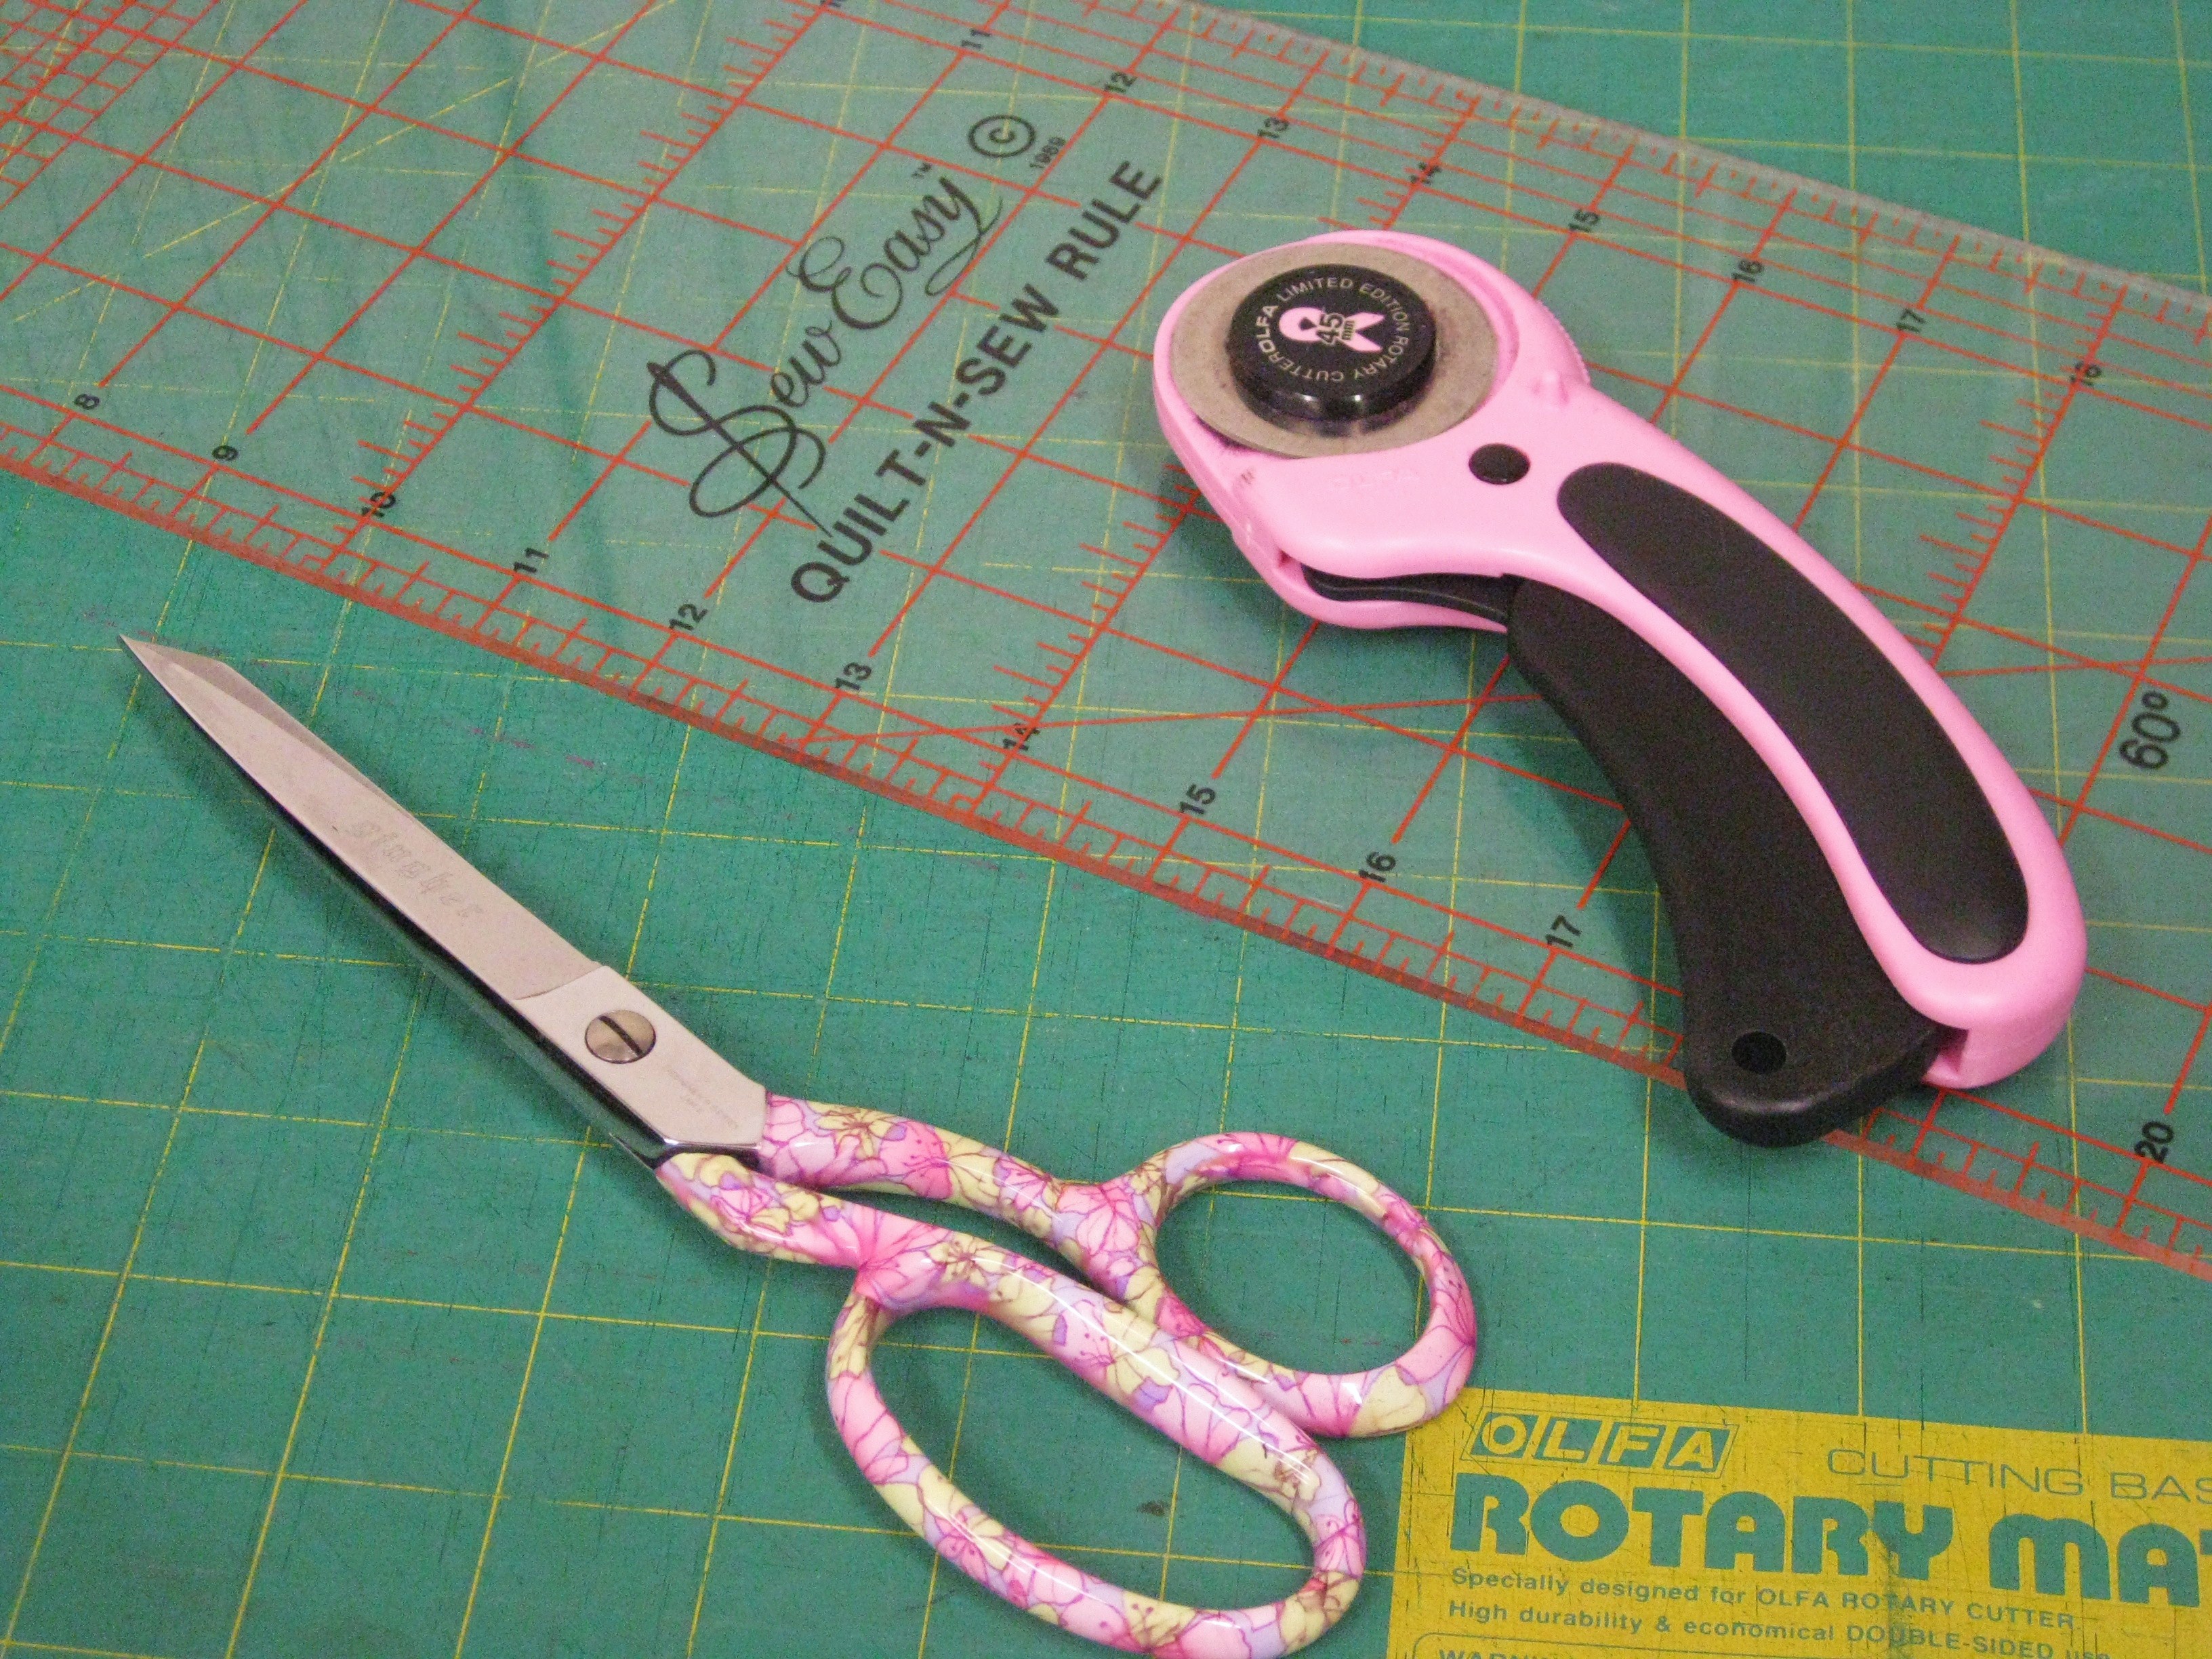
Dressmaking shears with rotary cutter, mat and ruler.
When cutting bias strips for binding, I also prefer to use a rotary cutter to achieve perfectly straight edges. I simply measure the length and width of the pattern pieces and cut the bias pieces separately.
Either way, I always cut away from myself while carefully moving the pieces so that I can mostly cut at right angles to my body. As I am right handed, I keep my left hand flat on the piece so that the fabric remains on the cutting surface as it is being cut. Left handed sewers would simply reverse this.
If possible, I try to cut directionally with the grain of the fabric (similar to the direction of stay stitching – see blog post 26th April, 2015 covering Stay Stitching and Edge Stitching).
I have to admit that cutting out is not my favourite part of a project because I find it quite hard on my back, even though I have a table at the correct height. A discussion with a physio resulted in some very good advice. When you are standing at the cutting table, very slightly bend your knees and keep your feet a shoulder width apart. I have tried this and it does make a difference. I hope it works for anyone else with a similar problem.
Marking the Fabric
To help with accurate piecing of the garment pieces, there are various notches, dots, triangles and lines on the pattern pieces. These need to be carefully transferred to the wrong side of the fabric. Never risk using a marking implement on the face side of the garment.
There is a wide range of marking methods and tools. The choice of marking method I use is always dependant on the fabric, style elements and where the marks need to be placed.
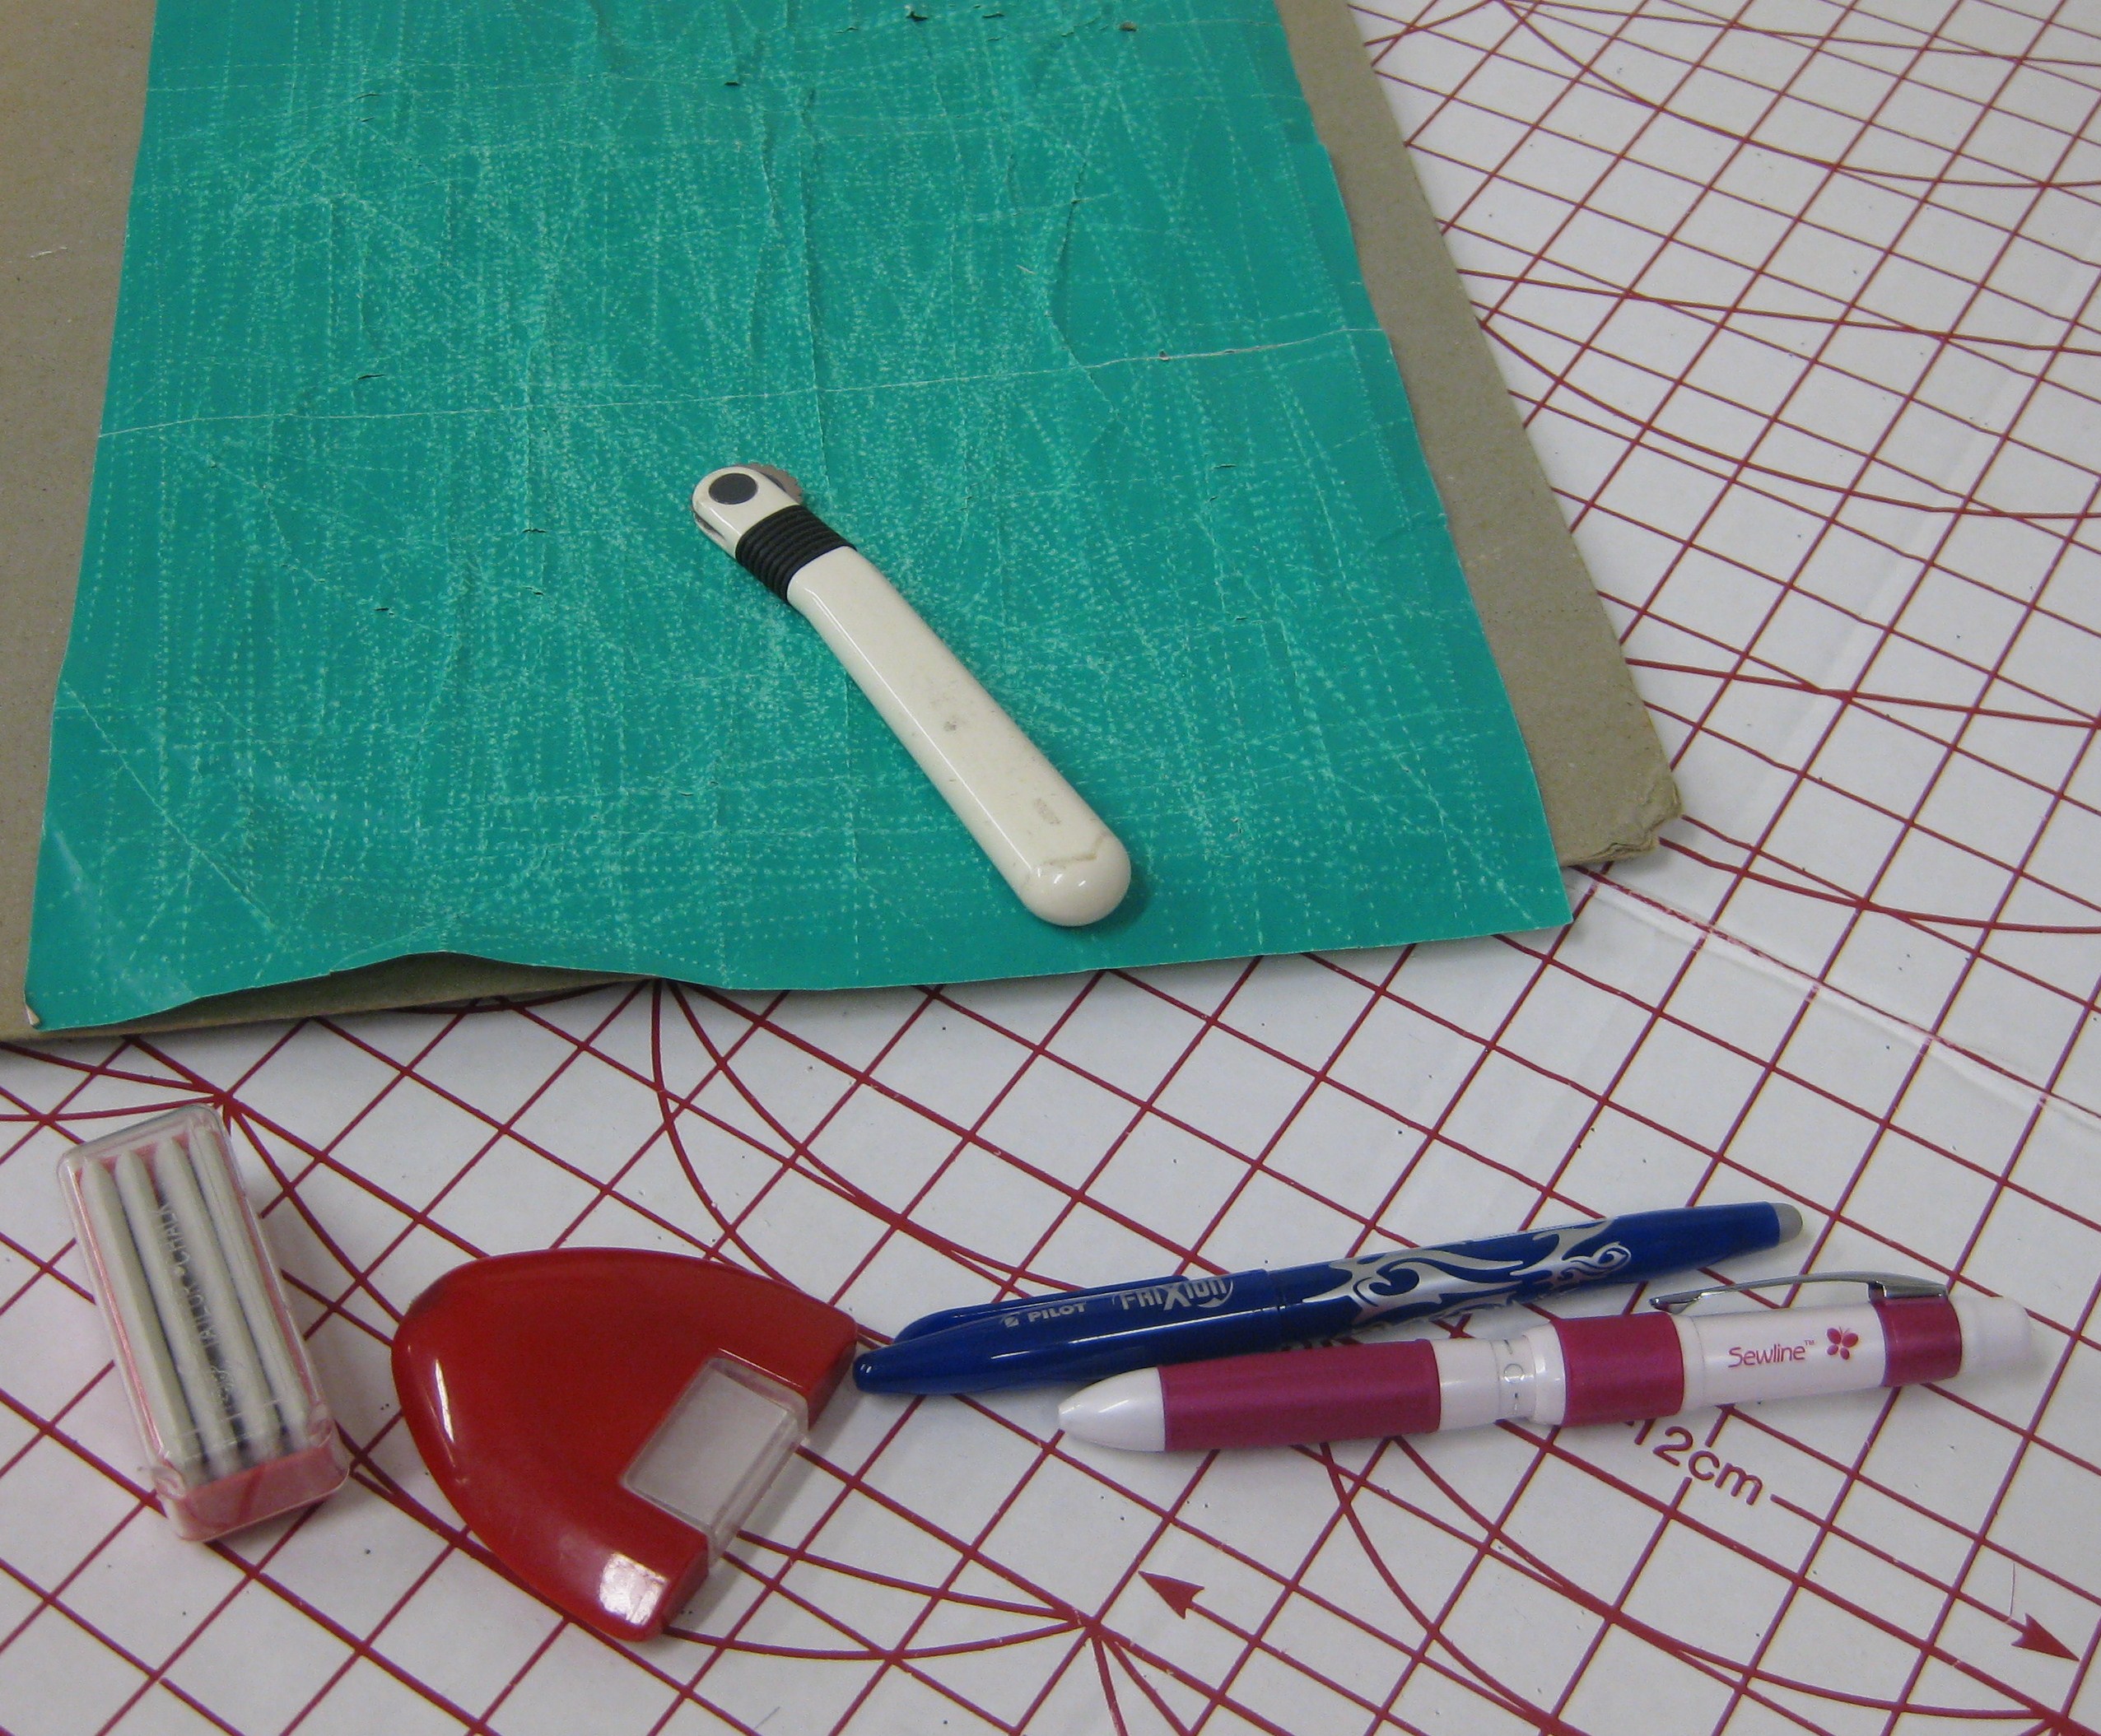
A selection of marking implements – dressmaker’s carbon and tracing wheel; tailor’s chalk and chalk wheel; Frixion pen and Sewline mechanical ceramic marking pencil
I believe all pens and pencil markers are best kept for markings in the seam allowances so that there is no chance that a permanent mark will show on the final garment.
For stable, non slippery fabric, pin marking works very well and is very accurate. It is necessary to place the pins right before sewing the garment piece as they may leave marks if left in the fabric for any length of time.
Small snips (no more than 6mm in a 15mm seam allowance) are also a quick and accurate method for marks at the cut edges. Simply remove the notches when cutting out the fabric and place the tip of sharp scissors in the middle of each notch and at centre front and centre back edges and make a small snip. The only drawback with this method is that if the fabric edges are finished before the pieces are joined together, the clips will disappear.
Chalk markers can be used in both within the seam allowance and in the body of the garment (for example when marking grain lines, pocket placements, centre front line, etc.).
If the garment has complex elements (unusually shaped pieces, sharp corners or curves) the best and most accurate marking method is to use dressmaker’s carbon paper and a tracing wheel. Just be sure to use the palest colour that can be seen on the fabric (I usually stick to white) so that the coloured lines will not be seen through to the face of the fabric. If you are using an underlining, the marks should be transferred to this layer which is attached to the main fabric and sewn together – thus avoiding any possibility of the marks showing on the right side of the garment.
Slide the tracing carbon between the pattern and upper layer of fabric. With a piece of cardboard or the underside of a rotary cutting mat under the piece, use the tracing wheel to run along all grain, seam and placement lines and through notches, dots, triangles etc.
Once the first piece of fabric has been marked, carefully remove the pattern and pin the fabric pieces together. With the carbon paper face up against the bottom layer, trace over the previous marks to transfer them accurately to the second piece.
In areas where it is necessary for specific construction techniques to see the marks on the right side of the fabric, thread trace the marks with embroidery floss (one strand is usually sufficient). This is particularly useful to mark the centre front and grainlines through to the right side which greatly assists when checking the fit of the garment. The other benefit of hand stitching marks is that they will not come out of the fabric until you remove them – how many times have we had to get the pattern out to see a mark that has faded?
Tailor’s tacks using the same embroidery floss are great for placement marks for pleats and tucks.
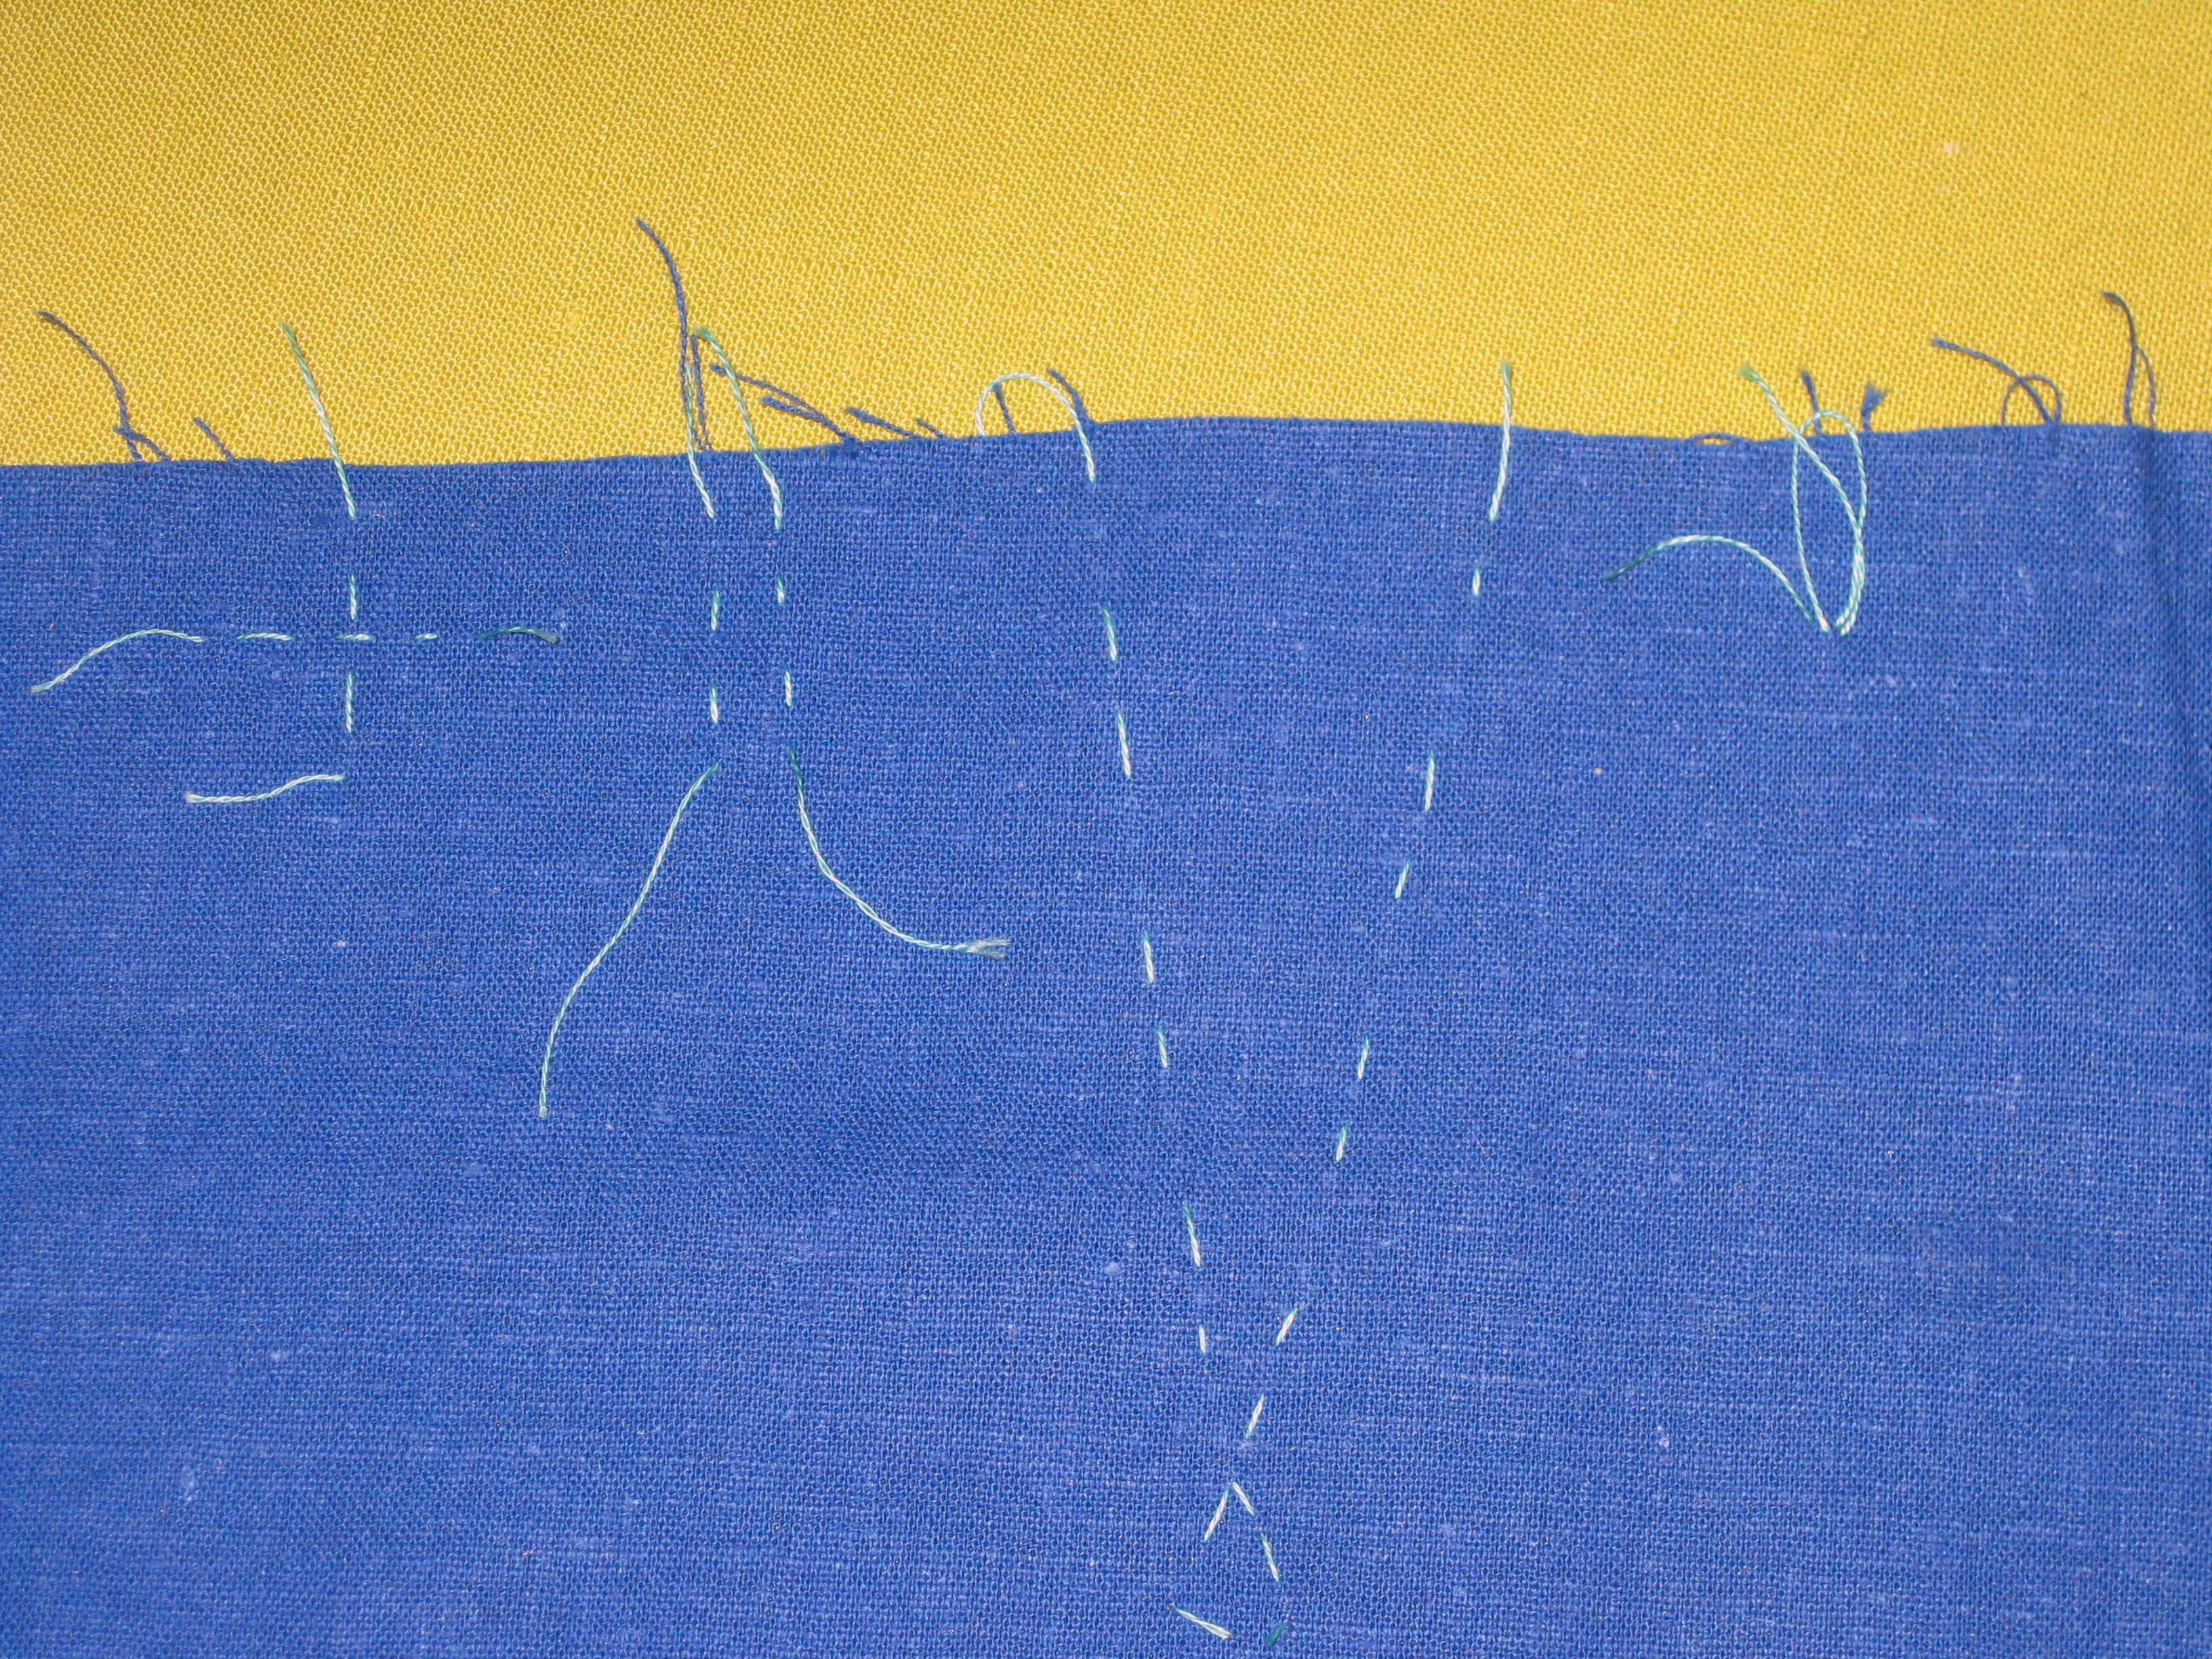
Marking by hand : L to R – crossed running stitches to mark dots; running stitch parallel to seam to mark notches; thread tracing to mark dart legs; tailor’s tack to mark exact point
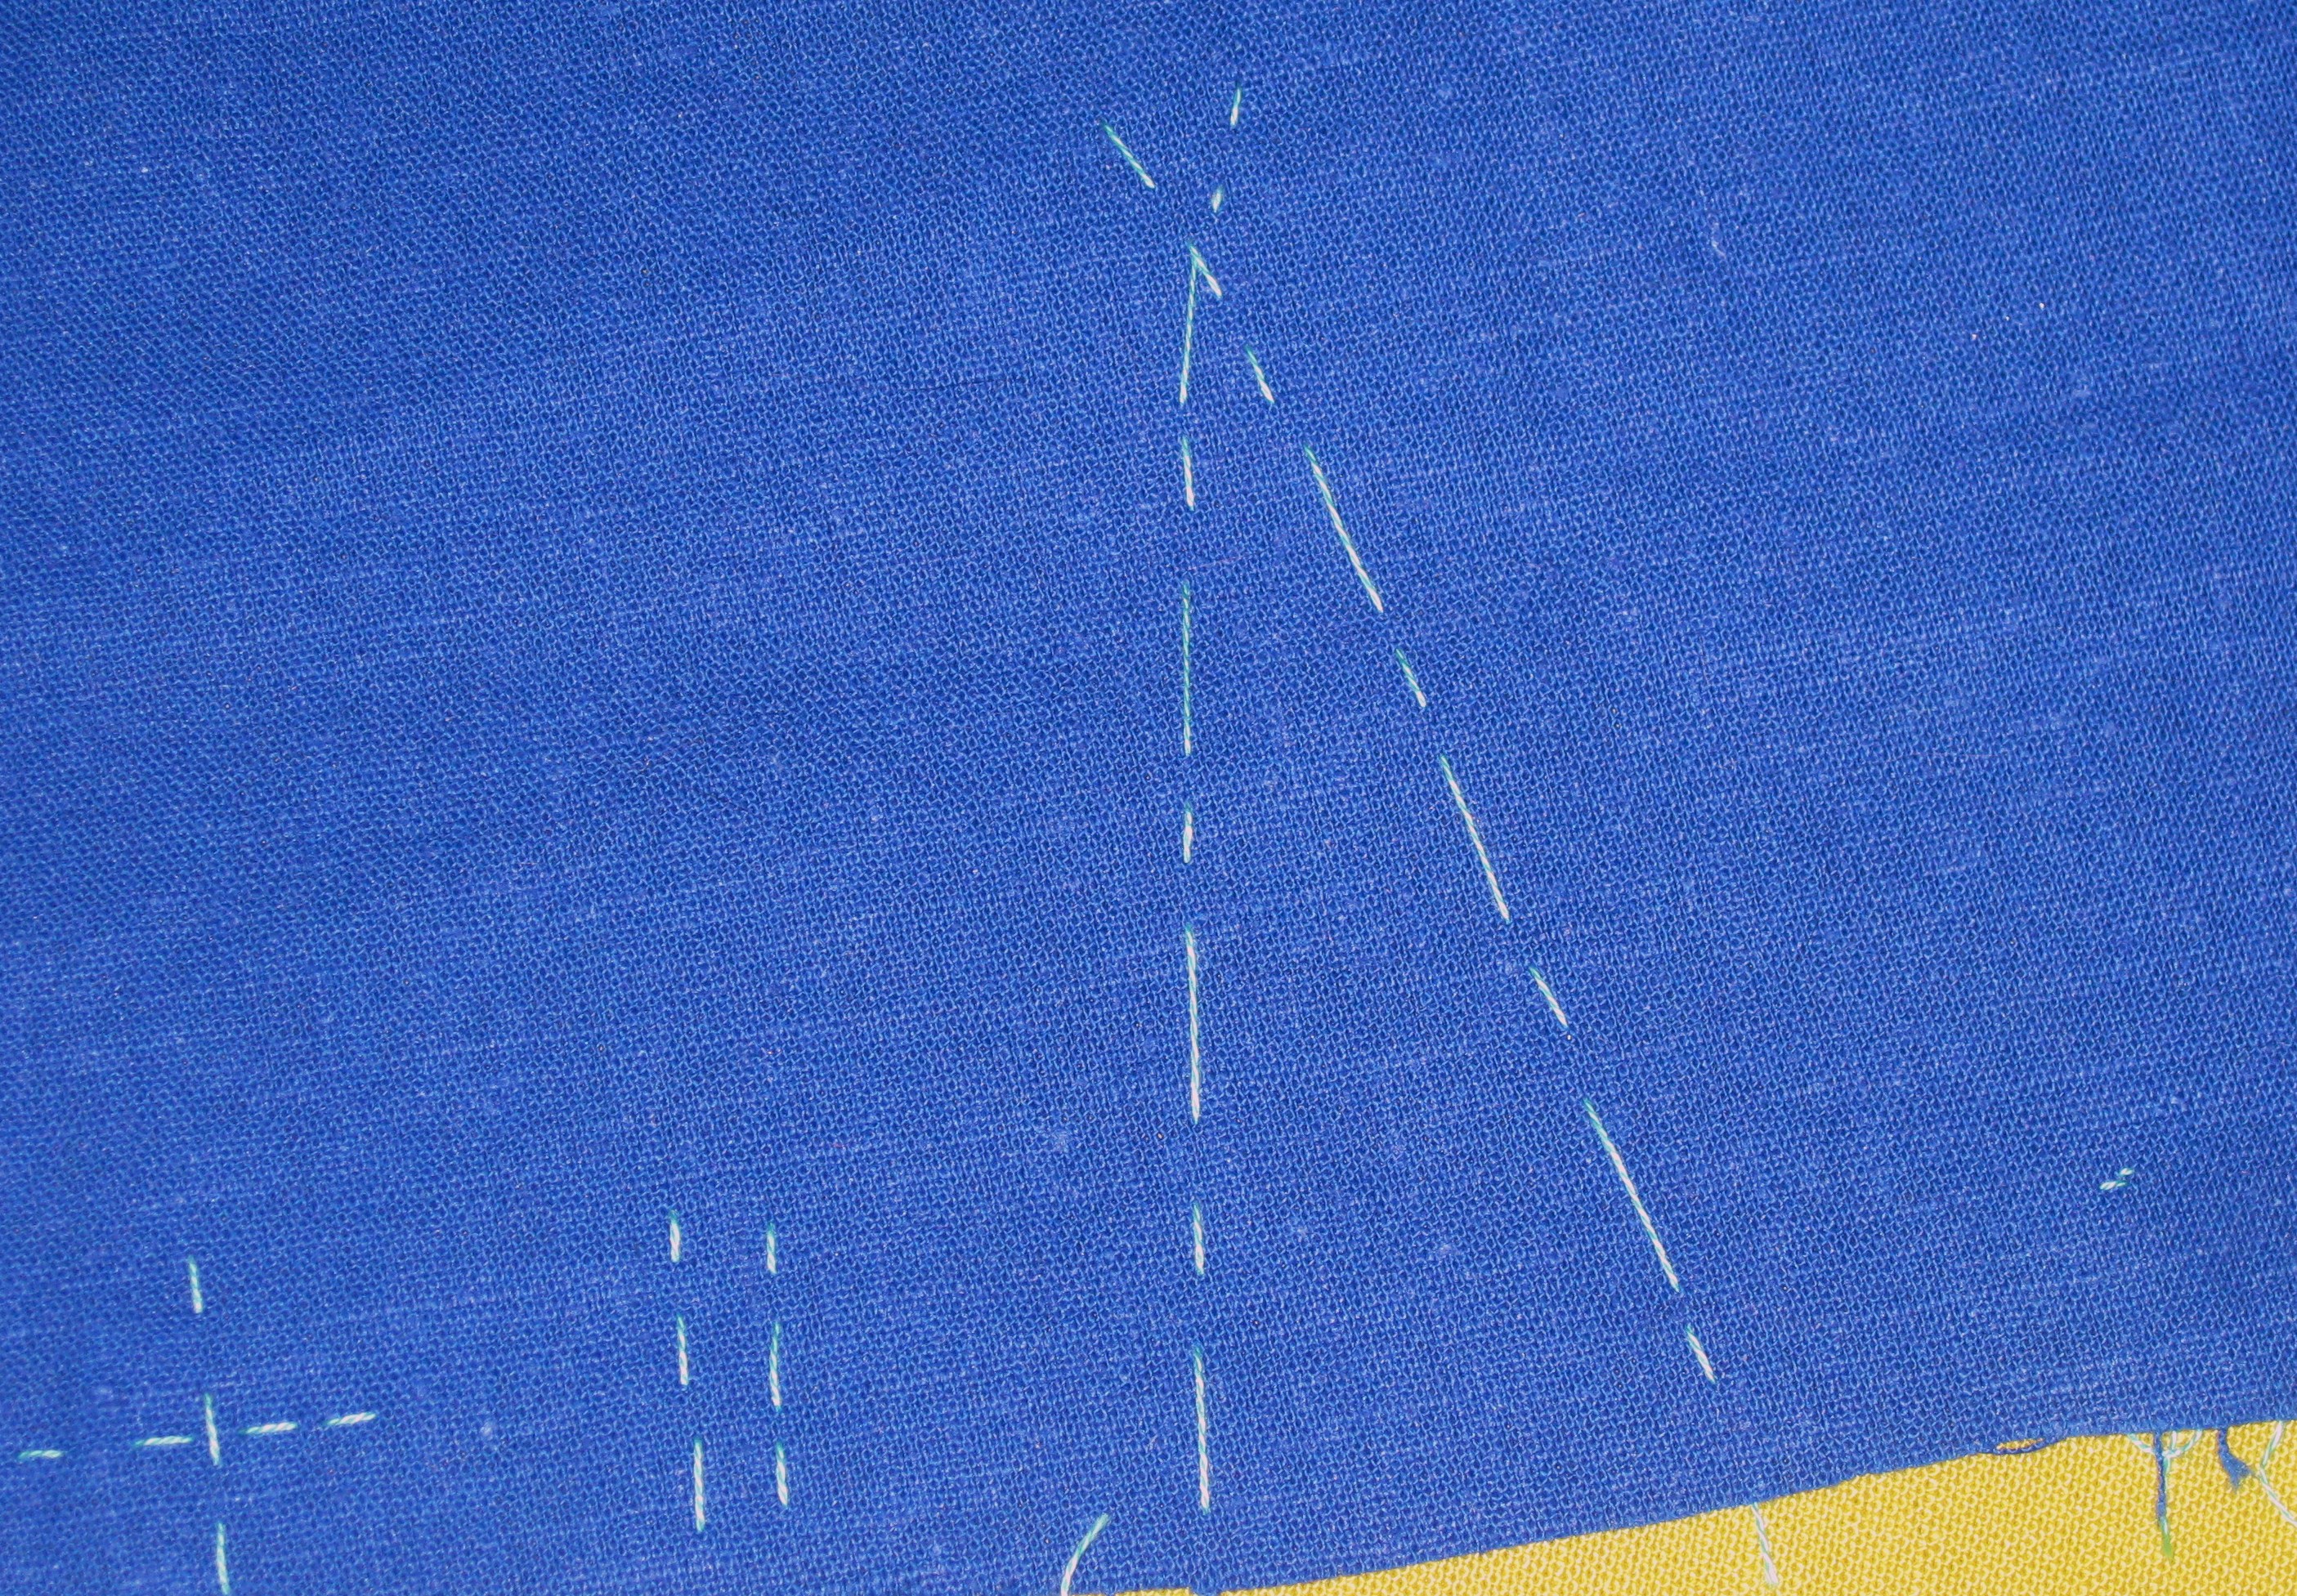
Marks seen on the right side of the fabric as well.
Whichever method is chosen, it is extremely important to test on a scrap of the fabric to be sure it will achieve the desired result and not cause unexpected problems.
