The Dream Wedding Gown

Yesterday I attended the wedding ceremony of one of my lovely students, Tina Patrick, and her fiancé, Steve Donovan.  The wedding was a “Gloryville” at Cudgera Creek in northern New South Wales – a little piece of green paradise which was the perfect setting for a wonderful family occasion.  It was such a privilege to be part of it all.  Congratulations, Mr and Mrs Donovan!

The happy couple - Tina and Steve Donovan

The happy couple – Tina and Steve Donovan

What sets a wedding gown apart as a sewing project, is not just working with unfamiliar (and often expensive) fabrics but the techniques used.  To achieve a gown which is not only beautiful but will allow the bride to be comfortable so that she can really enjoy her special day, the process starts with a good fit and an inbuilt foundation and stays to support the gown during the whole event.  The inclusion of lots of hand work gives a softer and unpuckered finish to the outer edges.  It also makes controlling the task much easier.

Tina started coming to classes around 8-9 months ago with a view to learning enough to make her own wedding gown.

As the weeks progressed, she completed a toile of her chosen style – excitedly embracing all the new techniques involved, especially boning!  Once the fit was perfected, she made the dress another couple of times and has received lots of well deserved compliments.

And so to THE DRESS!

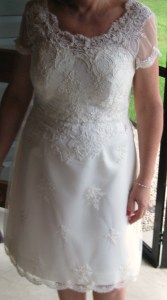
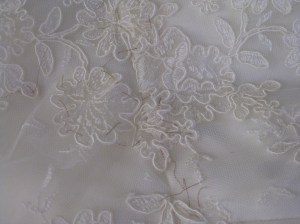
Tina found her special fabric at Selective Fine Fabrics (Shop 10, Cnr Compton and North Road, Underwood, Q  4119 – 07 3208 9373).  It is a natural white corded lace on tulle with a wide, heavy border on one side flowing into a delicately embroidered tulle with a beautiful lace scallop on the other side.  The under dress is Duchesse satin and the dress is lined with silk crepe de chine.

Beautiful cream corded lace on tulle over Duchesse satin underskirt

Beautiful cream corded lace on tulle over Duchesse satin underskirt


She started with making the boned foundation using beautiful cotton which is sturdy, yet soft and cool.  The satin bodice was pieced and attached to the foundation.  To finish the top edge, the fabric was folded over the catch-stitched to the foundation.  This technique gives a lovely rolled edge to the satin bodice. We then positioned the lace while Tina was wearing the bodice.   The lace was tacked to the satin bodice and the excess pinched out  to achieve a smooth shape.

The beauty of working with this type of lace is that it can be cut and motifs rearranged to avoid sewing seams and darts which can distort the flow of the pattern.  When corded lace is pieced in a dart or seam, it creates an uneven seam which often looks bulky and unattractive.

The fabric was carefully cut using lace work scissors and leaving a small margin of tulle around motifs.  It was then tacked in place and stitched by hand using #100 silk thread and a fine, short needle.

All seams and darts eliminated from the lace.

All seams and darts eliminated from the lace.

Lace trimming scissors help to avoid nicking the tulle

Lace trimming scissors help to avoid nicking the tulle

To create the beautiful neckline, back and front shoulder sections were cut from silk organza which was stitched by hand (using a catch stitch) to the underside of the satin bodice.  Shoulder and under arm seams have been joined with a small French seam.  Again with Tina wearing the bodice, the lace was carefully placed in an attractive scoop shape and tacked in place.  Chosen motifs were trimmed and stitched, again by hand as above.

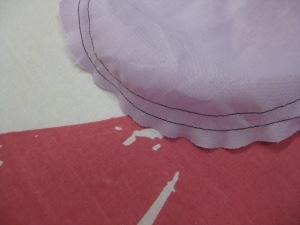
As the scallops are unsupported, a small hand running stitch was applied inside each curved and pulled slightly to force the edges to “cup” and stay in place all day.

To ensure the scalloped edges stayed in place, a small running stitch was sewn by hand around the curve and pulled up slightly.

To ensure the scalloped edges stayed in place, a small running stitch was sewn by hand around the curve and pulled up slightly.

Sleeves were made from plain tulle and the small scalloped border hand stitched along the edge.  The sleeves were then set into the armholes and machine stitched.  The seam allowance was trimmed; rolled over the seam and stitched in place to achieve a hairline seam.

Sleeves were cut unadorned sections of tulle with scalloped border appliqued to the hem. Inserted using hairline seam by machine.

Sleeves were cut unadorned sections of tulle with scalloped border appliqued to the hem. Inserted using hairline seam by machine.

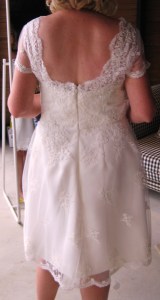
Tina constructed the skirt, inluding hand stitched hems, and then layered the tulle, satin and lining silk and stitched it in place to the bodice.  Small tucks were added at the side back to give a little more fullness in the back of the skirt.  The hemline of the lace at the centre back has been lowered slightly and, together with the slight fullness, gives interest at the back of the gown.

Slight fullness and lower hem to add interest to the back of the gown.

Slight fullness and lower hem to add interest to the back of the gown.

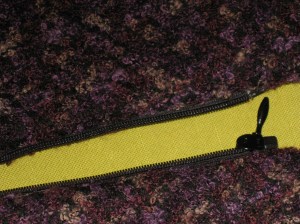
A heavy duty invisible zip has been used as a regular invisible would not be strong enough to hold the thickness of the corded lace.

A heavy duty invisible zip.

A heavy duty invisible zip.

To help keep the garment beautifully in place all day, an elastic stay was applied across the back bodice and narrow braided lace has been hand couched across the shoulders.

Neckline/shoulder stays hold the shoulder and sleeves in place with a wide deep neckline in the front and back. They are made from narrow braided elastic couched in place with catch stitch and fastened at each end.

Neckline/shoulder stays hold the shoulder and sleeves in place with a wide deep neckline in the front and back. They are made from narrow braided elastic couched in place with catch stitch and fastened at each end.

Once the additional lace was hand appliquéd across the waist and down the top of the skirt, the silk lining was inserted by hand and the elastic back stay fed through slits in the lining side seams.

The addition of an elastic suport across the back holds the dress securely in place.

The addition of an elastic suport across the back holds the dress securely in place.

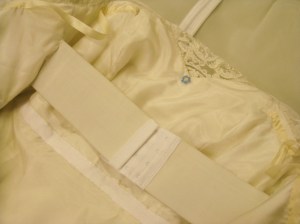
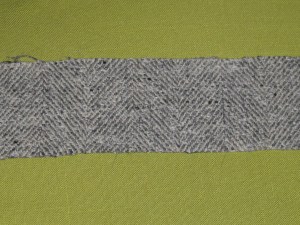
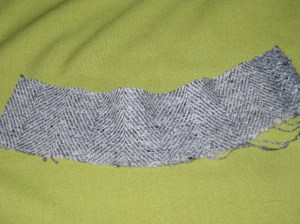
A waist stay was applied using Petersham ribbon with hidden hooks and thread eyes.  This is fastened before the zip and holds the back together to minimise strain on the zipper at the waist as well as holding the skirt in place.

Rayon Petersham waist stay fastens around the waist to keep the skirt in place and take the strain of the zipper when it is being opened and closed.

Rayon Petersham waist stay fastens around the waist to keep the skirt in place and take the strain of the zipper when it is being opened and closed.

Elastic stay and Petersham waist stay are lie inside the gown - over the silk lining (inserted by hand).

Elastic stay and Petersham waist stay are lie inside the gown – over the silk lining (inserted by hand).

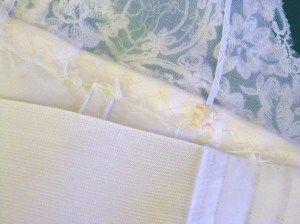
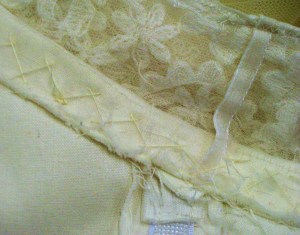
Because the shoulder and sleeve sections are quite delicate, ribbon hanging loops have been added to support the weight of the dress on a hanger.

Ribbon hanging loops.

Ribbon hanging loops.

A touch of blue for luck was added as a beaded flower inside the top of the bodice on the lining.

The final touch - a hand beaded blue flower for luck.

The final touch – a hand beaded blue flower for luck.

With all of this inner structure keeping her beautiful gown in place and comfortable, Tina was able to kick off her shoes and dance the night away with her handsome groom.  By the way, Tina also made Steve’s vest – she is justifiably proud and Steve is as pleased as punch and very proud of his wife’s wonderful achievements.

Tina was a gorgeous bride and it was such a joy to help her achieve her dream wedding gown and to share her and Steve’s happiness as they start their new life as man and wife.  Good luck and good health to you both and may you enjoy many years sharing your lives together.

Pressing Matters

Portions of this article were first seen in Australian Stitches magazine – Volume 22 No 4.
Permission has been sought and granted for electronic use and the photos and text remain the property of Alison Wheeler – Sewing Lady.

One of the key construction elements affecting the finish of a garment is Pressing Techniques.

Many sewers who learned from their mothers and grandmothers were repeatedly told to never sew a garment together without pressing each seam as you go.  While many other techniques have come and gone, the importance of pressing in garment construction remains.

When buying fabric, take particular note of the composition of the fabric and the care instructions attached to the fabric bolt.  They should be your guide when choosing iron temperature.

Tip:  If you have a smart phone, take a photo of the swing tag.  Otherwise, write the details on the reverse of your sales docket and store it with your fabric for later reference.

So what do we equipment do we need; what are these techniques and how do they affect the final finish of the garment?

Pressing equipment:

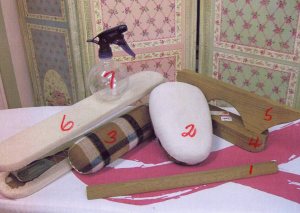
1: Seam stick and organza press cloth 2: Tailor's ham 3: Seam roll 4: Clapper 5: Point presser 6: Sleeve board 7: Spray bottle

1: Seam stick and organza press cloth
2: Tailor’s ham
3: Seam roll
4: Clapper
5: Point presser
6: Sleeve board
7: Spray bottle

A heavy based iron with good steam delivery is the key. If you do not have a good steam iron, you can mist your press cloth with a plastic spray bottle.  If your iron is lightweight, lower the ironing board so that you can press down easier to achieve the necessary pressure.

  • A well padded ironing surface. This can be an ironing board or a pressing surface made by covering a piece of plywood with an old blanket and a calico cover.   In my studio, I have an ironing surface made from a cork notice board that I have covered with an old wool blanket .  A heavy cotton  duck fabric cover was made with elasticised sides (like a fitted sheet) so that it can be washed.
  • This large flat surface is perfect for fusing interfacing and pressing garment sections flat during construction.
  • A press cloth is essential to avoid damaging your fabric. It should be used every time your iron comes into contact with your fabric. My choice of press cloth is a piece of silk organza.  It is really tough and handles high heat and pressure well and has the added benefit of allowing me to see what I am doing.  Make sure you use silk and not polyester organza which would burn on to the base of the iron.  Tip:  Half a metre of silk organza can be trimmed with pinking shears and cut into two or three cloths for reasonable cost.  Use a separate cloth for fusing interfacing so that you do not inadvertently damage your iron or fabric.
  • A seam stick is very useful to place under the seam so that, when it is pressed open, the seam allowances do not make an imprint which can often show through to the right side of your garment. It can be made easily from a piece of 3cm dowel cut in half and sanded smooth.  If your fabric is delicate or needs more steam, you can make a pocket of fabric from wool flannel to cover the stick so that the timber does not touch your fabric.
  • A tailor’s ham is a reasonably priced and very useful piece of pressing equipment and are used to press any sections of the garment that fit over curved areas of the body. Hams take their name from their shape and are usually covered on one side with a sturdy cotton fabric and on the other with a woollen fabric.  The cotton absorbs the steam and the wool increases the effect of steam on your fabric where extra is needed.  Tip: Store your ham in a clip lock bag so that the wool side will not be eaten by insects and to keep the ham clean when it is not being used.)
  • Similar to a ham, a seam roll is made in a sausage shape and used for pressing seams open in trouser legs, sleeves, etc.  They allow the fabric of the garment and seam allowance to fall away from the surface of the iron so that the chance of an impression of the seam allowance on the right side of the fabric is greatly minimised.
  • A clapper is used to pound a pressed seam so that it smooth and flat once cool. They are also available with a point presser attached.  The point presser is used to press open seams when facings are applied as well as lapel and collar seams which would be difficult to access with just the iron.  These tools work by drawing the moisture from the fabric and allowing it to cool smooth and flat.
  • A sleeve board makes pressing sleeves, pants and difficult to access areas a breeze. They are particularly good for children’s clothes and smaller sized garments.
  • A plastic misting bottle for where extra moisture/steam is required.
  • A natural sponge which has been wet and wrung out well can also be used to place moisture exactly where it is needed to achieve the desired result.

I also use an ironing press for large fusing jobs, for example when fusing a whole garment to support open weave fabrics or lighter fabrics which I am using for more structured projects. My ironing press is at least 30 years old and does not have a steaming feature – this is where the misting bottle comes into its own.  If you have a press with steam, be very careful to completely empty the tank when the press has cooled and then heat it to make sure there is no moisture left.  Any moisture left in the tank can cause it to rust, causing marks on your future projects.

Pressing versus Ironing:

Pressing involves a lift and lower motion over sections of the garment and is useful for flattening seams and moulding the fabric into the desired shape during construction of the garment.

Ironing  uses a gliding motion over the right side of the garment and is mainly used to remove creases  after laundering and on-going care of the garment.

Melding the stitches:

Most dressmaking these days is done using polyester sewing thread.  While this thread is strong and durable, it does not meld with the fabric unless it is pressed when the seams are sewn.  Just stitch a seam and run your finger over the stitches.  You will feel the thread lying on top of the fabric.

Take your sample to the ironing board and press the seam flat as it was sewn.  Now run your fingers over the stitches and you will find that they have melded into the fabric and no longer feel like a ridge against the fabric.

With the thread melded into the fabric, your seams will sit smoother and flatter when pressed open or to one side.

Pressing seams:

Once you have pressed the seams flat to meld the stitches, seams should be pressed open from the wrong side of the fabric.  Place seam over the seam stick or seam roll and use a press cloth.  If you do not have a seam stick or seam roll, place some brown paper or tally roll paper between the seam allowance and the garment fabric.  Do not use waxed paper as it will not absorb steam.

Be sure to press lightly using the tip of the iron.  If you are using a springy fabric, once the seam has been pressed open, pound it with the clapper.

For very springy fabric, use a sponge to moisten the line of the seam stitching, cover with a press cloth and press again.

Do not move your fabric until it has cooled down.

Seams can then be pressed to one side (again using the seam stick and press cloth) and pounded with the clapper.  This gives a really flat seam line to follow if you are topstitching.

Pressing Hems:

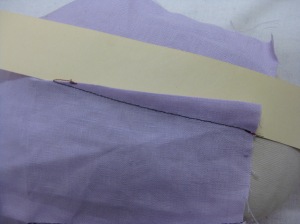
To aid in pressing an even hem width, cut a piece of manilla card stock to the width of the finished hem.  Hold it against the wrong side of the hem allowance and flip the fabric up so that it aligns with the top of the card and press in place.  This method results in a crisp hem crease and avoids marking the front surface of the garment.

Using a manilla strip cut to the hem depth makes pressing an even hem allowance very easy.

Using a manilla strip cut to the hem depth makes pressing an even hem allowance very easy.

This technique is also very useful for pressing under the edge of patch pockets .

Pressing pleats:

If your garment features pleats, you will find it much easier to stitch them if the crease has been pressed in place first.  Use tailor’s tacks to mark the crease lines; fold the along the marked lines and press using a cloth; pound with a clapper to set the crease.

Continuous tailor's tacks stitched through both sides of garment piece to mark fold line for tucks and pleats.  They can be clipped apart between each tack to separate fabric layers.

Continuous tailor’s tacks stitched through both sides of garment piece to mark fold line for tucks and pleats. They can be clipped apart between each tack to separate fabric layers.

Press tucks from right side using thread marks as a guide to the fold line

Press tucks from right side using thread marks as a guide to the fold line

Pressing gathered fabric:

Once your gathered section has been applied to the rest of the garment, use the tip of the iron to press at right angles to the seam.  Applying a gentle pull to the fabric will help to position the gathers with the iron.

Press gathers towards seam, spreading them with the point of the iron.

Press gathers towards seam, spreading them with the point of the iron.

Pressing sleeve caps:

Once a set in sleeve has been eased, place the sleeve cap over a tailor’s ham and pin it in place along the seam line.  Without touching the fabric, steam the sleeve cap.   Press the seam allowance gently with your fingers to smooth it and allow it to dry completely before setting the sleeve into the armhole of the garment.  This method results in a pucker free installation of the sleeve.

Place sleeve cap over small end of the ham and pin in place with glass head pins. Keep the pins on the seam line.

Place sleeve cap over small end of the ham and pin in place with glass head pins. Keep the pins on the seam line.

Steam the section being eased - do not allow the iron to touch the fabric.

Steam the section being eased – do not allow the iron to touch the fabric.

The result is a smooth seam line ready for insertion into armhole.

The result is a smooth seam line ready for insertion into armhole.

The sponge method can also be used on wool fabrics.  Be careful to test on a scrap to make sure your fabric will not water stain.

Pressing darts:

The dart stitching should be pressed flat first to meld the stitches into the fabric.  The darts are then pressed against the garment, usually towards the centre back or front for vertical darts and towards the waist for bust darts. Place the fabric right side down over a tailor’s ham and a small piece of manilla card stock under the dart.

Place dart over ham with manilla card under the fold and press.

Place dart over ham with manilla card under the fold and press.

Cover the fabric with press cloth and press over the ham to shape the fabric.  Always allow the fabric to cool before removing it from the ham.

If the garment is underlined or a lining is to be inserted, slash the darts open  for a smoother, flatter line.   Press using a press cloth and pound with clapper while fabric is over the ham.  Again, allow the fabric to cool before removing it from the ham.

Dart slashed and pressed open will give a flatter garment surface in lined garment.

Dart slashed and pressed open will give a flatter garment surface in lined garment.

Stretching and Shrinking:

Used in tailoring, these techniques can be used in dressmaking where you do not want to clip seam allowances; for example, if working on a white or pale colour garment with princess seams or if stitching a dart would make a plaid garment less visually appealing.  It is also a useful technique beacuse if the seams are not clipped, future alterations are made much easier.

Curved side seams will not press flat. Most patterns mention clipping them so they will lie flat.

Curved side seams will not press flat. Most patterns mention clipping them so they will lie flat.

Pressing with steam, stretch the outer edge of the seam allowance.

Pressing with steam, stretch the outer edge of the seam allowance.

Top seam allowance pressed flat after being stretched. Bottom seam allowance clipped.

Top seam allowance pressed flat after being stretched. Bottom seam allowance clipped.

Straight piece of fabric cut on the crossgrain.

Straight piece of fabric cut on the crossgrain.

Outer edge of seam allowance of concave curve is pressed and stretched.

Outer edge of seam allowance of concave curve is pressed and stretched.

Upper edge shrunk into a curve; lower edge stretched into a curve.

Upper edge shrunk into a curve; lower edge stretched into a curve.

I hope you will give these techniques a try.  You will see a marked improvement in the finish of your garments and understand that our mothers and grandmothers did indeed know a thing or two about quality construction and pressing techniques.

Placement of Buttons on Tab Placket

In last week’s post, I forgot to mention where to sew buttons.

When using horizontal and vertical buttonholes, the buttons are stitched on the centre front.  However, with vertical buttonholes, the button should be at the top of the buttonhole.  If it is sewn in the centre of the buttonhole, the button side of the garment will drop during wear, allowing the button to rest against the top of the buttonhole, resulting in an uneven hemline.

Buttons and Machine Buttonholes

The choice of buttons can greatly affect the impact of a garment and, with such a wonderful selection available, we are spoiled for choice.

I believe that Sckafs Fabrics at Indooroopilly Shoppingtown have the best range of buttons that I have found in Australia and if you are visiting Brisbane, well worth a visit.

Buttons make a great memento of a holiday visit – and they don’t add much weight to your luggage!

An assortment of my souvenirs from the button shop in Nurses Walk, The Rocks, Sydney.

An assortment of my souvenirs from the button shop in Nurses Walk, The Rocks, Sydney.

Buttons:

There are a few things to consider when selecting buttons for a garment and I hope this information will be a helpful guide:

  • If using a commercial pattern, check for size of buttons
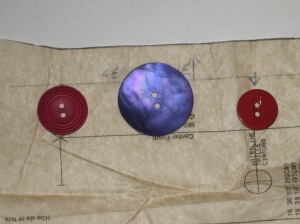
    Left - correct size Middle - larger - seam line needs to be moved out Right - smaller - seam line needs to be moved in

    Left – correct size
    Middle – larger – seam line needs to be moved out
    Right – smaller – seam line needs to be moved in

    required – detailed on back of pattern envelope in the Notions section. If you wish to use a larger or smaller button, the pattern will need to be altered to accommodate the different size.

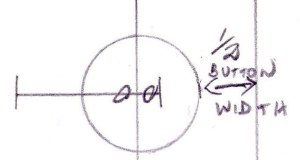
Button extension should be the button width so that when garment is buttoned, button sits at centre front and there is a space half the width of the button between the edge of the button and the edge of the garment.

Button extension should be the button width so that when garment is buttoned, button sits at centre front and there is a space half the width of the button between the edge of the button and the edge of the garment.

  • If you are creating the pattern, the button extension will need to equal the width of the button.
  • The suitability of button style for the intended garment:
  • shank versus holes – if the fabric is bulky or thick, a shank button will better accommodate this thickness of the two sides of the garment under the button. A thread shank can be added under a flat button but for thinner fabrics, flat buttons are a better choice as shank buttons tend to hang down.flat versus dome or rounded shaped – if making a shirt, it is often better to use flat buttons if the shirt will be work under a fine wool pullover
Top row - rounded shape Bottom row - angular shape

Top row – rounded shape
Bottom row – angular shape

  • round, square, triangular or oblong style – if using a graphic print, match the dominant shape in the print to the button shape. For swirls and curves – a round button; for angular patterns – a square, oblong or triangular shape.
  • How to care for them during the life of the garment – do buttons need to be removed before washing or dry cleaning, for example glass and antique buttons?
  • To properly assess the actual measurement of the button, measure the circumference of button use narrow tape or ribbon. Wrap the tape around the centre of the button (just to the side of a shank) and pinch tape together.  Slide button out and flatten the tape – this is the required length for the button to pass through the buttonhole.
    Measuring dome button.

    Measuring dome button.

    Wrap ribbon around dome button right beside the shank - underside.

    Wrap ribbon around dome button right beside the shank – underside.

    Flatten the ribbon and measure the length required for the buttonhole (my cat, Beau, decided to help me!)

    Flatten the ribbon and measure the length required for the buttonhole (my cat, Beau, decided to help me!)

  • When buttons are sewn to the garment, the direction of the stitching through holes or shank should be the same as orientation of the buttonhole.
  • So that both sides of the garment sit comfortably on top of each other without being squashed by the button.
  • For thicker fabrics, make a thread shank for buttons with holes.

Machine Buttonholes:

  • Pattern markings indicate where buttons sit but this needs to be checked so that the placement the placement and number of buttons suit the stature of the wearer. For women’s garments, especially fitted styles, the garment needs to be tried on to determine best position for buttons, especially at bust point.
  • Place first button on centre front, exactly at bust level with remaining buttons spaced evenly from there. Lowest button should not to be too close to the hem (unless it is a key design element) usually no closer than 12-15cm /5 -6 “from the bottom of the garment.
  • Buttonholes should be approximately 3mm / 1/8” longer than button – except high round buttons which may need longer length buttonholes
  • Consider the orientation of the buttonholes. Buttonholes should be stitched horizontally to centre front unless there is a front tab when they are stitched vertically.
  • Some machines offer a number of options for type of buttonholes – this is best determined by stitching samples on your fabric to see which is best for the style of garment and weight of the fabric which has been treated exactly as it will be in the construction of the garment (facing interfaced and stitched to garment, trimmed pressed, and under stitched).
Selection of buttonhole styles - stitch a sample of each to make it easier to make a choice.

Selection of buttonhole styles – stitch a sample of each to make it easier to make a choice.

  • The programmed buttonholes will default to a base width and length of buttonhole which affect the thickness of the side bars and ends as well as the density of the stitching. Adjustments can be made to suit the type and thickness of the garment fabric.
  • Density issues resulting in very tight stitching or stalling of the stitches can sometimes be solved by using stabiliser underneath fabric and/or a plastic topper.

Tip:  Be sure you carefully grade seam allowances at front openings to minimise problems with an uneven surface when stitching buttonholes.

  • Use FrayCheck on centre of buttonhole and allow to dry before cutting
  • To cut buttonhole:
    • Use buttonhole chisel with block of wood or plastic board for clean cut, or
    • Place pin through fabric at either end and, starting from centre of buttonhole, cut with unpicker or scissors
Buttonhole chisel and block; awl and Fray Check

Buttonhole chisel and block; awl and Fray Check

All buttonhole feet have prongs at either end. Wrap thicker thread around the back prong and fasten in the grooves at the opposite end. Stitch the button hole as usual - over the cord. When buttonhole is complete, pull the cord ends and use a hand needle to feed them to the back; trim the tails.

All buttonhole feet have prongs at either end. Wrap thicker thread around the back prong and fasten in the grooves at the opposite end. Stitch the button hole as usual – over the cord. When buttonhole is complete, pull the cord ends and use a hand needle to feed them to the back; trim the tails.

  • For keyhole buttonholes, use an awl at the rounded end and carefully trim the fabric away
  • Use small sharp scissors to remove any stray threads from cut hole
  • Buttonholes can be corded for strength and definition – use Güterman™ topstitching thread or fine crochet cotton

Tip:  If you don’t have thicker thread, several strands of regular thread can be used.

Tip: This is an excellent technique for stretch and stretch/woven fabrics when buttonholes can easily stretch out of shape.

Until next week. Happy sewing!

Threads, Needles and Pins

In this blog I am sharing some things you may not know about threads, needles and pins.

Much of this information was in an article which I wrote for Dressmaking with Australian Stitches.  This article was first seen in Australian Stitches magazine  Volume 22 Number 11. Permission has been sought and granted for Electronic use and the photos and text remain the property of Alison Wheeler – Sewing Lady.

Threads:

Selecting the most suitable thread for a project is not just about the best colour match. Threads vary in composition and thickness.  Using a thread that is not compatible with the fabric (too weak or too thick) can spoil the finished result as the thread will not do its job of holding the garment together while remaining an invisible part of the construction.

There will be times when thread is used in a decorative context but, for the main construction, the thread’s smoothness, strength and ability to blend and meld into the fabric are the most important requirements.

Types of thread:

Most threads intended for general construction are either polyester or a polyester wrapped cotton thread.  They are usually very strong and suit the majority of fabrics.  Cotton thread is readily available and gives seams a softer feel making it ideal for heirloom sewing and quilting.  Silk thread is extremely fine and very strong – and threading needles is a breeze with such fine thread!

The main things to consider are the thickness and strength of the thread.

It is interesting to compare threads as the thickness can vary widely

Threads arranged according to thickness - finest to heaviest. From left: Gutermann polyester topstitching Gutermann polyester all purpose Metrosene poly sheen embroidery Metrosene polyester all purpose

Threads arranged according to thickness – finest to heaviest.
From left:
Gutermann polyester topstitching
Gutermann polyester all purpose
Metrosene poly sheen embroidery
Metrosene polyester all purpose

.

If you are sewing a fine, lightweight fabric it is best to use a finer thread. Thicker threads are more suitable for heavier fabrics.

Threads are identified by numbers indicating thickness– #100 very fine, #50 fine, #40 medium, #30 thick.  Most common machine sewing thread is #40.  When you see a thread marked for example #50/3, the first number indicates the thickness of the thread and the second number is the number of filaments wrapped together to make up the thickness.  A thread with 3 filaments is not necessarily thicker but will be stronger.

Silk thread comes in a variety of thicknesses from #100which is wonderful for hand-sewing hems – it is so fine that hemstitching is not visible from the right side of a garment  (provided of course that a very small stitch and fine needle are used!). #50 weight silk thread blends into the fabric beautifully with machine sewing.
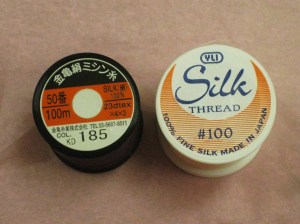
Left - 50 weight silk for hand or machine stitching Right - 100 weight silk for hand stitching

Left – 50 weight silk for hand or machine stitching
Right – 100 weight silk for hand stitching

Decorative and specialty threads are available for specific purposes – fine rayon machine embroidery thread, topstitching thread, fine cotton heirloom thread, #50 quilting cotton.

Tips for Usage:

  •  Always use a good quality thread.
  • The thread colour looks darker on a reel than when it is unwound so choosing a slightly darker thread to match the project will give a better match.
  • If you are unable to match a colour in topstitching thread, you can use two regular threads through one needle to add the required thickness – just be sure to use a needle with a larger eye to accommodate the extra width and do not use your machine’s needle threader.  The two threads can be blending colours for multi-coloured garments.
  • Use fine thread for buttonholes – heirloom or #50 cotton work well for machine buttonholes; use silk buttonhole thread if making hand-worked buttonholes.
Top - #50 silk thread - all purpose Bottom - silk hand buttonhole thread

Top – #50 silk thread – all purpose
Bottom – silk hand buttonhole thread

  • Use topstitching thread to sew high use buttons in place e.g. coat or jacket buttons.
  • Most general purpose threads are cross-wound and work well with horizontal feed.
  • Some specialty threads are not cross wound and will work better with vertical feed.
  • If your machine does not have provision for two spools feeding in the same direction, there are separate thread guides available for a reasonable cost – these can also be a great sanity saver when using twin needles or two threads in one needle.
  • If you have difficulty threading a machine needle, place a small piece of white paper directly behind the needle and the hole will be more visible.
  • Cutting thread on an angle also helps with easier threading.
  • If bobbins are wound at high speed, there can be problems with the thread stretching as it is wound on to the bobbin, resulting in puckered stitches – slow down to around three quarter speed to avoid possible problems.
  • Make sure the thread is securely in the bobbin tension as you are winding a bobbin – it should be loose between the thread reel and the tension mechanism and taut from the tension mechanism to the bobbin. If you end up with a “squishy” bobbin, failure to do this is the most likely cause.
  • “Squishy” bobbins can be rewound from the thread spool to a new bobbin.
  • Avoid adding thread to a bobbin which is already wound
  • Always make sure the thread type being used in the needle is exactly the same as the thread wound on to the bobbin. Different colours can be used but, for perfect stitching, the thread brand and weight needs to be the same – unless of course you are using decorative techniques.
  • Press seams and darts flat as sewn to blend the thread into the fabric.

A few words about thread tension:

Many sewers are wary of thread tension, often resulting from “never touch the tension dial!” warnings in their early sewing experiences.

I hope that an explanation of how thread tension works will help your understanding.

All machines have tension discs (some times visible, sometimes not) to control the speed at which the needle thread passes through to make a stitch. Basically, it is about the needle and bobbin threads being in perfect balance so there are no loops on either side of the stitched seam and the fabric pieces are lying exactly on top of each other with no gap forming when they are exposed to the pressure of wear.

If the tension is too tight, bobbin threads can be pulled through to the opposite surface of the fabric and, if the tension is too loose, needle thread will show on the underside of the seam.  Tension which is too tight will result in puckering of the fabric and tension which is too loose will allow gaps between the layers.

The tension is adjusted using numbers either with a lever, dial or button on an LED screen:

  • small number = looser stitches/lighter tension = no puckers
  • larger number = tighter stitches/heavier tension = no gaps between layers

Universal tension (the automatic setting) is 4 and this works well on the majority of medium weight fabrics.  When using fine, lightweight fabrics, a lower tension (looser stitch) is required and setting is around 3.  If sewing heavy fabrics (for example some heavyweight denims), the stitches need to be tighter so that the layers are held firmly together – a setting of 5+ may be needed.

When sewing buttonholes, lower the tension to 3.

All of this is a guide and making a test seam before starting a project is essential.  Take two pieces of fabric approximately 30cm/15″ long and cut on the same grain as your seam.  Stitch the strips together, press to meld the stitches and inspect the result.  Make any necessary adjustments (using the information above) and test again.

Needles:

Machine needles are identified by type on the package by both their type name and a type number which is common to all brands. The needle size is also marked on the package.

An assortment of machine needle types and sizes.

An assortment of machine needle types and sizes.

An excellent resource to learn about machine needles is the Schmetz Needles website –http://schmetzneedles.com which provides an wonderful illustration of their colour coding system for download as a PDF as well as the following diagrams and information for which they give permission to reproduce in blogs.

How to Read the Needle Package

Home sewing machines require a flat shank needle with a scarf. These characteristics are known as needle system 130/705 H. All needles in system 130/705 H have a scarf and a flattened shank for perfect positioning in the needle bar in relation to the hook.

How to read the needle package.
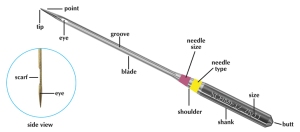
How to read the needle package.

The anatomy of a machine needle.

The anatomy of a machine needle.

With machine needles, the smaller the number, the finer the needle.

Schmetz also have an app for iPads/iPhones which would make needle choice when shopping for notions very convenient.

Tips for machine needles:

  • Most machine needle threaders will not accommodate a needle smaller than Size 75. If using a finer needle, it needs to be threaded by hand.
  • Needles should be changed regularly at approximately 6-8 hours of actual use. Be guided by your fabric as polyester fabrics dull needles much faster than natural fibre fabrics. If your machine is making a louder sound as you stitch or is skipping stitches, consider changing the needle.
  • Dispose of bent or broken needles (and pins) in a sharps container (readily available at pharmacies) and when full place in the bin.
  • Do not store needles in a pincushion. It is very easy for them to disappear into the pin cushion and if the filling is a type of fibre-fill, they can rust. Emery powder or fine, dry sand is a better filler but be aware that in very humid climates, moisture can be absorbed by the sand and can also resulted in rusted needles.
  • Needle sharpener "Strawberry"

    Needle sharpener “Strawberry”

    Use an emery strawberry if you think your needle may have a burr which is most often caused by hitting a pin.

  • Do not sew over pins and, if you do accidentally hit one, stop and check the needle immediately.  If working with very fine fabric, change to a new needle regardless or you will risk pulling threads in your fabric.
  • For storage of needles which have been used but are still usable, mark needle types with a permanent fabric marker on an inexpensive pin cushion.
Needle storage options - I have added needle types for machine needles.
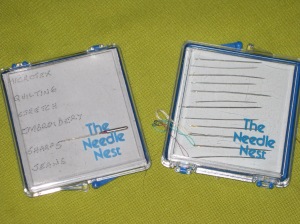
Needle storage options – I have added needle types for machine needles.

Needle storage idea

Needle storage idea

Hand needles: 

The sizing system for hand needles is the opposite of that for machine needles (why this was done I have no idea! Doubtless there was a good reason which has been lost in the mists of time).
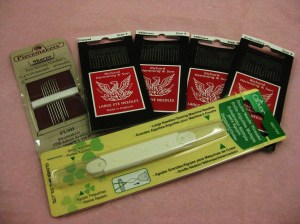
Assorted hand needles and needle threader

Assorted hand needles and needle threader

#3 is a large needle; #6-7 is medium and #9-12 fine to very fine.

When selecting needle size, match the size of the needle to the thickness of the thread and type of fabric being sewn.  Most hand needles (except Milliner’s) have a thicker width at the eye.

Needles come in different types for different techniques

  • Sharps are general sewing needles
  • Crewel are intended for embroidery
  • Milliner’s needles (formerly called straw needles) are used for making bullion stitch but are also wonderful for dressmaking purposes because they are an even width from end to end and therefore pull very easily through the fabric
  • Quilters/Betweens are used for stitching in smaller spaces.

Tips for using hand needles: 

  • Use the finest needles that will suit the thread and fabric and do the job – no big holes when using fine thread and it is much easier to pull thicker thread through a larger hole.
  • Long needles are best for basting/tacking and running stitches.
  • Short needles are best for fell-stitch and slip-stitch, especially in tight spaces.
  • Sharps have a small eye so if you have a problem threading them, use a Crewel needle of the same size as it has a longer eye and similar tip.
  • Keep your needles in a needle case or piece of wool flannel – the lanolin in the flannel will reduce the risk of needles rusting.
  • The emery strawberry can be used to sharpen hand-needles.
  • Discard bent needles and always store them separately from pins.

Hand-stitching Technique:

There are many resources available to assist in learning hand stitches and their uses and I will cover my favourites in a future post.

Twisting thread is one of the most common problems encountered when hand-stitching.

To minimise twisting:

  • cut thread on an angle.
  • when using thread from a reel, thread the end through the eye of the needle and cut off the required length.
  • when using thread from a bobbin, cut the required length and thread the cut end through the eye of the needle.
  • thread the needle and then iron the thread before stitching.

Technically Speaking:

  • Use a single thread for all handstitching except when attaching fastenings (e.g. hooks and eyes, press studs, etc.).
  • Keep thread length to approximately 50cm (20ins).
  • If you need to do a lot of hand-stitching, prepare several threaded needles before starting.
  • To increase thread strength for permanent stitches only, wax the thread – thread the needle and run the thread through beeswax; place between two pieces of paper towel.  Place iron over the towel and pull the threads through and iron while pulling the thread – this melts the wax and embeds it into the thread.

Pins:

There are many schools of thought about the direction of pinning and the comments I am offering are methods I have found work well for me.

As with needles, there are numerous types and sizes (in both thickness and length) of pins available.

I prefer to use glass head pins because they are generally quite fine and sharp and not too long.  The heads do not melt if I am pressing around pins.  They work well for most general dressmaking.

L - Stretch glass head pins R - magnetic pin dish

L – Stretch glass head pins
R – magnetic pin dish

If using fine silk, I prefer to use silk pins.  Flower (or novelty) head pins are very fine but they are also quite long and care is needed where they are used as it is very easy to catch the fabric with them.  They bend very easily so they are not suitable for use in the fitting process.

Ball point pins are available for use with fine knits.

Fork pins are excellent in helping to prevent slippage of layers when sewing fabrics with nap (for example, velvet) or matching patterns (for example, plaids or stripes) or previously sewn seams.

For pinning thicker garment sections together, it is necessary to use longer, thicker pins which are usually stronger and less likely to bend.
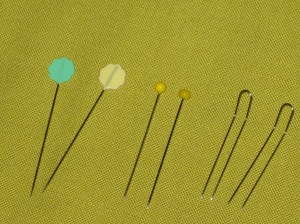
L to R: Flower head pins Extra long glass head pins Fork pins

L to R:
Flower head pins
Extra long glass head pins
Fork pins

Small gold safety pins can be useful to indicate wrong side of fabric or to pin garment pieces between sewing sessions as they will not catch on other pieces.

Tips for Using Pins:

  • As with needles, do not use bent or blunt pins – dispose of them immediately you find them.  It is a good idea to “sort” pins every now and then, removing any that are blunt, marked, bent or burred.
  • If using different types of pins, keep them in separate containers so they do not become all mixed together.
  • Never store fabric which is pinned together for long periods – a recipe for rust marks in a humid climate! – as this can leave permanent marks or holes in some fabrics.
  • When pinning seams ready for machine stitching, I prefer to pin at right angles to the seam line – especially in curved seams.
  • From the side of the fabric to be sewn, pin both the beginning and end of the seam; pin match points or centre point; pin in the middle of each remaining section.
  • Take a small bite of fabric right at the position of the sewing line to control the fabric.
  • To pin a garment ready for fitting, pin parallel to the cut edges right along the seam line and have the pins pointing towards the floor to avoid injury.
  • When machine stitching, try not to sew over pins. Simply sew up to the pins and remove them as you go.
  • If working with delicate fabrics or lace, be sure to use glass head pins as it is very easy to lose track of metal head pins which can be left in the garment.
  • I like to use a magnetic pincushion or dish because I find it easier to grasp and quicker to use the pins as I am working.
  • When preparing to hand stitch, pin the fabric in place and hand tack so the pins can be removed. This saves lots of frustration from hand thread getting caught around pins.

One last tip, invest in a magnetic pin wand! – great when accidents happen and for finding that “lost” pin or needle.
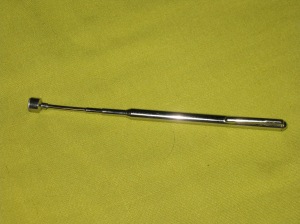
Telescopic magnetic wand - great for finding and picking up needles and pins.

Telescopic magnetic wand – great for finding and picking up needles and pins.

Hope this information will encourage you to explore the wonderful range of threads, needles and pins to make sewing more pleasurable and achieve the great result you are seeking.

Inserting Zippers Part 5 – Exposed Zipper and Separating Zipper

Exposed zippers have been in fashion for the past few years and they can add a dash of fun and surprise to otherwise plain or tailored garments.  Try using them at the bottom of a sleeve or at the hem or a skirt of pants for a stylish accent.

Separating zippers can also look great horizontally to join a removable piece to the bottom of a jacket hem or sleeve hems.

They inserted into any seam where an opening is needed and can also be used to establish an opening where there is no seam.

I can be difficult to find a big variety of different colours or zips with printed tapes and when I seem them, I usually buy one and I can then add it where I choose to any future garment.  Sckafs Fabrics at Indooroopilly and Sewco Sewing Centre at Macgregor in Brisbane have a small selection of the more decorative styles.  Otherwise it will probably be necessary to source them on line.

A selection - Left to right are metal zip; decorative tapes; regular dress zip; lightweight dress zip; metal zip

A selection – Left to right are metal zip; decorative tapes; regular dress zip; lightweight dress zip; metal zip

Most of those used in ready-to-wear seem to have metal teeth which can be quite heavy and rough against the skin; and sometimes the zips are inclined to ripple – most probably because they are used with either knit fabrics (usually double knit) or lightweight fabrics.

Choosing a zipper which is of comparable weight to the garment fabric and taking the time to stabilise the area where the zipper is to be sewn would greatly reduce this problem.

Partially Exposed Zipper:

Since the zipper will use part of the width of the seam allowance, it is important to measure the width of the amount of the teeth and/or teeth plus zipper tape and to subtract half this amount from each seam allowance.  If this is not done, the garment will be bigger across the garment piece.

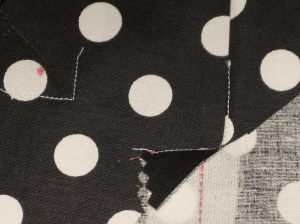
Mark this measurement from the cut edge of the seam and stay stitch 15mm / 5/8” towards the bottom of the zipper opening, across the opening and up the other side by the same amount.  Use small machine stitches (Length 1.5) to protect the corners.

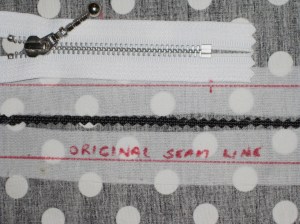
Mark seam line and position of stopper on interfaced seam.

Mark seam line and position of stopper on interfaced seam.

Measure width of teeth.

Measure width of teeth.

Divide measurement of teeth by 2 and mark this width on the garment side of the seam line.

Divide measurement of teeth by 2 and mark this width on the garment side of the seam line.

Top left - stay stitched corner Bottom right - clipped and turned seam allowance

Top left – stay stitched corner
Bottom right – clipped and turned seam allowance

Stitch the remainder of the seam in place.

Stitch to close seam below zipper opening.

Stitch to close seam below zipper opening.

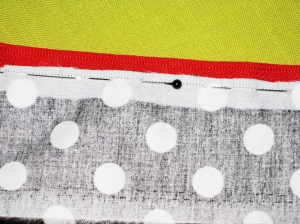
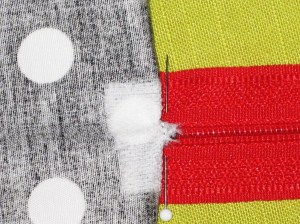
Centre the zip under the opening; pin and baste in place.  Turn the top ends of the zipper tape under and hand stitch in place.

Edgestitch and/or topstitch from the right side, catching the zipper tape in place.

Position zipper and edgestitch and/or topstitch in place.

Position zipper and edgestitch and/or topstitch in place.

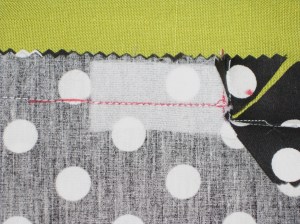
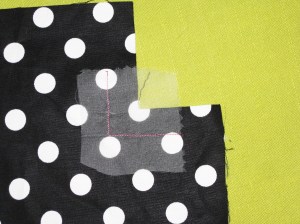
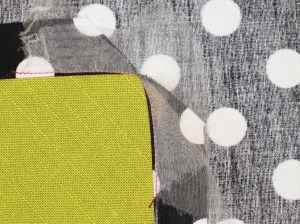
If the garment fabric frays easily, place a small piece of silk organza over the fabric when stay stitching as above.  Clip and press the organza to the wrong side, slightly favouring the fabric to the wrong side.  Stitch in place as above.

Place a small piece of silk organza over the fabric when stay stitching

Place a small piece of silk organza over the fabric when stay stitching

Clip through all layers to reinforced corner. Turn to wrong side and press in place.

Clip through all layers to reinforced corner. Turn to wrong side and press in place.

This technique works well to establish a decorative opening in a garment where there is no seam and also with knits where other zipper applications do not give an attractive finish.  Use a lightweight dress zip in knits to minimise distortion.

Finished zipper with just the fine teeth showing.
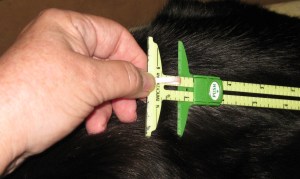
Finished zipper with just the fine teeth showing.

Mark the fabric where the centre of the teeth will sit and fuse a strip of interfacing (centred on this mark) to the wrong side of the fabric.  Measure the width of the zipper teeth and draw fold lines an equal distance away on both sides of the centre mark.  Mark where the zipper stop will rest.

Mark centre of opening and on either side to cater for total width of the teeth. Stay stitch the whole area of the opening and cut down the centre and into corners.

Mark centre of opening and on either side to cater for total width of the teeth. Stay stitch the whole area of the opening and cut down the centre and into corners.

This is how the zipper will look

This is how the zipper will look

Stay stitch down one side of the fold line, across the base of the opening and up the other side.  Clip to the corners and fold the fabric under.  Press slightly favouring to the wrong side.  Position the zipper and edgestitch and/or topstitch in place.

Fold fabric at the bottom of the zipper up over the teeth to reveal the triangle at the base of the zipper. Stitch across.

Fold fabric at the bottom of the zipper up over the teeth to reveal the triangle at the base of the zipper. Stitch across.

Underside of zipper.

Underside of zipper.

Totally Exposed Zipper:

Stitch the bottom of the seam up to the base of the zipper opening.  Increase stitch length to 4.0-4.5 and machine base the rest of the seam.

Press the seam flat and open.

Turn under the zipper tapes at the top and bottom and baste or glue in place.

Position the centre of the zipper over the seam; pin and baste in place.

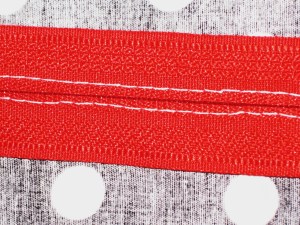
Topstitch around the zipper.

Reverse of exposed zip. By keeping the full width of the seam allowance, there will be no chance of the harsh metal teeth rubbing skin.

Reverse of exposed zip. By keeping the full width of the seam allowance, there will be no chance of the harsh metal teeth rubbing skin.

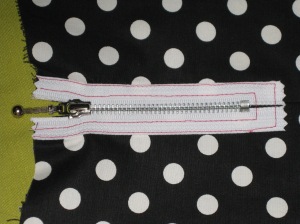
Centre zip against wrong side and stitch in place.

Centre zip against wrong side and stitch in place.

Separating Zipper:

These zippers are one of the easiest types to use and are available in various lengths and thicknesses.  Some have metal teeth and others plastic teeth.  The teeth can be chunky or finer.  Rhinestone teeth are also available (Sckafs have some great ones in black, white and black and white).

They are also available as invisible zippers making them a great option for edge-to-edge jackets.

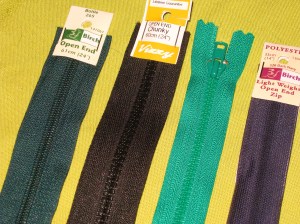
A selection of open-end zips - Left to right are large plastic teeth; wide chunky teeth; narrow teeth; open end invisible zip.

A selection of open-end zips – Left to right are
large plastic teeth; wide chunky teeth; narrow teeth; open end invisible zip.

A selection of open-end zips - Left to right are large plastic teeth; wide chunky teeth; narrow teeth; open end invisible zip.

A selection of open-end zips – Left to right are
large plastic teeth; wide chunky teeth; narrow teeth; open end invisible zip.

Always buy the length which is closest to the opening.  It is often easier to lengthen or shorten the opening rather than try to lengthen or shorten the zipper.

The zipper can be exposed, partially exposed or hidden entirely.

Concealed front closure with open end zipper.

Concealed front closure with open end zipper.

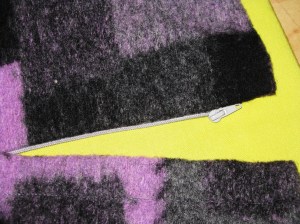
Textured wool jacket with invisible open end zip.

Textured wool jacket with invisible open end zip.

Simply  fold the seam allowance to the inside of the garment.  Press in place.

Separate the two sides of the zipper and position each side under the folded edge exposing as much of the teeth as desired.  Baste and topstitch in place.

For an unlined garment, finish the seams as desired – overlocking or binding both work well and give a tidy finish.  You can also use a facing with the zipper teeth sandwiched in place between the facing and the garment.

If you choose to line the garment, you can attach the lining to the facing edge or line to the zipper teeth.  In both cases, understitching will keep the fabric away from the zipper teeth when the zipper is being raised or lowered.

Lining stitched close to underside of teeth and understitched by hand.

Lining stitched close to underside of teeth and understitched by hand.

Open invisible zipper.

Open invisible zipper.

Facing side of zipper which has been sandwiched between layers.

Facing side of zipper which has been sandwiched between layers.

I have seen photographs of garments featuring separating zippers with two pulls – one opening down from the top and the other, up from the bottom of the garment.  They are available on line and would be inserted in exactly the same manner as I have detailed above.

I hope these posts have been helpful and next week I will start a series on a different construction element.