Curves and Corners – Marfy 3879

This pattern is from the current 2016/17 Marfy catalogue.  It has a strong 1970’s influence which is enhanced by the fabric used.

marfy-3879

fullsizerender-5

Purchased at The Fabric Store in Brisbane, the base fabric is cotton with a fancy square weave which was available in the 70’s but not for many years since.  The overlay is a very soft, nylon lace – also very popular in that era.  In addition to the curved panel and hem band in the original pattern, I have continued the overlay over the left shoulder and partially across the back hem edge to bring interest to the back as well as the front.

Marfy Patterns is a family owned and operated company based in Ferrara, Italy since 1966.  They produce a catalogue in January each year which can be ordered directly and shipped to Australia.  The catalogue includes several free patterns with each issue.

While a number of the patterns can be viewed on the McCall’s website – https://mccallpattern.mccall.com/brand/marfy – they are not sold by McCall’s outside of the United States.

The patterns can be purchased from http://www.marfy.it/our-patterns/ or by choosing a style from the catalogue and ordering by email.  They come in single size, printed and pre-cut using onion skin paper.  They have no seam allowances added and do not come with a guide sheet.

photo-2-marfy-patterns-as-they-arrive

Planning the Project:

While all the pattern pieces are labelled and have letters to indicate joining points, it is best to trace the pattern on to greaseproof to make any fitting alterations needed before a trial garment is cut in calico.

Apart from helping to see what further alterations may be needed, making a trial garment is very helpful in understanding how the garment goes together.

Once the toile has been fitted and the working pattern altered, it can be laid out on a gridded cutting board to assess the amount of fabric that will be required.  Marfy provide basic guidelines for fabric needed but this needs to be checked to make sure the chosen yardage will be sufficient.

Adding Seam and Hem Allowances:

Seam and hem allowances need to be added to the working pattern before trial garment is cut and sewn.  The choice of seam width is made after considering:

  • whether the seam is straight or curved
  • the stability of the fabric – does it fray easily?
  • the position of the seam – around a neckline or armhole

This garment has a curved feature panel and has an all in one armhole and neckline facing.

The side seams have been sewn using the standard 15mm while 1cm was used around neck and armhole openings.

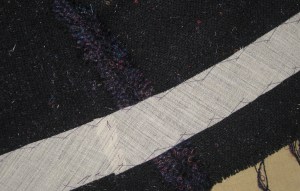
While I initially intended to use 1cm seams in the curved seams on either side of the feature panel, the thickness of the overlay made the narrow seams more bulky.  Once the seams were sewn, the overlay seam allowances were pared back between the layers of main fabric.  This resulted in a flatter join.

photo-3-overlay-fabric-trimmed-to-reduce-bulk-seam-allowances-clipped-where-needed

Overlay trimmed from seam allowance to reduce bulk and seam allowances clipped to allow them to lie flat.

Tip:  Before deciding on hem or seam allowance widths, it is important to make some samples using the chosen fabric and to finish and press them as they will be in the garment in order to see how the fabric behaves.

Since the pattern gives no indication of a suggested hem finish or pressing direction for seams, testing beforehand is a must.

Cutting and Fabric Preparation:

Each piece of the pattern needs to be cut once only so it is important to carefully label the right side of the pattern pieces which are placed on the fabric laid right side up as well.  photo-4-overlay-fabric-trimmed-to-reduce-bulk-seam-allowances-clipped-where-needed-2

Seam lines and match points were marked on wrong side in curved areas.  This was done with dressmaker’s carbon and a tracing wheel and helps with accurate seam piecing. 

photo-5-seam-lines-traced-on-to-wrong-side-of-fabrid-to-assist-accuracy

Once all base fabric pieces have been cut and match points marked, cut the overlay and position it on the appropriate garment pieces.  Hand tack the layers together within the seam allowance so they will not move during construction. 
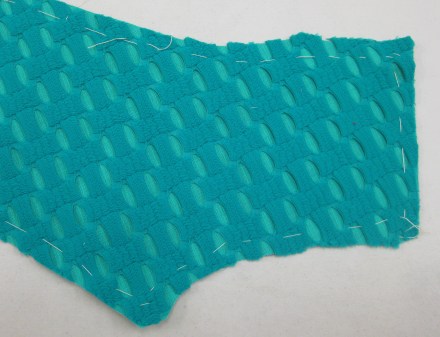
photo-6-overlay-tacked-to-garment-fabric

The concave curves on both sides of the inset panel have been staystitched just inside the seam allowance – stitch length 2.0 – to protect the seam if clipping is required after the seam has been stitched.

 img2

Sewing the Curves:

While the curves are quite pronounced, they are quite long which makes it easier to achieve smooth seams.

The key to this is to pin at right angles to the stitching line taking a very small bite of fabric and making sure that the cut edges of both pieces are perfectly aligned.  Hand tacking before machining makes the sewing easier.

Tip:  Sew with the curve and do not attempt to straighten it while machining.

Accurate Corners:

Careful marking is essential.  Depending on the fabric, mark or thread trace the seam lines to indicate the exact shape of the inside corner and the exact point of the corner on the outside corner.

photo-7-inside-corner-thread-traced-and-outside-corner-marked

Position a 5cm square of silk organza on the right side of the fabric, centred over the corner point.

photo-8-organza-square-positioned-on-right-side-of-fabric-directly-over-the-corner

Stay stitch along the marked seam lines.

photo-9-organza-stitched-in-place-defining-the-corner

Clip exactly to the corner photo-10-clip-exactly-to-corner-pointand turn the organza to the wrong side.  Press the seam allowance open and then press the patch flat against the wrong side of the fabric.

img_4188

Organza has been basted out of the way so it does not get caught up in seam stitching

Pin the corner match points and, starting at the corner, stitch out along the seam line on each side of the corner before stitching the remainder of the seams.

photo-11-finished-corner

Finished corner

If using an overlay, be careful to trim away any bulk in between the seam allowances.

Pressing Seam Allowances:

The seam allowances should be pressed flat as sewn before assessing which way to treat the seam finishing.

There are several options for the direction to press the curved seams and they all depend on the fabric being used and the desired finish.

With a single fabric layer garment, seams can be pressed flat and then open, perhaps with topstitching on either side of the seam line.  They can also be pressed either to the main garment or towards the overlay.  Whichever is chosen will make the area towards which the seams are pressed advance to become more of a highlight.

Because of the thickness of the overlay, I decided to go with this latter option as having thick seams under the main fabric made the seams look very bulky.

Once pressed, the seam allowances were clipped where necessary to allow them to lay flat and the edges overlocked together.

Hem Facing:

Because of the thickness of the overlay and fabric together, a facing has been applied to finish the hem.  It was cut from the main fabric and applied across the full width of the band before being hand stitched in place.

If I had been using a single layer fabric, I would have most likely turned up a 5cm hem, finished the upper edge with the overlocker and hand stitched it in place.

All in One Neckline and Armhole Facing:

Again, the thickness of the overlay needed to be taken into consideration when the facing was applied.

To minimise bulk, the facing was cut from a finer cotton fabric.  The usual method of leaving three open seams and completing the neckline and armhole edges before pulling the whole garment through the shoulders would have been problematic with the thickness of the overlay, even though the shoulder seams are wide.

Consequently, I seamed the shoulders and armholes of the facing and completed the neckline edge, including trimming, clipping and under stitching. photo-12-armhole-facings-pulled-through-at-lower-edge-of-facing-to-allow-seam-to-be-stitched-closedphoto-13-clips-staggered-to-allow-facing-to-lie-flatphoto-14-facings-understitchedBecause of the wide shoulders, it was relatively simple to reach inside the turn the fabric so that the armhole seam could be machined – this method was the same as stitching a sleeve lining by machine in a lined jacket.  Hand under stitching completed the armhole facing and has also been used to anchor the facing and shoulder seams in place. photo-15a-facing-hand-under-stitched-to-seam-allowances-at-underarmphoto-15b-facing-shoulder-seam-hand-under-stitched-to-seam-allowances

Invisible Zipper Finish:

An invisible zipper has been used for the back closure.

The zipper tapes were machine tacked in place before final stitching.  To avoid bulk at the neckline, stitching is started level with the top of the plastic zipper stop.  When facing is to be applied, zipper tapes are folded back so they are not included in the seam.  photo-16-zipper-tape-folded-back-so-it-is-not-caught-in-facing-seamFacing is stitched right through to the seam edge at centre back.

Using the zipper foot, stitch the facing seam allowance to the garment seam along the side of the zipper tape.  photo-17-use-zipper-foot-to-attach-seam-allowances-beside-zipper-teethTo clean finish the top of the zipper, place zipper foot blade on the garment side of the zipper teeth and stitch through neckline seam down approximately 6mm.photo-18-use-zipper-foot-to-stitch-pocket-to-hide-zipper-stopsThis technique forms a pocket which holds the plastic zipper stops so they are not visible from the right side of the garment. photo-19-finished-stitching-at-back-neckline

photo-20-finished-facing-with-hook-and-eye-attached

A hook and eye has been hand stitched to facing

photo-21-lhs-exposed-zipper-stop-rhs-hidden-zipper-stop

LHS – finish showing zipper stop /  RHS – finish with zipper stop hidden

—o0o—

Marfy patterns are a wonderfully stylish range, many of which have simple lines and details.  The cut is superb and well worth a try by any sewer of average ability.  Do give them a go!

The catalogue for this year “Marfy Evergreen” has just been released featuring a broader size range and highlighting their landmark dresses, tops, pants and skirts as well as classic jackets and coats and evening wear.  It can be ordered directly from http://www.marfy.it .

Sizzling Summer Style – Vogue 1498

The stylish sophistication of this dress designed by Nicola Finetti is just perfect for the long, hot Australian summer ahead.  With the illusion of a halter neck at the front, the full back bodice with its edgy metal zip is a stylish surprise.
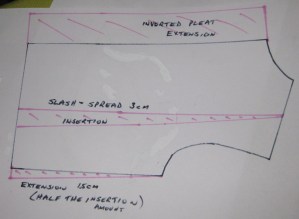
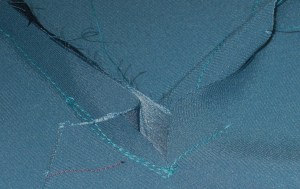
 

Vogue Patterns recommend this style for triangle and hourglass figure types and a good fit is critical for maximum comfort in this figure enhancing dress.

Recommended fabrics are Ponté knit, crepe, gabardine and piqué.  The fabric I have used is Lycra™ ponté purchased from The Fabric Store in Brisbane.

Even though knit fabric is recommended, there is no knit gauge on the envelope.  So to ensure a good fit, I made a trial garment using calico and fitted it close to the model’s body.  This worked very well and there was only minor alteration needed to the shape of the side seams in the skirt.

How To Maximise the Benefits of Making a Toile:

When making a toile, it is worth taking the time to mark all seam lines, grain and horizontal balance lines and match points with dressmaker’s carbon.  Just making a trial garment without marking these points where they can be seen makes fitting assessment and pattern alteration more difficult.

Accuracy at this stage is very important.  To stop the possibility of fabric layers moving against each other I mark each layer individually.  The method I use to do this is:

  • Mark seam lines on the pattern (Tip: Use the edge of a 15mm /5/8” tape measure placed against the cutting line as a guide.)
  • Place carbon with marking side up and lay fabric (single or double layer as required) with the pattern pieces pinned in place on top
  • Using a pointed tracing wheel, trace seam lines – to protect your table surface, use the wrong side of a rotary cutting mat to ensure clear marks on the fabric
  • If working with double fabric, carefully remove the pattern and pin the fabric layers together; flip the fabric over and lay it on top of the carbon paper.
  • Use the first carbon marks as a guide to mark the second layer.

Stay stitch neckline and armhole edges with a small straight stitch (length 1.5) right along the seam line.  Clip seam allowance to the stitching to allow the seam allowances to fold back.  Using this technique will allow the outer edges to sit flat on the wearer which makes the degree of any alterations easier to assess accurately.

When sewing the toile together, I used the marked side of the fabric as the right side and piece the garment with a long straight stitch (4.0 to 5.0).  This makes it easy to check that the garment is hanging on grain and the seams can be quickly ripped to let the garment out or pinched to take it in.

The insertion of a zip will also help to give a true picture of the fit with a close fitting garment.

Tip: When fitting the toile, the undergarments to be worn with the final garment should be worn.  As it is fully lined, the dress may be worn with or without a convertible bra and that decision needs to be made from the outset so that it can be fitted accordingly.

When the fitting is completed, the marks on the toile guide the placement or alterations on the pattern.

The Pattern:

The pattern features a close fitting, lined bodice which needs to be perfectly fitted to avoid gaping at the armholes and centre front.  The length of the bust section may need to be altered to achieve this.

The skirt is fully lined as well.  The back bodice features slightly cut-away armholes and the shoulder seams need to meet exactly at the wearer’s shoulder line so the angle from front to back is not distorted.

The back skirt is darted to a waist seam while the front skirt falls in two overlapping panels from a seam directly under the bust.  The front panel edges and all hem edges are finished with a separate facing to which the lining is attached.

The left side front crosses over the right.  The right side panel has an inserted panel of lining on the section that sits under the crossed over left panel.  This is to lessen the bulk in the under bust seam.

Because the garment fabric is a knit in a close fitting garment, it was necessary to use a knit lining.  I used a flesh coloured knit tricot from Sckafs Fabrics.  This fabric is very soft, light and perfect for eliminating bulky seams.

photo-2-tricot-lining

Tricot lining

However, this caused an issue of show through with the fabric I used.  The shadow of the seam joining the lining insert to the right side was visible through the left side panel.

Unfortunately I did not discover this until the first fitting and there was not enough fabric left to cut a new right front panel.  To solve the problem I cut the upper right front lining from the garment fabric and attached it as well as the previously inserted lining.  To eliminate a bulky seam right across the front, the bottom edge of this extra layer has been allowed to lie flat over the bottom section of the skirt before stitching and the edge of the seam allowance caught by hand so that it will not move.

photo-3-upper-section-laid-over-lower-section-of-right-front-side

Upper section laid over lower section of right front side

If the garment was made in a plain dark colour or print, this may not be an issue but is definitely something to think about when selecting fabric and cutting out.  I would suggest that using a darker or patterned fabric would prevent this problem.

The second issue with the pattern was the cutaway hem section on the right side panel.  At first fitting I discovered that the finished hem of the short section was at hip length.   For modesty, especially when sitting, an additional 15cm was added to the length of the extension.

photo-4-additional-15cm-added-to-lower-edge-of-right-front-garment-and-lining

Additional 15cm added to lower edge of right front garment and lining

Construction:

For accuracy in piecing, all match points (centre front position, notches and dots) were thread traced using two strands of embroidery floss.  This left no residual marks on the fabric and the thread was easily removed during construction.

photo-5-thread-tracing

Thread tracing

Even though the fabric stretches lengthwise and crosswise, it is not slippery and surprisingly stable and easy to sew.  I used a small zigzag (SW1.0; SL2.0) to stitch all seams.

To prevent stretching at the armhole and neckline edges, I applied fusible stay tape on all bodice edges.

The zipper opening was also stabilised to prevent any rippling of the heavy metal zipper.

The seams are quite thick so all horizontal and outer edge seam allowances have been graded which has resulted in smooth, flat neckline and armhole edges.

Facings were fused with lightweight tricot knit interfacing and seam allowances graded and under stitched.

Handling the tricot lining presented a number of problems.  It is very fine and the edges cut edges curl making accurate cutting and pinning critical.  Even with careful grading, pressing and under stitching, the outer edges were quite spongy.   To keep the edges flat I have added edge stitching (straight stitch with length of 4.0).

The tricot lining was laid out on tissue paper with the pattern pieces pinned through all layers to allow straight cutting and no slippage.

It was surprisingly easy to work with – except for the cut edges which continued to curl.  So to control the curling and ensure accurate seam allowances, the cut edges were pinned through twice which kept everything in place while machine stitching.

All lining seams were double stitched and trimmed to prevent them curling during wear.

photo-10-double-stitched-seam-trimmed-back-to-avoid-curling

Double stitched seam trimmed back to avoid curling

I was unable to source a regular metal zipper so metal open end zipper was used.  It has been shortened and the bottom end and unnecessary teeth removed.  Petersham ribbon has been used to finish the cut end of the zipper.  (Tip: Use the hand wheel if stitching across metal teeth – with care the needle slips easily between the teeth.)

photo-11-bound-edge-of-shortened-zipper

Bound edge of shortened zipper

A Petersham ribbon zipper shield has been applied to prevent the teeth abrading the wearer’s skin.

Conclusion:

The skill level for this pattern is noted as “Average”.  Lots of concentration and great care need to be taken to follow the guide sheet cutting layout so that right and left pieces are not reversed.  It is not a project that can be rushed.

I changed the order of construction in the bodice section so that the lining was applied in the manner of a pull through all in one construction.  This resulted in a much neater finish at the shoulder seams.  Care was needed so that when the back pieces were attached they allowed for the crossover in the bodice.  Having the pieces laid out on a flat surface when pinning was a great help.

photo-13a-join-shoulder-seams-of-lining-and-garment

Join shoulder seams of lining and garment

photo-13b-stitch-lining-to-neck-edge-grade-and-under-stitch

Stitch lining to neck edge; grade and understitch

photo-13c-stitch-lining-and-garment-at-armhole-edges

Stitch lining and garment at armhole edges

photo-13d-grade-seam-allowances

Grade seam allowances

photo-13e-pull-front-sections-through-shoulders

Pull front sections through shoulders

This is one pattern where it would certainly be unwise to omit careful reading of the guidelines before starting the project.  It is quite critical to follow the order of construction for the front skirt pieces, particularly regarding the application of the lining.


Another Winter Jacket

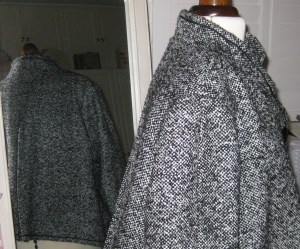
A couple of years ago I purchased some lovely  soft  woollen  fabric with a mottled grey, black and white weave to make  a winter jacket.   Having  ”aged” the fabric for a couple of years while I waited for its project idea to arrive(!), I finally decided the time had come.

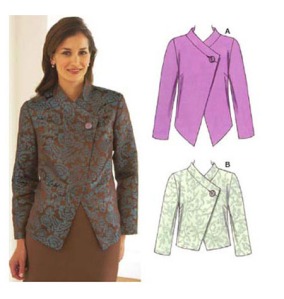
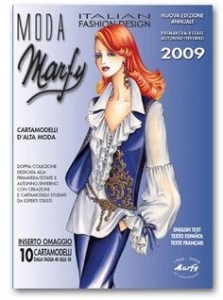
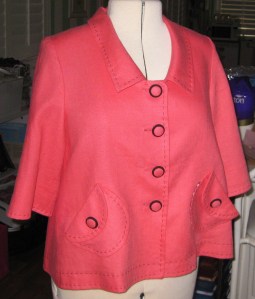
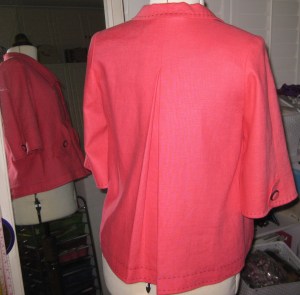
I wanted to incorporate the collar and asymmetrical front from KwikSew 3531 and the back and sleeve details from a Marfy jacket which is offered as a free pattern with their 2009 issue.  This pattern is not sold separately and I am not sure whether the 2009 issue is still available.  However, the details I used are fairly easy to replicate using a plain bodice jacket back and one piece sleeve.

Kwik Sew pattern 3531 used as a base - front and collar unchanged

Kwik Sew pattern 3531 used as a base – front and collar unchanged

Marfy Catalogue 2009

Marfy Catalogue 2009

Marfy jacket in linen

Marfy jacket in linen

Back and sleeve detail

Back and sleeve detail

I traced all pattern pieces from the KwikSew pattern and made the styling alterations.

The Back

To achieve the swing back, I used the back pattern piece from the KwikSew pattern which was to be cut with centre back on the fold and positioned  the centre back 3 inches /7.5 cm from the fold which resulted in an inverted pleat.   A line was also drawn parallel to the grain line from the centre of the shoulder to the hem.  This insertion was cut and spread by 1 ½” / 3cm at the hem and an extension added to the back side seam ( ¾” / 1.5cm which is half the insertion measurement).  Using this ratio, more could certainly be added to achieve a fuller swing.

Pattern changes to include  inverted pleat and swing back

Pattern changes to include inverted pleat and swing back

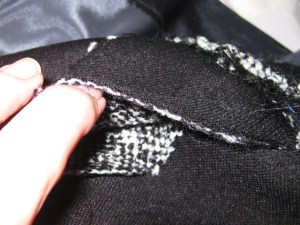
To keep the pleat in position, I stitched from the neckline down 6 inches /15cm.   Pleats were sewn from the centre to the outer fold and the excess fabric above the opening trimmed from the undersides of the pleats to avoid extra thickness at the neckline seam.

Return side of pleat removed to minimise bulk

Return side of pleat removed to minimise bulk

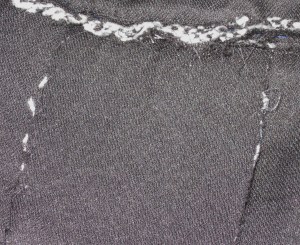
The remaining underside of the inverted pleat has been catch stitched to the interfacing and joined into the neckline.  It acts as a stay to keep the pleat in place.

Top edge of underside of inverted pleat connected at neckline seam provides a stay for the pleat

Top edge of underside of inverted pleat connected at neckline seam provides a stay for the pleat

The Sleeves

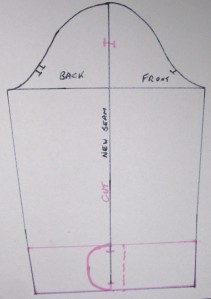
Again using the KwikSew pattern which has a one piece sleeve, I drew a seam line down the centre of the sleeve and drew in the sleeve flap which lies towards the back section.

Centre seam line added to sleeve; width of facing and sleeve hem detail drawn on to KwikSew sleeve

Centre seam line added to sleeve; width of facing and sleeve hem detail drawn on to KwikSew sleeve

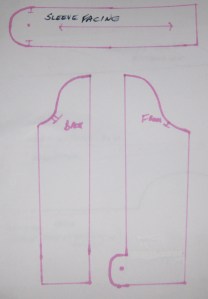
I joined the seam to the top of the button extension and applied a hem facing to finish the bottom of the sleeve.

The top section of the sleeve was cut down the centre and clearly marked front and  back.

Pattern pieces for sleeve and hem facing

Pattern pieces for sleeve and hem facing

Seam allowance was added to all new seam lines.

Inner support

The wool fabric has a very soft hand and is inclined to fray easily.  I fully fused each garment piece with a medium weight knit interfacing to support the structure of the jacket long term.

Underarm Gusset

Once the jacket  sleeves were set into the armholes, I tried the jacket on and found that, despite my taking careful measurements, the sleeves felt a little too close fitting with a heavier top underneath.

To fix the problem, I have inserted an underarm gusset.  This is a good solution for any sleeve that binds a little around the bicep area.

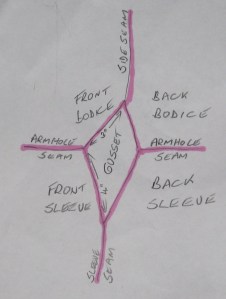
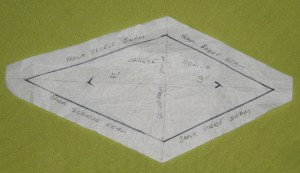
A gusset can be one or two piece.  I chose to open the underarm sleeve seam and the underarm bodice sleeves and insert a diamond gusset  7” x 3” / 18cm x 7.5cm.  The stitching points were marked on the sleeve and jacket seams.  The longest section of the gusset was cut on grain and the piece interfaced for stability.

Diagram of an underarm sleeve gusset

Diagram of an underarm sleeve gusset

Gusset pattern

Gusset pattern

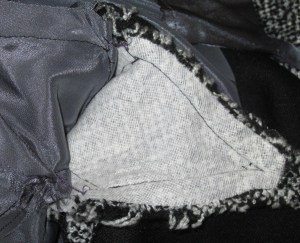
Underarm gusset in sleeve and lining

Underarm gusset in sleeve and lining

When stitching I gusset I find it much easier to achieve an accurate result if I stitch each side individually.  Starting at one sleeve/ side seam junction, each separate section of the gusset was stitched in place in both the garment and the lining.  This has given much easier movement when the jacket is worn over heavier clothing.

Hem Finish

Because of the swing back, the jacket lining has been hemmed and left hanging separately.  Hong Kong finish has been applied to the jacket hem which was then hand stitched in place.

Frenchtacks have been added at the side seam allowances and between the underarm seam allowances to keep the lining in place.

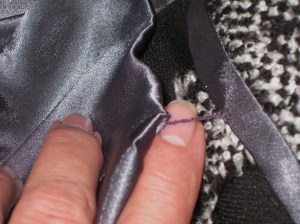
Hem finished with Hong Kong binding; French tack secures lining and top of hem

Hem finished with Hong Kong binding; French tack secures lining and top of hem

Trim

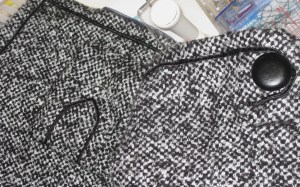
Russia braid has been applied by hand to the outer edges of the jacket, around the bottom of the sleeves and on the flaps of the pockets.

Russia braid applied by hand around outer edges of jacket, sleeve and pocket tab.

Russia braid applied by hand around outer edges of jacket, sleeve and pocket tab.

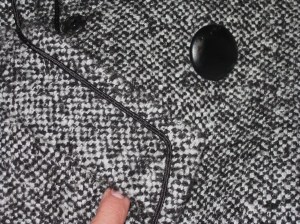
Buttons covered with faux leather have been stitched in place on the sleeves and at the collar.  The opening for the button is an inseam buttonhole and a large press stud/snap has been stitched to the underlap side to hold the front in place.

Inseam buttonhole, faux leather button and large snap on underside

Inseam buttonhole, faux leather button and large snap on underside

The weather in Brisbane is indulging my love of wearing coats with a westerly wind due on Monday and Tuesday so I will have an opportunity to wear this new one as well.

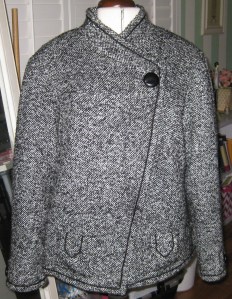
Front detail

Front detail

Side and back detail

Side and back detail

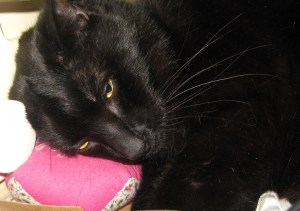
Beau has been helping me with the blog - he has his own cushion (formerly a pin cushion)

Beau has been helping me with the blog – he has his own cushion (formerly a pin cushion)

Another Beautiful Bride

Earlier this year, one of my wonderful students, Barbara,  decided she would like to make a wedding dress for her new daughter-in-law to be, Rocio.

The wedding was to be held on the beach at Stradbroke Island (in Moreton Bay) off the coast of Brisbane.  As Rocio is an ecologist, such a beautiful outdoor setting was perfect for her marriage to James.

She and Barbara shopped for a basic pattern which could be adapted to her chosen style and, once the dress was made in a lovely cotton print, the fit was adjusted and, not only did Rocio have a lovely new summer dress, but we were ready to start!

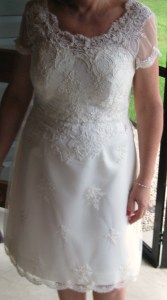
Rocio and Barbara purchased the beautiful silk taffeta and corded Chantilly lace at The Fabric Collection in Sumner Park.  The colour is just beautiful – a lovely clotted cream shade – and suits Rocio’s colouring perfectly.

To support the taffeta, Barbara has underlined the whole garment with silk organza and hand stitched all the seam allowances to the underlining to keep them in place.  The dress has been fully lined with lightweight silk satin.  A half slip of several layers of bridal tulle lightly supports the skirt – this was essential in the breezy weather which sometimes occurs in a beach setting.

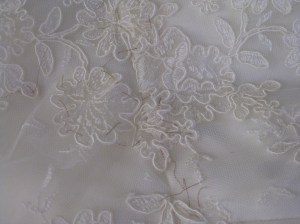
The lace was draped over the bodice; shaped and hand stitched in place.  Scallops were appliquéd by hand around the neckline.

Close up detail.

Close up detail.

The inspiration for the adornment of Rocio’s beautiful gown incorporated a randomly ruched swathe from the underarm on either side and crossing in the front.

Rocio has a classic hour glass figure and once the dress was underway, I suggested that a more structural bias basque would be much more flattering.  I had seen this technique in an article by Kenneth D King “Curved Tucks” in Threads magazine Issue #166 April/May 2013.

The bias construction causes the basque to follow the waistline curve of the garment and adds an interesting point of interest between the beautiful lace covered bodice and the pleated silk skirt.

To be sure that Rocio would be happy with this detail, I decided to test a mock up in calico on the dress form first before committing to the silk.  She was absolutely delighted so it was on with the silk.

The bias strips are 4” /10cm wide and carefully pressed in half (right sides out).  The strips were then stretched and curved while being steam pressed.  When cool, they retain the curved shape and are ready for assembly.

I used a June Tailor cut and press board to pin each strip in place, starting at the top and weaving in a dip at the centre front.  Strips were steamed over the board to set them in place; carefully pinned and hand stitched on the underside of each edge to the strip under it.

Toile version pinned in place on dress form

Toile version pinned in place on dress form

Side view

Side view

Back view

Back view

Front view

Front view

All the raw edges on the wrong side were hand stitched in place using acatchstitch.

Tacked in place through centre front

Tacked in place through centre front

Underside handstitched along each raw edge

Underside handstitched along each raw edge

Bottom edge turned under and stitched in place.

Bottom edge turned under and stitched in place.

Once the basque was completed, it was pinned in place from the centre front to the centre back and hand stitched to the dress from the inside.  Each strip was carefully matched where the invisible zip was to be inserted.

Shaped basque

Shaped basque

Barbara did a wonderful job and should feel very proud and satisfied with her achievement.

Rocio was a beautiful bride and very grateful for her special gown.  She and James enjoyed a wonderful celebration at the start of their lives together.

The lovely bride and her proud father

The lovely bride and her proud father

DSCF4226

A beautiful setting.

A beautiful setting.

Donna Karan Jacket – Vogue 1263 – Part 4

A cotton back saddle has been applied across the shoulders and upper back of the garment.

Cotton back saddle added to upper back

Cotton back saddle added to upper back

The technique of reinforcing the corners with organza certainly helped achieve a sharp corner where the back of the garment joins the front, resulting in a three seam join just above the pocket.

Sharp corner where side seam joins waist seam and side front

Sharp corner where side seam joins waist seam and side front

The pouch pocket is quite unstructured and rather floppy so, to keep it in place, I have added pocket stays to the waist seam line and front edges of the jacket.  Cotton tape and grosgrain ribbon were used for these stays.

Grosgrain pocket stay runs from front edge of pocket bag across to front edge of jacket.

Grosgrain pocket stay runs from front edge of pocket bag across to front edge of jacket.

Cotton tape stay attaches top edge of pocket bag to waist seam

Cotton tape stay attaches top edge of pocket bag to waist seam

The sleeve seams were flat felled and the hem stabilised with hair canvas.  To accommodate attaching the sleeve lining by machine, the hem has been hand stitched in place half way up the hem depth.

Hem catch stitched half way from hem fold to allow space to machine lining in place

Hem catch stitched half way from hem fold to allow space to machine lining in place

I eased the caps (see blog post 31st May Set-In Sleeves) and inserted the sleeves.

Shoulder pads have been added to provide a pleasing shoulder line while support the weight of the jacket.

At this point, I needed to make a decision about the width of the collar.  While I am not a small person, I do have narrow shoulders and the collar extended about 10cm / 3 ½” beyond the shoulder.  I measured, marked and removed 8cm /3” from the upper edges of the collar and feel it still maintains the basic integrity of the garment but is better suited to my body proportions.

Collar has been narrowed to keep the integrity of the style but better suit body proportions.

Collar has been narrowed to keep the integrity of the style but better suit body proportions.

The lining has been constructed and attached to the collar and front facing; followed by the attachment of the facing to the garment.

To hold the back neckline section in place, the seam allowance of the facing/lining has been hand stitched to the seam allowance of the under collar jacket.

Neckline seam allowances of under collar and upper collar whipped together.

Neckline seam allowances of under collar and upper collar whipped together.

Following the attachment of the sleeve lining to the upper edge of the sleeve hem allowance, French tacks have been used to hold the underarm sleeve and lining seams loosely together.

French tacks loosely hold sleeve seams and lining waist seams in place.

French tacks loosely hold sleeve seams and lining waist seams in place.

French tacks have also been used to keep the waist seam of the lining loosely attached to the garment waist seam.

I have chosen to slipstitch the bottom of the lining to the top of the hem allowance rather than using a machine bagging method which would be extremely difficult to achieve because of the weight and bulk of the garment.

The seam allowances at the front edge of the jacket have been graded, pressed flat and pressed open.  The finished seam allowance has been pressed from the right side and I used diagonal edge tacking to keep the edges in place for topstitching – again to avoid problems using pins with the weight and bulk of the jacket.

Diagonal basting holds front edges in place for machine topstitching.

Diagonal basting holds front edges in place for machine topstitching.

The topstitching has been done using two threads in the one needle.

As a final feature, I have used a hand whipping stitch and a variegated DMC cotton perle thread (No 5) to enhance the topstitching on the collar.   A chenille needle was used to accommodate the thickness of this thread and the stitches have been wrapped over each stitch along the length of the collar and back.

Variegated DMC Cotton Perle 5 thread "wrapped" around each topstitch around edge of upper collar and then reversed for emphasis.

Variegated DMC Cotton Perle 5 thread “wrapped” around each topstitch around edge of upper collar and then reversed for emphasis.

Thread ends buried between layers.

Thread ends buried between layers.

When the thread needed to be finished, it has been threaded back in between the layers.  A snag tool was very helpful with this as well as in repairing other pulled threads in this type of fabric.

Snag tool does an excellent job of repairing any thread pulls as well as burying thread tails.

Snag tool does an excellent job of repairing any thread pulls as well as burying thread tails.

I am really pleased with my finished jacket – now all I need is some cooler weather so I can wear it!

Since the collar is such an important feature, I am really happy with the way it hugs the neck and rolls so beautifully.

Since the collar is such an important feature, I am really happy with the way it hugs the neck and rolls so beautifully.

Donna Karan Jacket – Vogue 1263 – Part 3

The fabric is very soft and a little limp – the reason for the addition of the sew-in interfacing.

Collar before pad stitchiing - very floppy with no defined shape.

Collar before pad stitchiing – very floppy with no defined shape.

When using a sew-in interfacing, especially hair canvas, it is important not to add too much thickness when joining the outer seams.  To avoid doing this, I cut a frame from the outer edges of the facing piece from black cotton muslin. The same grain line has been used and the frame trimmed to 1 ½” / 3cm wide.

Muslin frame has been cut from the outer edges of the facing pattern piece.

Muslin frame has been cut from the outer edges of the facing pattern piece.

The hair canvas was tacked and then stitched in place at the inside edge of the frame and machine stitched in place.  Excess hair canvas has been trimmed back so that when the facing is applied to the garment, only the muslin will be included in the seam allowances.

Frame tacked in place along the line marked at 3cm/ 1 1/2

Frame tacked in place along the line marked at 3cm/ 1 1/2″ from the edge of the hair canvas.

Frame stitched in place and excess hair canvas trimmed away so it will not extend into the sewn seam.

Frame stitched in place and excess hair canvas trimmed away so it will not extend into the sewn seam.

The dart take up has been trimmed away from the four neckline darts and the hair canvass has been butted together over the open darts and stitched in place using catch-stitching.

Dart take up fabric removed; hair canvass and fabric edges butted together and catch-stitched in place  over opened fabric dart.

Dart take up fabric removed; hair canvass and fabric edges butted together and catch-stitched in place over opened fabric dart.

To support the back neckline area of the collar, I have included an overlay of hair canvass along the roll line.  Dense pad-stitching has been applied within the collar stand area which will support the weight of the collar.

I created a pattern piece for the back neckline   Dart take up sections will be removed when canvass has been cut.  Once this is closely pad-stitched, it will provide support for the back upper collar.

I created a pattern piece for the back neckline Dart take up sections will be removed when canvass has been cut. Once this is closely pad-stitched, it will provide support for the back upper collar.

Back neckline support piece held over my hand to build in curved shape with small pad-stitches.

Back neckline support piece held over my hand to build in curved shape with small pad-stitches.

Finished neckline support.

Finished neckline support.

I have also taped the roll line with cotton tape (fell stitched in place on either side on the lapel side of the roll line).

Taped roll line will keep lapels in place.

Taped roll line will keep lapels in place.

The remaining collar section of the interfacing has been lightly pad-stitched.

Remaining collar section has been loosely pad-stitched.

Remaining collar section has been loosely pad-stitched.

Upper collar placed over the pad-stitched under collar.  It now has good structure and appears much more like the photo of the original design.

Upper collar placed over the pad-stitched under collar. It now has good structure and appears much more like the photo of the original design.

Strips of hair canvas have also been catch-stitched over the hem line on the garment and sleeve hems.  This will keep the hem edges in shape during the life of the garment.

Hair canvass catch-stitched in the hem area of the jacket and sleeves.

Hair canvass catch-stitched in the hem area of the jacket and sleeves.

During the next week I will be setting the sleeves, stitching the hems and applying the facing and lining.

Till next week.

Donna Karan Jacket – Vogue 1263 – Part 2

My usual way of working through a project is to construct all of the individual parts and then assemble the garment.

This design has one very large piece which flows from the centre front, including the shawl collar, on through the skirt section right across to the centre back with no side seams.

Pattern piece covering collar, front and skirt section to CB

Pattern piece covering collar, front and skirt section to CB

Details on this large piece include six hemline darts, two double ended “waist” darts and an interesting pouch pocket.

I have sewn and slashed the darts.  They have also been pressed them open which reduces the bulk, particularly at the hemline.  Before the hem is completed they will be topstitched in place.

Hem line darts slashed open and pressed.  To be trimmed and topstitched.

Hem line darts slashed open and pressed. To be trimmed and topstitched.

The markings for the pouch pocket were traced on to the wrong side using dressmaker’s carbon. They were then thread traced by hand. Because of the textured surface and the need accurate and clear markings, I decided to machine baste the markings as well (used a stitch length of 6.0 which was easy to remove).

Darts were thread traced from wrong side and machine traced (SL 6.0) so the pocket markings were extra clear on the right side.

Darts were thread traced from wrong side and machine traced (SL 6.0) so the pocket markings were extra clear on the right side.

Bottom of pocket markings on right side of fabric

Bottom of pocket markings on right side of fabric

Nice deep pouch pocket will be good to keep hands warm.

Nice deep pouch pocket will be good to keep hands warm.

Underside of pouch pocket

Underside of pouch pocket

Pouch pocket with front edge topstitched.  The back edge will be hidden once the seam above is sewn.

Pouch pocket with front edge topstitched. The back edge will be hidden once the seam above is sewn.

The back bodice and side panels have been seamed and added to the front side panel.  I have used flat fell seams.  When I tested this seam finish on a scrap of the fabric, I found that while it is very soft, is quite springy so I allowed wider seam allowances wherever the flat fell seam will be used.  This has given me a wider amount of fabric to wrap over the trimmed seam.

I made a pattern for the front interfacing which will support the weight of the collar and keep the front edges stable.  This has been cut from sew-in hair canvas (purchased from http://sewexciting.blogspot.com.au/ ).  It is 60 inches/ 150cm wide and very good quality wool and goat hair at a very reasonable cost.

I have pencil marked a line at 1 ½” /3cm inside all cut edges that will be sewn into seams.  The dart fabric has been removed in preparation for attaching the hair canvas to the mounting cloth..

Pencil line marked 3cm/ 1 1/2

Pencil line marked 3cm/
1 1/2″ from cut edges of sections which will be included in seam allowances.

Dart sections of hair canvas removed to eliminate bulk.

Dart sections of hair canvas removed to eliminate bulk.

So that I can check whether I like the width of the collar, I have assembled the lining and attached it to the upper collar/facing and have placed it on my dress model to “live with it” for a few days before I make a decision.

Inset corner where bodice is joined to the front/skirt section.  Pleat is caused by allowance for the pocket.

Inset corner where bodice is joined to the front/skirt section. Pleat is caused by allowance for the pocket.

Stitching the second side of the inset corner.

Stitching the second side of the inset corner.

Unfortunately, time has run away from me this week and I am yet to cut the mounting cloth for the hair canvas so it can be applied to the wrong side of the under collar ready for the pad stitching.

Until next week.

Donna Karan Jacket – Vogue 1263 – Part 1

A recent unplanned purchase of a textured wool blend fabric at Spotlight sparked a search through my patterns for just the right style.

Last year I purchased this Vogue pattern with the intention of making it in wool for a casual winter jacket.

Line drawing Vogue 1263

Line drawing Vogue 1263

As I mentioned, I had not planned to buy the fabric during my visit to Spotlight for some haberdashery but, as soon as I saw it, I loved the colour and soft feel of the fabric and could not pass it by.  Consequently, I did not buy enough for this jacket which takes 3.3 metres (80 cm more than I bought).  Luckily, I was able to purchase some more and I bought the length of the facing – because of the wide shawl collar I needed another 1.2 metres.

I really should practise what I preach and have some measurements with me at all times in case I come across an irresistible piece of fabric!  But, all’s well that ends well.

Fabric Considerations:

The pattern lists suitable fabrics as “Novelty Organza, Wool Crepe, Cloqué or Taffeta”.

Since I was unsure what cloqué actually was, I looked it up using Google and found the following description:

“Translated from French (literally meaning ‘blistered’) Cloqué is sometimes referred to as Clox or Cloky.  Cloqué fabric is compound or double fabric with a Jacquard effect. Produced by using yarns of different characters or twists and very often blended with silk/wool or silk cotton.”

A close look at the photographs of the garment would seem to show that this was the fabric used.

Donna Karan jacket - made in cloque

Donna Karan jacket – made in cloque

The original jacket is unlined, except for the pocket and, apart from supporting the pocket opening, there is no interfacing in the jacket.  I can only assume that cloqué has a lot of body to it.

My fabric is a wool blend with a textured surface.  It is quite soft and has a heavy drape which I think will work well, especially for the back of the jacket and the large shawl collar.

However, it is much too soft to hold the shape of such a large collar without the support of interfacing and I have decided to use a lightweight sew-in hair canvass which will be pad-stitched in place.  Since I will be adding interfacing and wearing it over long sleeved garments, I will also line it so that it will be much easier to put on and remove.

The collar may also be a little too wide for me but since I am adding interfacing I have decided to go ahead with the original width to see how it sits.  It can be cut smaller later on in the construction if needs be.

Pattern Work:

Apart from the fitting alterations I usually need, I needed to make pattern pieces for the front interfacing and the lining.

For the interfacing pattern, I drew the outer edge of the areas to be interfaced which will allow the front shoulder and under collar areas to be supported.  I will be using a lightweight fusible woven interfacing on the upper collar and front facing.

The upper collar/facing extends to the front armhole so I have made a lining pattern which will join the outer edge of the facing and extend to the centre back.  Lining will also be cut from the upper back (allowing a wearing ease pleat in the centre) and upper and under sleeve pieces.

Markings:

Since the fabric is textured, it is difficult to mark with a pencil.  Another consideration is the size of the pieces – the main pattern piece covers the upper front, shawl collar and skirt section across to the centre back.

There are six darts to the hem and several small darts in the upper collar.  The markings for the pocket are within the body of the garment.

To avoid problems with such a large piece of fabric, it was imperative to work with the whole piece flat on the table during the marking process.  I chose to thread mark all notches and match points and used tailor’s tacks to mark the darts.

Tailor's tacks mark dots and darts.

Tailor’s tacks mark dots and darts.

To make accuracy easier to achieve with the pocket placement marks, I traced them on to a separate piece of greaseproof paper which could be aligned on each layer of fabric separately.  This avoided the problem of the large piece of pattern becoming unwieldy and tearing or moving during the marking process.

Pocket markings traced on to greaseproof for ease of marking.  Must remember to reverse the markings!

Pocket markings traced on to greaseproof for ease of marking. Must remember to reverse the markings!

I used dressmaker’s carton and a tracing wheel to transfer the guidelines to the wrong side of the fabric before thread tracing so they would be visible from the right side of the fabric to make installation of the pocket easier.

Testing the Flat Fell Seams:

The pattern suggests flat fell seams to give a clean finish on the inside.  Since I am lining the jacket, this will not be necessary.  However,

I tested the technique and like the appearance of a padded seam.  A normal thread topstitch would disappear in the texture of this fabric so I used two threads through the needle to complete the final topstitching – I am quite pleased with the result and will still use these seams in my garment.

Sample flat fell seam with double thread topstitching gives the appearance of a padded seam.

Sample flat fell seam with double thread topstitching gives the appearance of a padded seam.

To make it easier to fold the fabric in these seams, I have allowed 18mm / ¾” seam allowances where I will be using the flat fell seams.

Stabilising the Neckline and Armhole Seams:

Since the fabric does not have a tight weave, I have used cotton tape to stabilise the neckline and armholes.IMG_3245

I have used vertical basting on all the seams.

Seams vertically basted and ready for stitching.

Seams vertically basted and ready for stitching.

Next week I will continue with the pad-stitching and construction.

Vogue 1303 Kay Unger Dress

I made this lovely Kay Unger dress in some beautiful stretch cotton sateen with a stylised floral print.  I purchased the fabric a few years ago from the Fabric Collection at Mount Ommaney and have been waiting for just the right occasion to use it.  The dress code for Tina’s wedding was “garden party” so, since the print reminds me of Monet’s style of painting flowers, I decided it would be perfect.

Kay Unger dress Vogue 1303

Kay Unger dress
Vogue 1303

Kay Unger dress Vogue 1303

Kay Unger dress
Vogue 1303

Line drawing Vogue 1303

Line drawing Vogue 1303

I have made this pattern before so any fit issues had been addressed.   Even though I am not a svelte shape, I believe a well fitting garment that skims rather than envelopes is quite flattering.  It is certainly a lovely dress to wear, especially lined with a silk and cotton mix which keeps me comfortable in the sticky heat of late summer (the weather did not know it was Autumn!). The fabric was lighter in weight than I had remembered and, since I decided to use couture methods of construction, I decided to add a sew-in interfacing around the neckline and armholes to keep the dress in shape and support the piping. The pleated drape across the front of the dress has been supported with a shaped backing made from firm soft cotton.  The seams of the bodice and skirt have been catch stitched in place so they would not move out of place during wear and laundering over the life of the garment.

Seam allowances stitched to mid section fabric.

Seam allowances stitched to mid section fabric.

I drafted a “facing shape” on the original bodice front and back and traced this off as a pattern for the lightweight Shapewell  sew-in interfacing.  The interfacing was tacked to the seam line around the neck and armholes which were then staystitched and clipped in both the dress and lining.

Sew in interfacing tacked in place to support neckline and armholes.

Sew in interfacing tacked in place to support neckline and armholes.

A strip of lightweight fusible interfacing was applied to the centre back seam to support the weight of the invisible zipper.  IMG_2951Once the zipper was installed, the tapes were attached to the interfacing at the top of the zipper – the stitch used is a catch stitch.

Seam allowance tacked to interfacing and tape folded back and stitched in place.

Seam allowance tacked to interfacing and tape folded back and stitched in place.

I made the piping from cotton cut into bias strips, wrapped around rat tail cord and machine stitched using a narrow piping foot. After pinning the piping around the neckline and armholes, I tacked it in place close to the cord and caught the flange to the seam allowance and interfacing (using a catch stitch).  I then fell stitched the folded edges of the lining just under the piping cord.  The ends of the cord were trimmed so they do not overlap at the underarm seams or centre back seam.

Piping was hand stitched to neckline and armholes and machine stitching removed from piping to give a softer finish.

Piping was hand stitched to neckline and armholes and machine stitching removed from piping to give a softer finish.

Lining fell stitched to neckline, armholes and along zipper tape.

Lining fell stitched to neckline, armholes and along zipper tape.

The silk and cotton lining has been hand stitched (using a fell stitch) to the zipper tape and the seam allowances between the bodice and backing fabric and mid section and skirt have been stitched together to avoid the possibility of the lining riding up.   Lace has been hand stitched in place to finish the lining hem.

Lining mid section hand stitched to garment seam allowance at top of skirt section.

Lining mid section hand stitched to garment seam allowance at top of skirt section.

Seam allowances of lining and garment between bodice and underlay stitched together

Seam allowances of lining and garment between bodice and underlay stitched together

Lightweight fusible interfacing has been applied in the hem allowance before the edge was finished with rayon seam binding (Hug Snug) and stitched by hand.  This keeps the hemline in shape with this lightweight fabric.IMG_3006

Lace added to hem of lining.

Lace added to hem of lining.

I thoroughly enjoyed wearing my “garden party” dress to Tina’s wedding.  It was comfortable all day and evening and I am sure I will wear it a lot more next summer.

The Dream Wedding Gown

Yesterday I attended the wedding ceremony of one of my lovely students, Tina Patrick, and her fiancé, Steve Donovan.  The wedding was a “Gloryville” at Cudgera Creek in northern New South Wales – a little piece of green paradise which was the perfect setting for a wonderful family occasion.  It was such a privilege to be part of it all.  Congratulations, Mr and Mrs Donovan!

The happy couple - Tina and Steve Donovan

The happy couple – Tina and Steve Donovan

What sets a wedding gown apart as a sewing project, is not just working with unfamiliar (and often expensive) fabrics but the techniques used.  To achieve a gown which is not only beautiful but will allow the bride to be comfortable so that she can really enjoy her special day, the process starts with a good fit and an inbuilt foundation and stays to support the gown during the whole event.  The inclusion of lots of hand work gives a softer and unpuckered finish to the outer edges.  It also makes controlling the task much easier.

Tina started coming to classes around 8-9 months ago with a view to learning enough to make her own wedding gown.

As the weeks progressed, she completed a toile of her chosen style – excitedly embracing all the new techniques involved, especially boning!  Once the fit was perfected, she made the dress another couple of times and has received lots of well deserved compliments.

And so to THE DRESS!

Tina found her special fabric at Selective Fine Fabrics (Shop 10, Cnr Compton and North Road, Underwood, Q  4119 – 07 3208 9373).  It is a natural white corded lace on tulle with a wide, heavy border on one side flowing into a delicately embroidered tulle with a beautiful lace scallop on the other side.  The under dress is Duchesse satin and the dress is lined with silk crepe de chine.

Beautiful cream corded lace on tulle over Duchesse satin underskirt

Beautiful cream corded lace on tulle over Duchesse satin underskirt


She started with making the boned foundation using beautiful cotton which is sturdy, yet soft and cool.  The satin bodice was pieced and attached to the foundation.  To finish the top edge, the fabric was folded over the catch-stitched to the foundation.  This technique gives a lovely rolled edge to the satin bodice. We then positioned the lace while Tina was wearing the bodice.   The lace was tacked to the satin bodice and the excess pinched out  to achieve a smooth shape.

The beauty of working with this type of lace is that it can be cut and motifs rearranged to avoid sewing seams and darts which can distort the flow of the pattern.  When corded lace is pieced in a dart or seam, it creates an uneven seam which often looks bulky and unattractive.

The fabric was carefully cut using lace work scissors and leaving a small margin of tulle around motifs.  It was then tacked in place and stitched by hand using #100 silk thread and a fine, short needle.

All seams and darts eliminated from the lace.

All seams and darts eliminated from the lace.

Lace trimming scissors help to avoid nicking the tulle

Lace trimming scissors help to avoid nicking the tulle

To create the beautiful neckline, back and front shoulder sections were cut from silk organza which was stitched by hand (using a catch stitch) to the underside of the satin bodice.  Shoulder and under arm seams have been joined with a small French seam.  Again with Tina wearing the bodice, the lace was carefully placed in an attractive scoop shape and tacked in place.  Chosen motifs were trimmed and stitched, again by hand as above.

As the scallops are unsupported, a small hand running stitch was applied inside each curved and pulled slightly to force the edges to “cup” and stay in place all day.

To ensure the scalloped edges stayed in place, a small running stitch was sewn by hand around the curve and pulled up slightly.

To ensure the scalloped edges stayed in place, a small running stitch was sewn by hand around the curve and pulled up slightly.

Sleeves were made from plain tulle and the small scalloped border hand stitched along the edge.  The sleeves were then set into the armholes and machine stitched.  The seam allowance was trimmed; rolled over the seam and stitched in place to achieve a hairline seam.

Sleeves were cut unadorned sections of tulle with scalloped border appliqued to the hem. Inserted using hairline seam by machine.

Sleeves were cut unadorned sections of tulle with scalloped border appliqued to the hem. Inserted using hairline seam by machine.

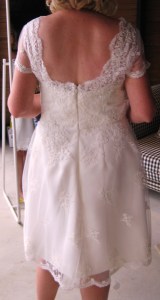
Tina constructed the skirt, inluding hand stitched hems, and then layered the tulle, satin and lining silk and stitched it in place to the bodice.  Small tucks were added at the side back to give a little more fullness in the back of the skirt.  The hemline of the lace at the centre back has been lowered slightly and, together with the slight fullness, gives interest at the back of the gown.

Slight fullness and lower hem to add interest to the back of the gown.

Slight fullness and lower hem to add interest to the back of the gown.

A heavy duty invisible zip has been used as a regular invisible would not be strong enough to hold the thickness of the corded lace.

A heavy duty invisible zip.

A heavy duty invisible zip.

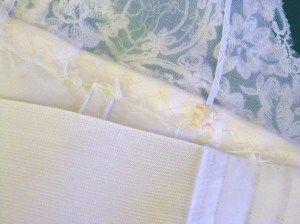
To help keep the garment beautifully in place all day, an elastic stay was applied across the back bodice and narrow braided lace has been hand couched across the shoulders.

Neckline/shoulder stays hold the shoulder and sleeves in place with a wide deep neckline in the front and back. They are made from narrow braided elastic couched in place with catch stitch and fastened at each end.

Neckline/shoulder stays hold the shoulder and sleeves in place with a wide deep neckline in the front and back. They are made from narrow braided elastic couched in place with catch stitch and fastened at each end.

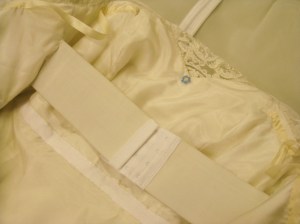
Once the additional lace was hand appliquéd across the waist and down the top of the skirt, the silk lining was inserted by hand and the elastic back stay fed through slits in the lining side seams.

The addition of an elastic suport across the back holds the dress securely in place.

The addition of an elastic suport across the back holds the dress securely in place.

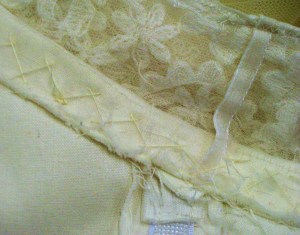
A waist stay was applied using Petersham ribbon with hidden hooks and thread eyes.  This is fastened before the zip and holds the back together to minimise strain on the zipper at the waist as well as holding the skirt in place.

Rayon Petersham waist stay fastens around the waist to keep the skirt in place and take the strain of the zipper when it is being opened and closed.

Rayon Petersham waist stay fastens around the waist to keep the skirt in place and take the strain of the zipper when it is being opened and closed.

Elastic stay and Petersham waist stay are lie inside the gown - over the silk lining (inserted by hand).

Elastic stay and Petersham waist stay are lie inside the gown – over the silk lining (inserted by hand).

Because the shoulder and sleeve sections are quite delicate, ribbon hanging loops have been added to support the weight of the dress on a hanger.

Ribbon hanging loops.

Ribbon hanging loops.

A touch of blue for luck was added as a beaded flower inside the top of the bodice on the lining.

The final touch - a hand beaded blue flower for luck.

The final touch – a hand beaded blue flower for luck.

With all of this inner structure keeping her beautiful gown in place and comfortable, Tina was able to kick off her shoes and dance the night away with her handsome groom.  By the way, Tina also made Steve’s vest – she is justifiably proud and Steve is as pleased as punch and very proud of his wife’s wonderful achievements.

Tina was a gorgeous bride and it was such a joy to help her achieve her dream wedding gown and to share her and Steve’s happiness as they start their new life as man and wife.  Good luck and good health to you both and may you enjoy many years sharing your lives together.