In my last blog, I illustrated where to take the body measurements needed to check the paper pattern before starting to cut out the fabric for a trial garment.
So what to do now! How and where do we compare the body measurements with the paper pattern?
Using this method takes some time and patience in the beginning but it is well worth the effort in terms of saving time in the future – as well as saving fabric, our sanity and good humour!
The first step involves marking all seam lines and reference points on a traced copy of the basic pattern. The pattern is then measured at various points to see where body measurements vary from the generic pattern.
In this blog I will show where to mark and measure a bodice starting with the angle of slope at the shoulder. I discovered this method last year in Issue 178 of Threads Magazine. Judith Neukam wrote an article called “Preparing Patterns for Fit” in which she demonstrated how to use an angle locator to determine the degree of the shoulder slope.
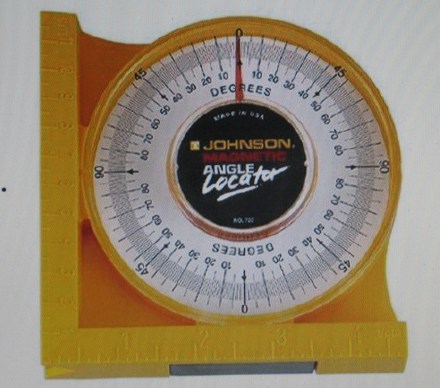
Angle Locator
As I have narrow, sloping shoulders, I could have shouted, “Eureka!!!!” – I did restrain myself and went immediately to Google to see where I could buy one of these amazing gadgets.
The reason for my jubilation was that I had finally learned a way to measure the shoulder position accurately which is vitally important to how the garment will fit. If this angle is not correct, the garment hangs badly with prominent folds – just like it would on a wire coat hanger versus a properly padded coat hanger.
When I located the supplier through Amazon, unfortunately they did not ship to Australia. However, one of my lovely students was going to the United States and she purchased one for me. There was much excitement when it arrived and I have been measuring shoulder slopes accurately ever since!
(I have since found a similar item offered by an Australian supplier through Ebay – http://www.ebay.com.au/itm/LEVEL-ANGLE-FINDER-LOCATOR-PROTRACTOR-SATELLITE-DISH-INCLINOMETER-CLINOMETER-/201523298851?hash=item2eebb98223:g:ByMAAOSwVFlT8dZ9)
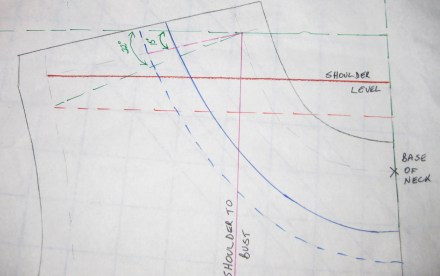
Working on front bodice, extend centre front line and square a line from the highest shoulder point to the centre front. When using a pattern with a narrower shoulder seam and lower neckline, extend the shoulder seam to the base of the neck stem and use this new point to square a line to the centre front.
After checking the shoulder angle on at least 20 commercial patterns, I have discovered that they all use an angle of approximately 15°. From checking the angle of quite a few of my students, I have found only one with that shoulder angle – they mostly range from around 18° to 24°.
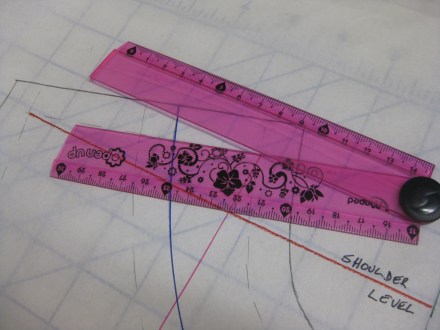
An inexpensive angle ruler can be used to measure the original shoulder level which is measured along the line squared from the centre front at the highest shoulder point.
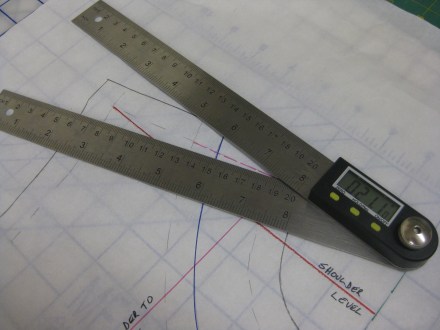
Digital angle ruler set to 21 degrees. Draw new shoulder line position.
After marking the new shoulder line on the front bodice, trace the same new shoulder line on to the back bodice pattern.
You might think, “What difference does a couple of degrees make?” Correcting this first means that often more complicated and unnecessary alterations are not required. Yes, it will decrease the armscye circumference and raise the underarm but these can be easily changed if such an alteration is needed.
Having the shoulder seam placed correctly can reduce (and sometimes eliminate) the amount needed for a full bust adjustment. This is a good by-product of the shoulder angle adjustment. If the amount needed for the full bust adjustment is reduced, it helps to avoid a lot of distortion caused by large darts.
Once the shoulder length and level has been established and marked on the pattern, the following points are checked, first on the front and then on the back:
Front Check Points:
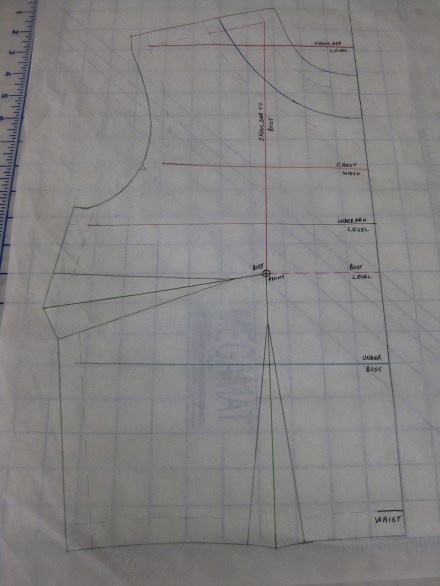
Front bodice with seam lines added and showing horizontal reference lines and vertical measurement points.
- Shoulder to shoulder:
- extend the centre front up beyond the neckline point
- measure from where the shoulder seam meets the armhole seam and across to the centre front line
- multiply this by two to find the whole measurement
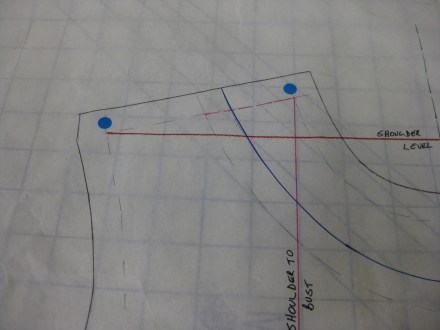
Shoulder to shoulder from end of shoulder to centre front – multiply measurement by 2 for total width.
- Chest Width:
- measure from seam line just above the notch at the armhole to the centre front
- multiply this by two to find the whole measurement
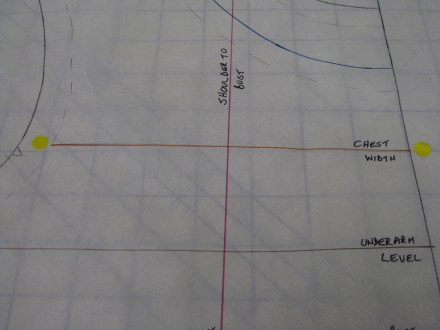
Chest width from arm hole to centre front – usually 10-15cm (4″ – 6″) down from shoulder point.
- Shoulder to bust point:
- measure from the base of the neck stem where it meets the shoulder to the level of the fullest part of the bust
- many patterns mark the bust point however, if this is missing, draw through the centre of the bust dart (and under bust dart if there is one) to a point approximately 2.5-3cm / 1″- 1 1/2″ beyond the point and use this as the measuring point (most commercial patterns position the bust point approximately 5cm /2″ below the level of the underarm seam)
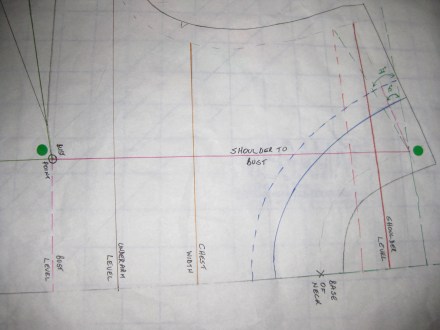
Highest shoulder point to bust point.
- Bust separation:
- this is the distance between the fullest point of the breasts
- divide the amount by 2 and mark the point in from the centre front line
- Bust point to under bust:
- taken from the centre of the bust at the fullest part to level with the chest under the bust (usually at the bottom of the bra underwire)
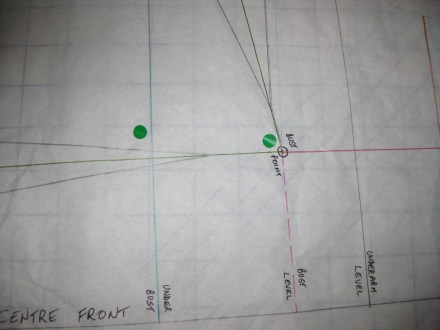
Bust point to under bust – straight measurement down from centre of bust to the level of bra underwire.
- Under bust to waist:
- from the base of the bra to the waist (at the bottom of the elastic around the natural waist)
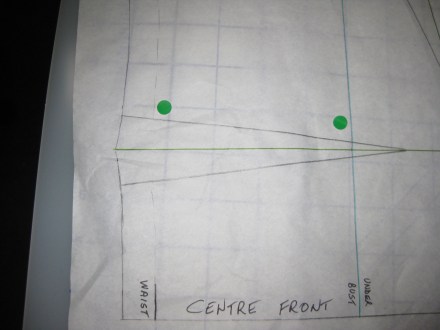
Under bust to waist measurement.
Back Check Points:
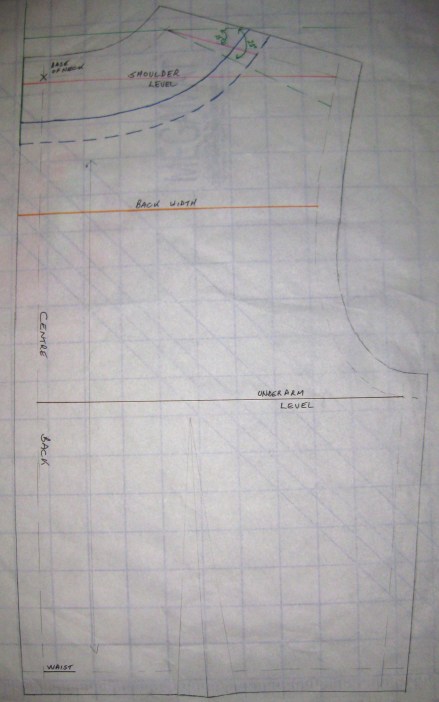
Bodice back with seam allowances and horizontal reference lines marked.
- Back width:
- measure from seam line just above the notch at the armhole to the centre back
- multiply this by two to find the whole measurement
- Shoulder to shoulder:
- extend the centre back up beyond the neckline point
- measure from where the shoulder seam meets the armhole seam and across to the centre back line
- multiply this by two to find the whole measurement
- Back length:
- measured from the nape of the neck (highest point of the spine) to the bottom of the elastic marking the natural waist
You will notice that, except for shoulder to shoulder lengths, chest and back widths and bust separation, the remainder of these measurements are vertical.
Completing vertical alterations first before horizontal adjustments are assessed is very important so that any additional width will be placed in the correct position on the pattern which will make the first check of the toile much more meaningful when the need for any further changes is being assessed.
Since ease is very minimal at the shoulder to shoulder and chest width points these measurements provide an excellent guide when selecting which size pattern to use.
My next blog will cover the method for comparing body measurements to a skirt pattern.
There is an iPhone and iPad app called Angle Finder, free. It’s easy to use and will tell your shoulder angle. You’ll need someone to read the angle, at least I did.
Hi Patti, Thanks for your message and interest in my blog. I have tried a similar app for android – also free and easy to use on a static surface. I too found it difficult to read the angle myself and it changed at the slightest movement. Best wishes, Alison.
Hi Allison and Patti,
There is another free app called iHandy level. It has a hold button, so if you stand in front of a mirror and note where the hold button is, you can press it with your opposite hand and remove the phone. The angle will show on the screen. Magic!
xo
Susan
Thank you so much, Susan. I will check it out. xo
This is really interesting, I’ve downloaded iHandy and now need to find my Threads magazine.
Thanks for your comment, Sharon. I hope you find the information helpful. The measuring of the shoulder angle was a revelation to me but so logical when you think that every bodice garment hangs from the shoulder.