
This article was first seen in Australian Dressmaking with Stitches magazine – Volume 20 No 4.
Permission has been sought and granted for electronic use and the photos and text remain the property of Alison Wheeler – Sewing Lady.
I started teaching dressmaking in 1998 and, right from the beginning, I was determined that I would not allow students to make garments which did not fit them -to do so would be very counter-productive, especially those who are beginning to learn how to make their own garments.
Finishing a simple garment which fits well and you are proud to wear is the goal of sewers of all levels of ability and greatly contributes to our pleasure in achieving good results with new and different techniques.
Achieving a good fit is probably one of the most vexing issues for sewers.
The major commercially produced patterns use a set of measurements which represent “ideal” figure proportions. This method ensures standards of commonality across the various designs and brands and is important in keeping mass produced patterns relatively affordable.
Over the last 40 years since the measurements were standardised, body shapes and sizes have evolved and changed along with women’s lifestyles and attitudes to exercise – all of which contribute to the need to customise commercial patterns to fit the individual.
In an effort to make altering patterns easier, lengthen and shorten lines and multi size patterns have been incorporated over the years. The Palmer/Pletsch patterns in the McCall’s catalogue and Today’s Fit by Sandra Betzina in the Vogue catalogue give expanded instructions covering how to alter for fit.


There are also excellent reference books and DVD’s on pattern fit and alteration available.
After 17 years of fitting people, I am yet to meet the person who does not need at least minor pattern alterations. Many home sewers who learned to sew when they were in their teens never really learned about fitting since the patterns they used rarely needed much alteration apart from length. However, with maturity comes many figure changes and unless there are minimal differences in the body shape and the chosen pattern, it can be quite frustrating to accomplish a good fit.
With some knowledge of simple techniques, this situation can be overcome so that the pleasure of making and wearing an individual garment which suits the wearer and fits well will be experienced again.
From my experience in fitting many women in many and various patterns, I have come to the conclusion that an organised approach utilising a combination of flat pattern measurement comparison, tissue fitting and making a toile is the best way to achieve success. Once a pattern is altered to properly fit, it can be used as a basis to assess other patterns or as a basis for different styles.
A good place to start can be to make a fitting shell – patterns are available from all the main commercial pattern brands.
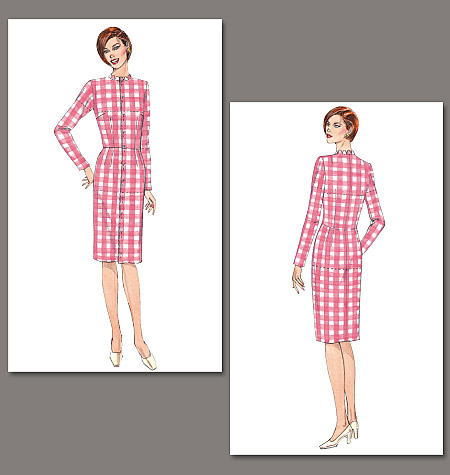
Vogue 1004 Fitting shell useful for bodices and skirts
The assessment of correct fit is subjective and depends on a number of things:
- personal interpretation of appearance and comfort
- posture of the wearer
- style choice
- fabric used
When making pattern alterations, the key points to remember are:
- make one alteration at a time and re-check on the wearer after each alteration is completed
- alterations need to be done where the problem is happening – this is not always at the side seam!
Style Choice:
- Styles which are meant to be worn with a tighter fit often require more alteration than looser fitting styles
- Selection of a style which will flatter the wearer’s figure and highlight the most pleasing features is really important
- When determining the fit, skimming the figure rather than swamping it with lots of loose fabric will always be more flattering – whatever the wearer’s size
Pattern Choice:
- Many fitting issues arise because the design and shape garment is unsuitable for a particular body shape
- Choosing a pattern with vertical seams, for example an armhole or shoulder princess style, will make width alterations much easier while maintaining the original proportion of the style lines
Pattern Size:
- For garments which hang from the shoulders, select size by high bust measurement
- For garments which start at or below the waist, select size by hip measurement
- Take hip measurement approximately a hand span from natural waist
- If figure has a fuller tummy, high hip is needed as well and note how far down from waist that measurement is taken
- If fullness is in the upper thigh area, ignore this when selecting size and use the hip measurement as above
Fabric:
- It is sometimes necessary to alter a garment because of the type of fabric used
- Make sure that the stretchiest part of the fabric (usually the crosswise grain or weft) is going around the body
- If using Bengalene™ and some other woven fabrics with stretch threads made from Spandex™ or Elastene, check to see that the stretchiest part of the fabric is not parallel to the lengthwise grain – if it is, the pattern needs to be cut with the grain line at right angles to the selvage to ensure a comfortable fit
- The stretch threads woven into these fabrics are for wearing comfort and to reduce the fabric wrinkling during wear and are not usually factored into the fit
- When purchasing stretch wovens, it is important to check the recovery of the stretch threads
- Sometimes garments made from these fabrics will shrink with washing and grow during wear
- Stabilising either facings is important with these fabrics
- Even if fabrics do not have stretch threads added, different weaving methods will result in natural elasticity of the fabric, for example:
- crepe weave has more stretch than twill (gabardine) weave
- loose weave fabrics have more stretch than tighter weaves
- thin fabrics will give more than thicker fabrics
- If you are unsure about the fabric will behave during wear, cut wider seam allowances on vertical seams to allow for adjustment during fitting
Key Measurements and How They Equate to the Flat Pattern:
- Measurements should be taken wearing the undergarments and shoes which will usually be worn with the garment to be made (Shoes are important because the height of the heel can alter the stance of the wearer affecting the posture and thus the hang of the garment.)
- Check that tape measure has not stretched – they are quite cheap to replace
- The tape measure should be firm against the body but not tight
- With horizontal measurements, keep the tape measure parallel to the floor
- Tie a piece of cotton tape or narrow elastic around the body at natural waist level
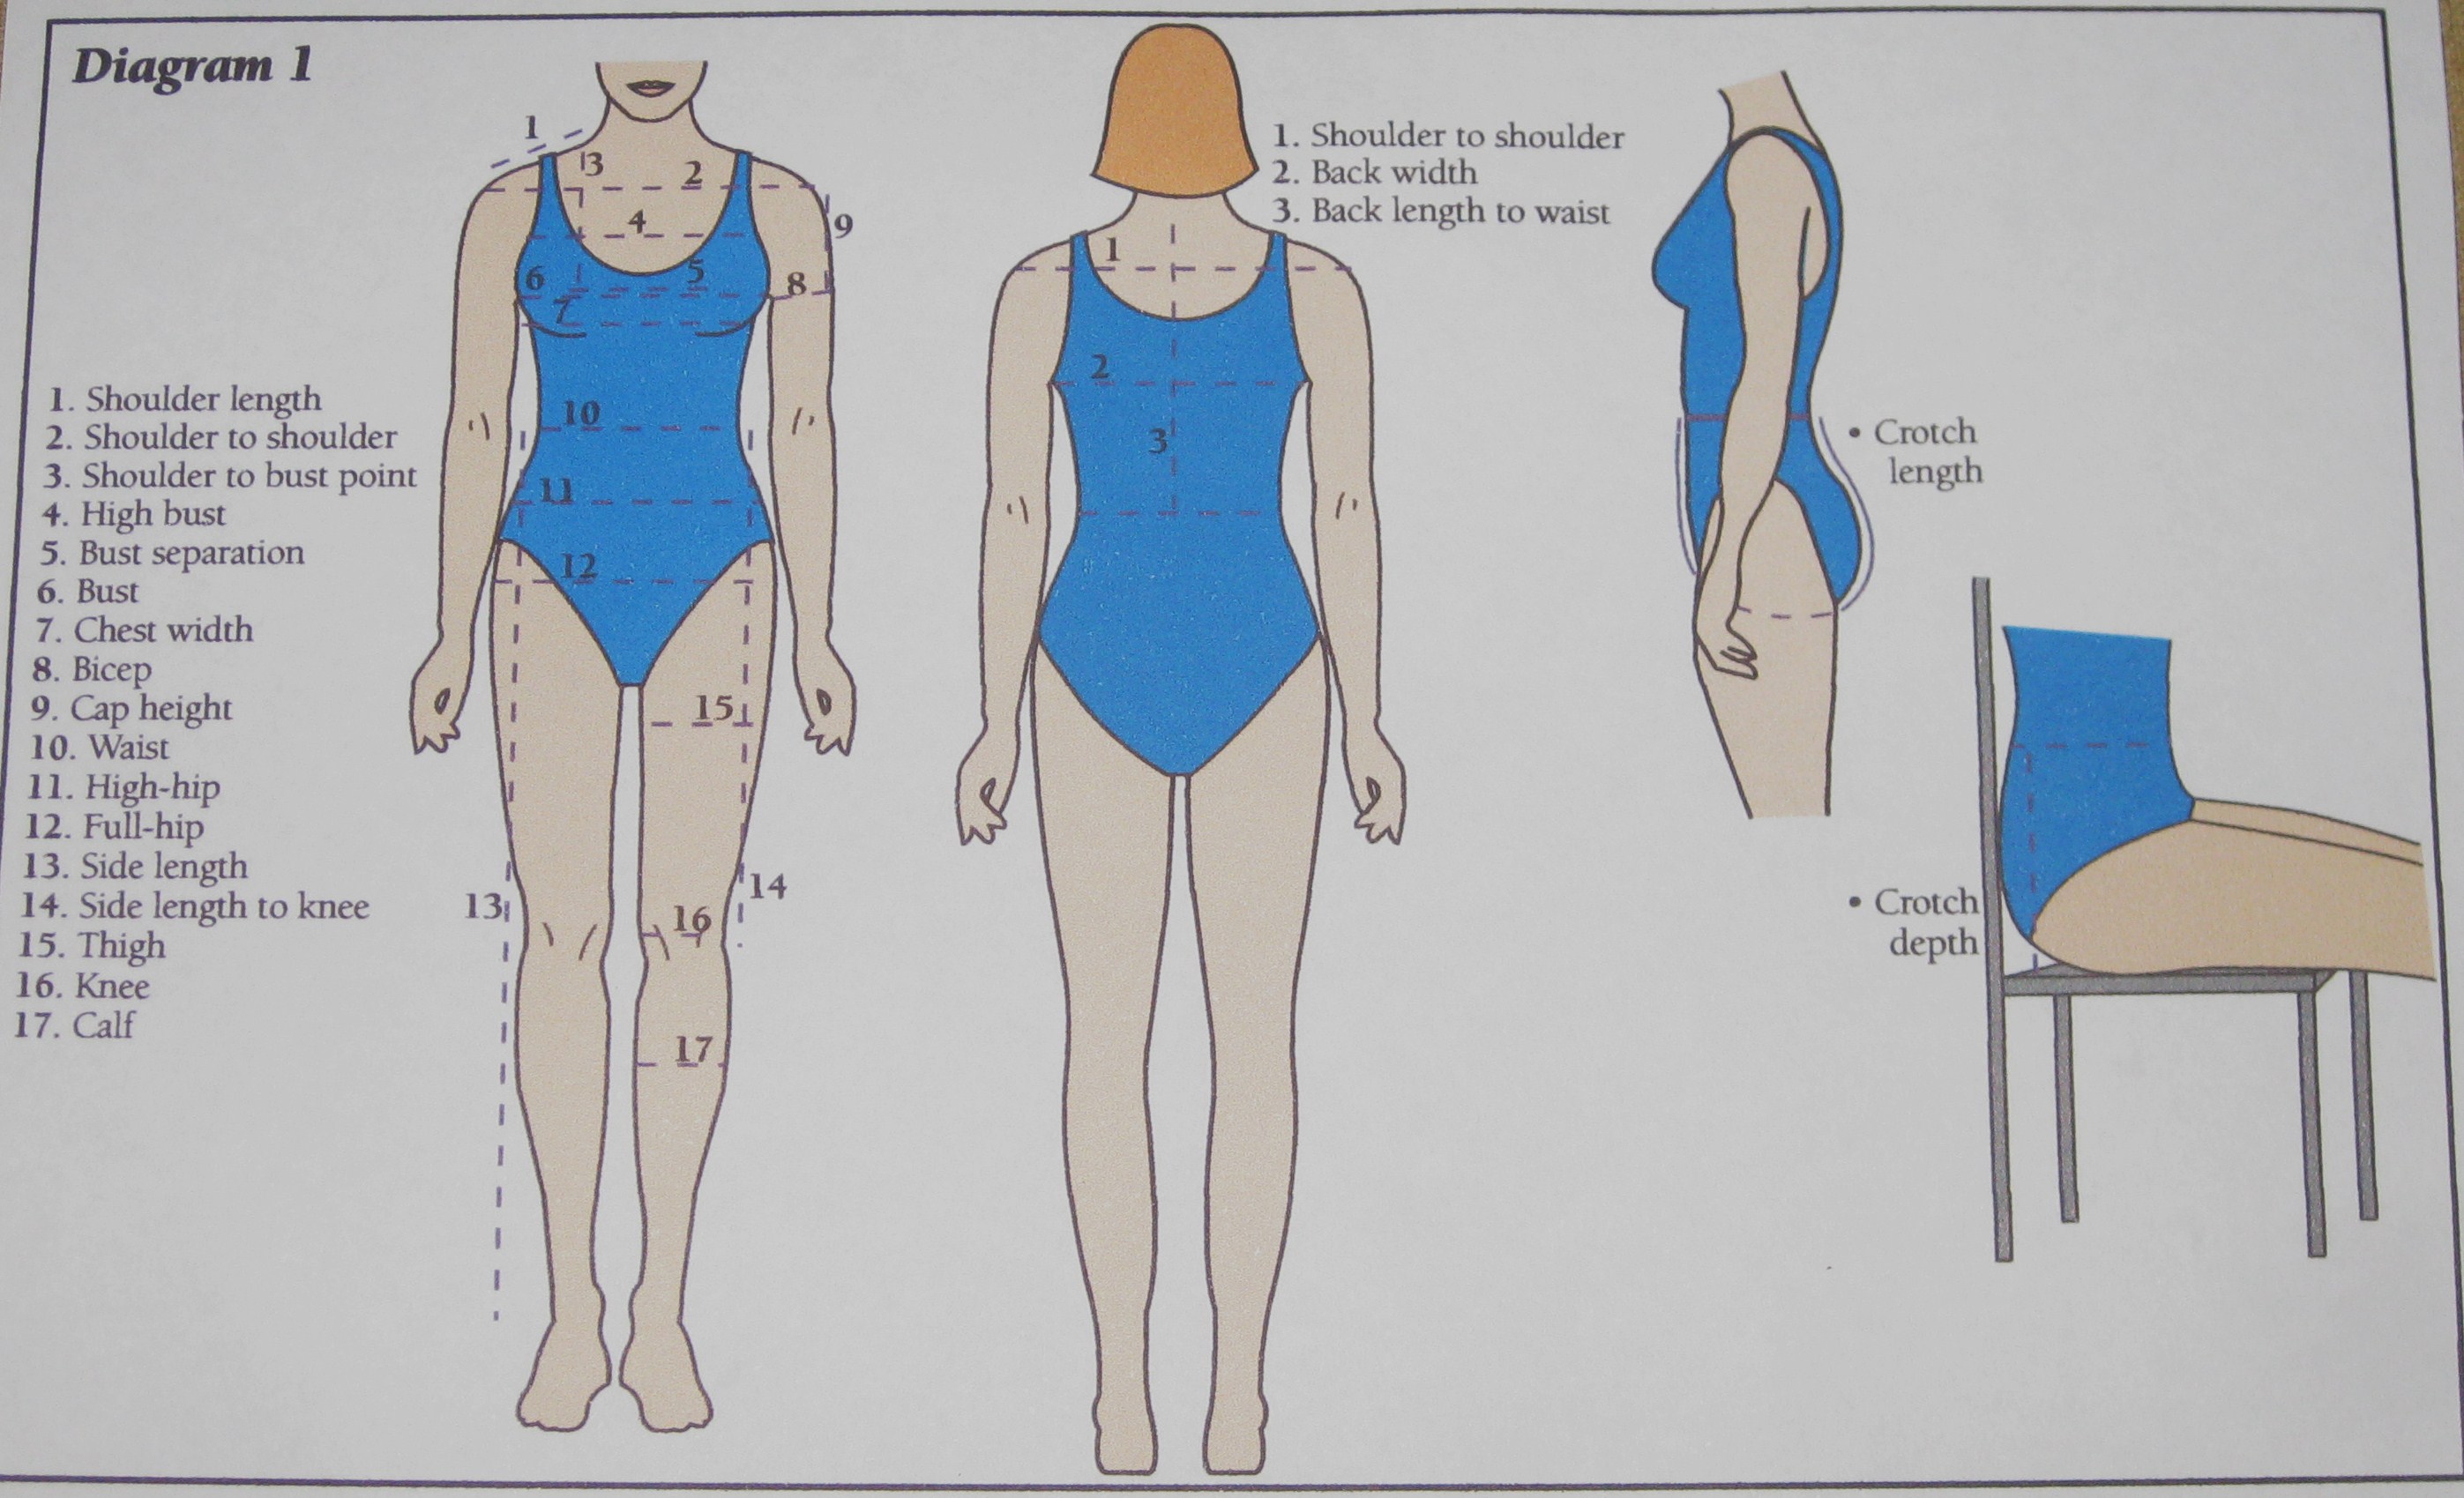
- Take the following measurements:
- High bust – across the broad of the back and above the bust
- Bust
- Shoulder length from base of neck to shoulder bone
- Shoulder to bust point – from base of neck to bust point
- Bust separation – distance between bust points
- Shoulder to shoulder – front and back
- Chest width – from crease where arm meets the body
- Back width – from crease where arm meets the body
- Back length to waist – from nape of neck to waist
- Bicep – place tape around arm with top of tape at point where arm meets body
- Cap Height – from top of tape placed as for bicep measurement up to shoulder bone
- Waist – often easier to find waist at the back
- High Hip – note measurement down from the waist where this measurement is taken
- Full Hip – usually a hand span from the waist – also note the measurement down from the waist where this measurement is taken
- Side length from waist level to finished hem
- Side length from waist level to knee
- Crotch length – from front waist, between the legs and up to back waist
- Crotch depth – using a dressmaker’s square placed between the legs, approximately 1.5cm from body, measure depth to the level of natural waist
- Thigh at fullest part – keep tape measure parallel to the floor
- Knee measurement level with the crease at the back of the knee
- Calf measurement at fullest part

It can be difficult to take your own measurements accurately. A sewing buddy can be a great help.
- These measurements can then be compared to the corresponding finished pattern measurements to assess possible preliminary alterations prior to tissue fitting and/or making a toile – even if measurements are not made before tissue fitting, assessment of differences between the body measurements and pattern measurements will give an idea of where to focus when looking at fit
Length alterations:
- Horizontal alterations are needed to ensure garment shaping is in the correct place for the person wearing the garment
- These include:
- Position of darts/bust shaping in relation to bust point
- Natural waist position
- Crotch depth to cater for full abdomen or derriere
- Finished garment length – including sleeve length
Provision for Width Alterations:
- Width alterations need to be applied where the fitting problem occurs, for example full bust, abdomen, tummy, thighs and calves
- Provision for these alterations during the tissue fitting step can be accommodated by allowing larger seam allowances on side seams and inseams
Tissue Fitting:
- Be sure all seam allowances are marked on the pattern tissue and allow additional width in seam allowances on side seams and inseams
- Apply Magic Tape™ around the curved seams – armhole, neckline, crotch seam lines – tape is placed on the garment side of the seam and not in the seam allowance
- Clip seam allowances so tissue won’t tear
- Pin darts/pleats in place on the outside of the tissue
- Pin front to back at side seam and inseam – place pins parallel to the seams and pointing towards the hem
- Carefully try on the tissue
Making a Trial Garment (Toile or Muslin):
- After making alterations indicated from the assessment of the tissue, cut out the front and back of the garment as well as any pieces which form part of the garment, eg yoke, slash pocket pieces
- Use a fabric which is similar in weight, thickness and drape to what will be used in the garment
- Mark grain lines on the fabric
- Mark horizontal lines at right angles to the grain line
- Stitch using long straight stitch and slightly looser tension
- Stitch darts/pleats and insert zipper in centre back
- Fold hem to desired length
- Try on garment
Assessing the Garment:
- Stand as you would naturally
- Look for wrinkles, folds or pulls in the fabric to indicate areas which need alteration
- Use a hand mirror and full size mirror to assess the back
- Mark areas to be altered directly on the tissue and toile
Order for Alterations:
- Start at the top of the garment (shoulder and neck area for tops; waist for pants and skirts)
- Whether I start at the back or the front depends on the area most in need of alteration
- Work on one thing at a time – it is all about cause and effect – trying the garment again between each individual alteration
Fitting a basic dress is a good place to start as this will help you identify your challenges. Unfortunately there is no magic formula; even if you know what type of alterations you regularly need to do the amount will often vary because of design ease. However, the more you practice pattern assessment and alterations, the easier it becomes.
I urge sewers to give this a try as there is no substitute for actually doing. If you are worried about wrecking your pattern, trace it on the greaseproof paper first and remember it is only paper!

Thank you Alison I always enjoy your information, I need to pay you the deposit for the dressmaking course starting Sunday 26 July, can I please have your bank details to deposit it. Many thanks Robyn
Sent from my iPhone
>
You are most welcome, Robyn. I will send the details by separate email. See you on Sunday. Alison
So true and something I need to reassess due to gravity.
Don’t we all!
Thank you Alison, the information you provide is wonderful and very comprehensive. I will be studying this Post and trying out your tips. I feel very lucky that I can view your blog and that I have been fitted by you, there is nothing better. Thank you. Lee-Anne
Thanks for the feedback, Lee-Anne.